In this tutorial, we will explore the possibilities to properly uninstall a plugin on a WordPress website.
The reasons for removing a plugin in WordPress can vary. One reason might be to install a different version of the plugin that is more secure and updated on a regular basis. Another could be to keep the WordPress environment clean and running smoothly – having multiple plugins can cause a significant load and can also decrease your website’s performance.
AwardSpace offers its WordPress Hosting users various options for deactivating a plugin in their content management system. Below we’ve summarized the most commonly used ones:
If you are unsure which method for uninstalling an add-on to use, please continue reading this article until you find the option that best suits your needs.
Uninstalling a plugin via WordPress Admin Panel
One of the most convenient and easiest methods to uninstall a plugin in WordPress is through the dashboard. The uninstall process is extremely easy and takes only a few clicks. You do not need any coding skills to disable a WordPress plugin.
To uninstall a plugin, please kindly follow the steps outlined hereunder:
-
- Enter WordPress admin panel.
- After a successful login, navigate to the Plugins menu and click Installed Plugins.
- WordPress will display a list of installed plugins. Look through the plugins list and find the one that is no longer needed.
- Click the Deactivate button next to the plugin that you would wish to disable.

-
- Once the request has been submitted, please allow WordPress some time to process it.

- Once the plugin is Deactivated click on the Delete button to uninstall it.
If the uninstall process is successful, you will get a Plugin that was successfully deleted response from the server.
Uninstall a plugin through FTP
Another way to remove a WordPress plugin is with the use of an FTP client program through our built-in File Manager. If you prefer to use your FTP program, please see our complete guide on how to establish an FTP connection to the FTP server.
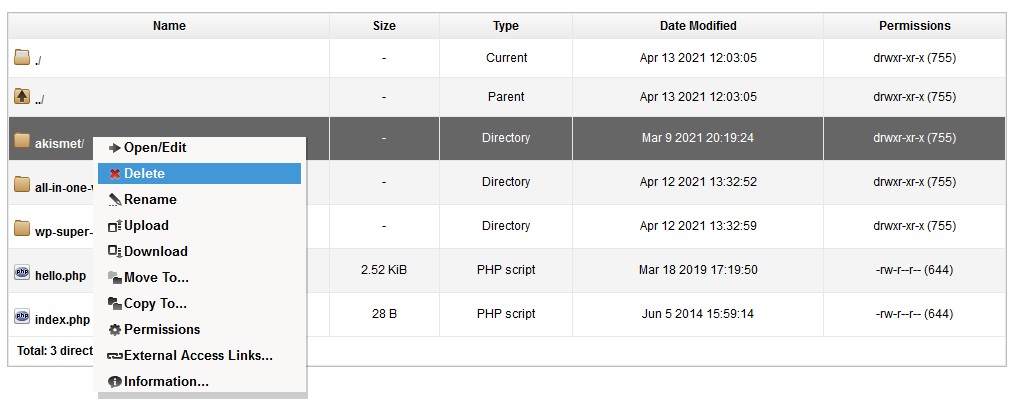
After you establish a successful connection, navigate to the /wp-content/plugins directory on your server. Right-click on the plugin that you would like to be disabled and press Delete.

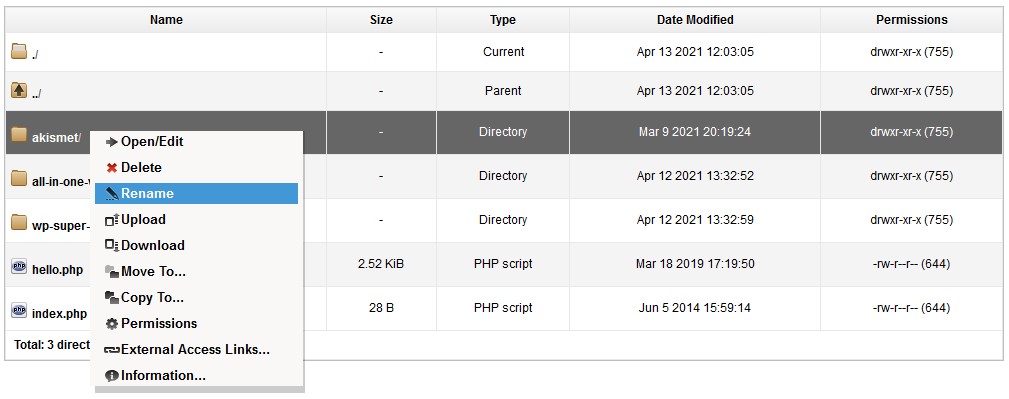
If you would like to only disable the plugin click on Rename and enter a new name for your plugin’s directory (e.g. Akismet. disabled) and click the green checkmark.

At this point, the selected plugin should no longer be functioning and should appear inactive in your dashboard. To see if this is the case, log back into the admin area of your WordPress blog and check the status of the add-on in the Installed Plugins section.
Disabling a plugin via phpMyAdmin
Another way to deactivate a plugin in WordPress is through phpMyAdmin.
Log in to phpMyAdmin using WordPress’s MySQL username and password. Information on how to access a database is available in our Database Manager article.
Once connected to the MySQL server, phpMyAdmin will populate a list of database tables. Click on the one named wp-options (it would normally appear under the wp-links table).

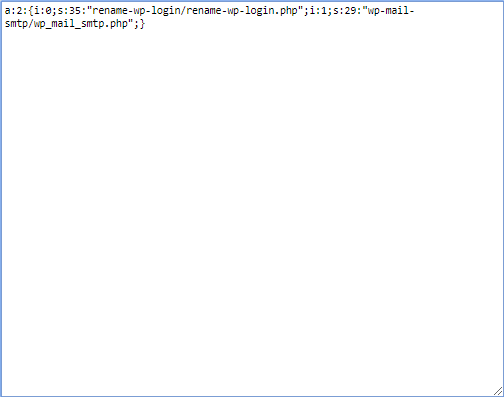
Find the row labeled active_plugins and click on the Edit button next to it to enter the editor.

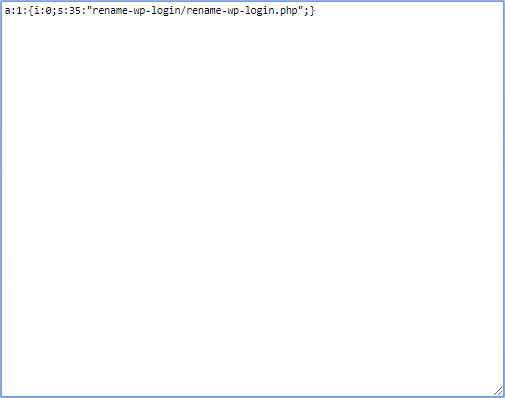
Once inside the editor, look at the option_value to identify the add-on name. Select all of the content related to the plugin (for example, i:1;s:29:”plugin-name/plugin-name.php”;) and remove it. Additionally, you will need to lower the value of a:X by one. Finally, press Go.


Why should a plugin be disabled?
There are many reasons for which you might want to disable instead of uninstalling the WordPress plugin. For example, a plugin is preventing your website from working properly. In order to identify the plugin causing the issue, you need to disable your plugins one by one. Once you have identified the problematic plugin you can leave it disabled until you have resolved the problem. Another reason would be if your plugin is outdated and you need to disable it until it receives an update. Outdated plugins often contain exploits and become the target of abusers to attack your website. Also when you disable the plugin you keep its configuration saved. This way when you decide to re-activate the plugin you will not have to go through the configuration process again.