In our article on what is a sitemap and how it may put your website at risk, we’ve mentioned the fact that your username URL is giving а hint to hackers by telling them what is the username you are using to log in to your website. This is a half job done for them. Even if you’ve put in all of your creativity to create that username, so no one could possibly guess it, let alone your strong password, your sitemap will spoil all of that.
But if you decide to use the Edit Author Slug plugin, you’ll be granted the option to… well edit your author’s slug. Doing so will surely make it harder for everyone who might want to enter your website. If they see an author page that says “A” but your real author name is “B”, most likely they’ll try again and again to enter your website by using the wrong username.
How to Edit Author Slug
As mentioned, to edit the username we’ll install a plugin.
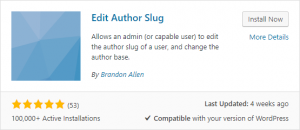
The name of the plugin we’ll use is Edit Author Slug.
In the plugin search, it should look something like this:

Once the plugin has been installed, you need to enter your WordPress Dashboard. Hover the Settings option on the sidebar, and wait for the submenu to emerge.
Find the Edit Author Slug option and choose that.
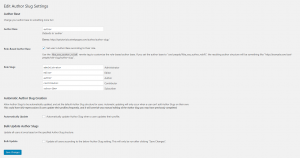
Here is what you should expect to see, when the page loads, you should expect something like the following to emerge:

From this page, it is up to you how you’ll modify your author’s slug, but there are a few things that are worth mentioning.
You can change the slugs of all your WordPress user roles simultaneously. If you want your administrators to be called “superstars”, for example, you can do that.
Also, at the bottom of the page with plugin options, there is something called Bulk Update. By using it, you can change the slug to all the users in a second. And the options are noteworthy.
The slugs of your users could be:
- Username (default)
- Nickname
- Display name
- First name
- Last name
And a few more, that I’ll leave you to find out, once you install the plugin
After, you’ve tuned your Edit Author Slug plugin the way you want, and you are ready to go, click the blue Save Changes button in the bottom of the page and you are good to go.
This is how to change the URL of your username in WordPress
Want to learn more?
Continue reading our WordPress Tutorials.