Summary on How to Add a Plugin to WordPress
Adding a plugin to your website could be the difference between an ideal website and a big dose of frustration. There are two main methods to add a new plugin to WordPress.
Method 1: Installing a Plugin Using the WordPress Search Engine
Step 1: Go to Plugins -> Add New
Step 2: Search for the plugin you need
Step 3: Install and activate the plugin
Method 2: Manually Uploading a Plugin to WordPress
Step 1: Go to Plugins->Add new
Step 2: Upload the Plugin From Your Computer
Click the Add New button, followed by Upload Plugin and Choose File
Step 3: Install the Uploaded Plugin
How to Activate Several Plugins at the Same Time
Step 1: Go to Plugins->Installed Plugins
Step 2: Mark the Plugins You Want to Activate
Step3: Activate the Marked Plugins by Going to Bulk Actions -> Activate and then click the Apply button
Plugins are essential assistants in the process of establishing a WordPress-based website. They are the building blocks that are creating the magic of the CMS. Basically, it doesn’t matter what kind of website you are crafting. At one point or another, you’ll need a plugin.
Especially if your reason to use WordPress is the lack of coding skills.
The good news is that there are so many plugins, serving so many purposes that there is even a saying that states “there is a plugin for that”. Where “that” stands for pretty much everything you may need.
Essentially, whatever feature you need, you can add a plugin that is doing exactly that.
How to Add a Plugin to WordPress?
Adding a plugin to WordPress resembles the theme installation process.
‘How come?’ – you may ask.
Well, the main ways to add a plugin – by searching and by uploading one that you’ve already downloaded or bought and you have somewhere on your computer – are pretty much the same as the ones we used to install a theme. In this tutorial, we’ll cover both of those methods to install a plugin.
Method 1: Installing a Plugin Using the WordPress Search Engine
Step 1: Go to Plugins -> Add new
Step 2: Search for the Plugin You Need
Step 3: Add the Chosen Plugin in WordPress

As you can see in the top right corner of the image, for the purpose of the tutorial we are searching for a “contact form”. Once you like a plugin all you need to do is to click the Install Now button(also highlighted in the image above).
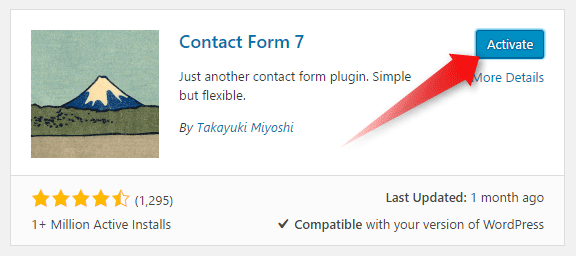
Once the plugin is installed, you’ll have two options. Either you can click Activate, which will redirect you to the plugin activation page, or you can keep searching for other plugins.
Just click Activate and you are good to go! This is how to add a plugin to WordPress!
Method 2: Manually Uploading a Plugin in WordPress
Step 1: Go to Plugins->Add new
As you can imagine, these steps are the same as the first step from the previous method.
Step 2: Upload the Plugin to WordPress from Your Computer
You may have bought a plugin from a third-party provider, or maybe you downloaded one directly from www.wordpress.org. Either way, the plugin will be located on your computer and you’ll have to upload it to your site.
After you’ve entered the Add new page, at the top left corner, you’ll see an Upload Plugin button. Click it. A menu will show up.
Click the Choose file button and locate the plugin on your computer. Upload it.
Step 3: Install the Uploaded Plugin to Your WordPress Website
Once, you’ve uploaded the chosen plugin, just click the Install Now button.
Once installed, a new page will show up. You can either Activate the plugin or get back to the Plugin Installer.

Click Activate. This is how to manually install a plugin in WordPress.
How to Activate Several Plugins at the Same Time
If you want to activate a few plugins at the same time you’ll have to go to Plugins- > Installed Plugins
As you can imagine, a list of the installed plugins will show up before you. Here you can either activate the plugins one by one, by clicking the Activate button, located under the name of every one of them.

And, of course, you have the option to activate several plugins in the so-called Bulk Action.
To do so, first, you should check the plugins you want to activate. Then click Bulk Actions. A drop-down menu will show. Choose to activate. Click apply.

This is how to activate several plugins at the same time.


