Put Your WordPress Website Under Construction

Home » Knowledge Base » Design Tools » WordPress » Put Your WordPress Website Under Construction

While working on your WordPress website, especially while setting it up for the first time, it is often a good idea to make it private. There are multiple ways to achieve that. In this article, we’ll cover the easiest one. Which is, naturally, by using a plugin.

Putting your website “Under Construction” will let you feel more comfortable and at ease while creating your website. Also, the search engines won’t be able to crawl and get a wrong interpretation of your to-be-created website.

One of the easiest to use and most used plugin to put your website under construction is called “Under Construction”. Which is to be expected, as this is what it does.

There are multiple plugins that will let you achieve this goal. You can use whichever else you wish to.

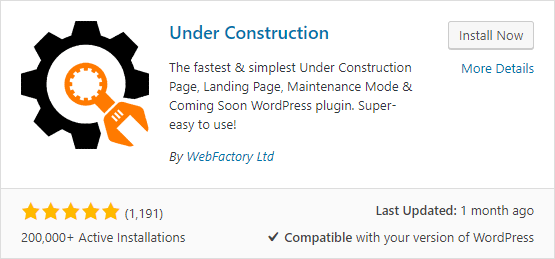
Go to the plugins page, Add New, and type “under construction” in the plugin search field.  The plugin in question ought to be the first one in the results. You are looking for something like:
 

Once installed and activated, the plugin adds a button in the menu. You can find it by hovering over the Settings option, and look at the bottom of the sub-menu that emerged.
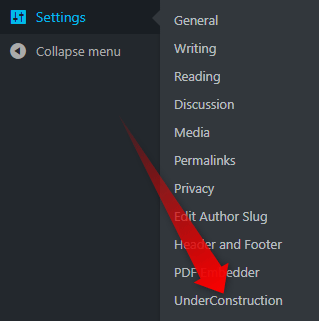


Click on the Under Construction option. A new page loads. On that page, you’ll be presented with all the options of the plugin. Here you can make your WordPress private while working on it.

The page should like this:
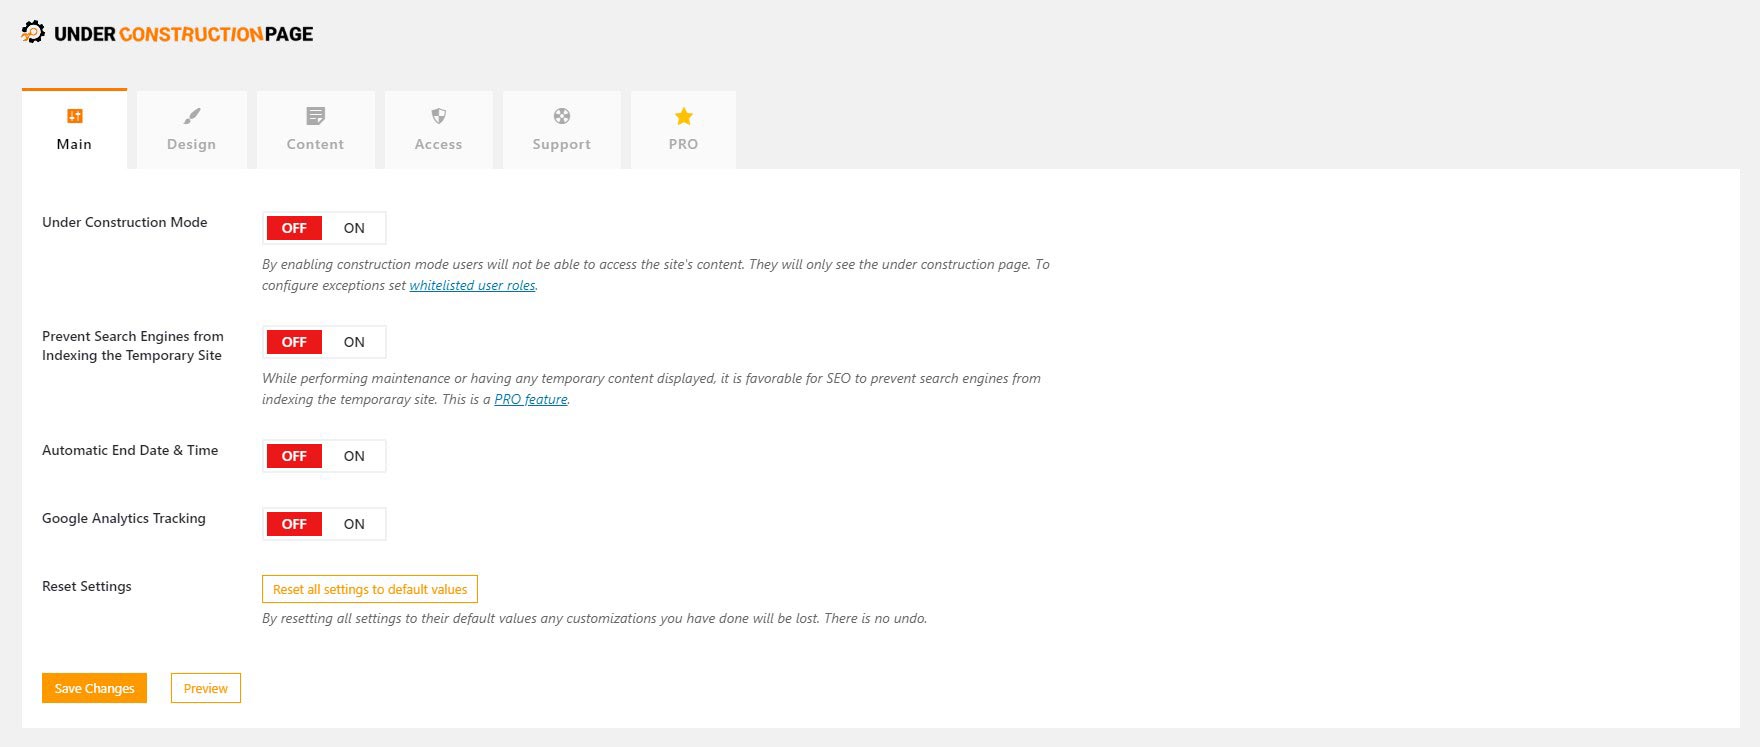
Here on that page you can easily put your WordPress Website Under Construction. To do so, click on the first big red OFF button. It will change to a big green one, saying ON.  

Like so:

NB! Check the text before the text, as plugins are subject of updates, and the location of the Under Construction Mode might be changed. 
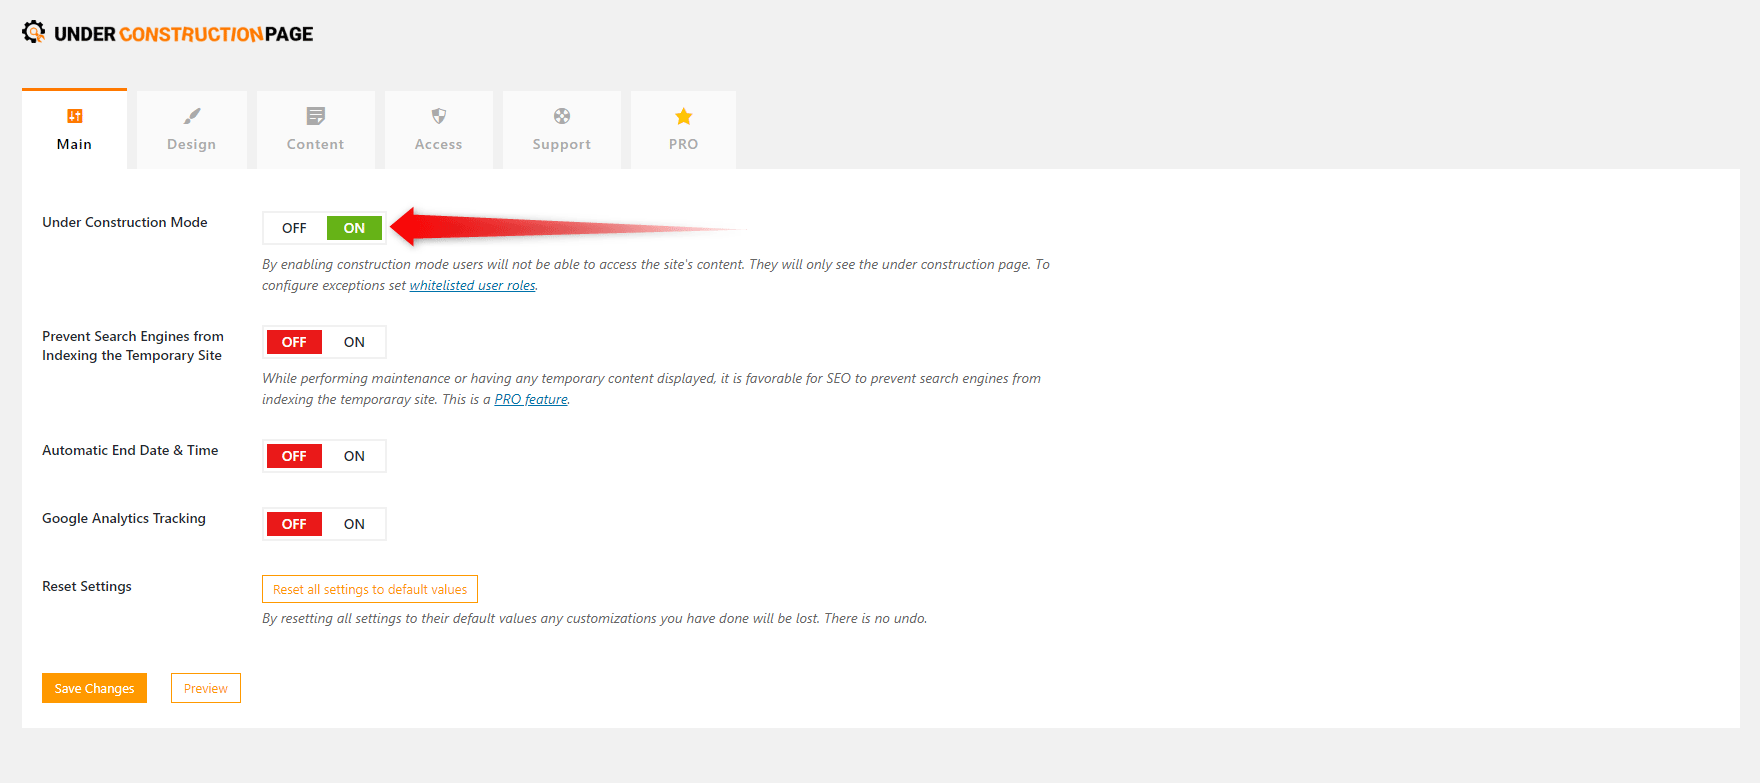
Once you’ve put Under Construction Mode to ON, click the Save Changes button at the bottom.

Your website should now be hidden from other people. To check, you can use incognito mode on your browser, another device, or simply log out of your account.

Bear in mind that the plugin has more options and it would be a good idea to look around and see whether something might be useful to your specific case.

Follow this link for a detailed guide on How to Make WordPress Private While Working on It.

Was this post helpful?

i

Relevant tags:

Connect

Latest posts:

How to Install a MediaWiki Skin

In MediaWiki, skins determine the visual appearance of your wiki website. Skins define how content is presented to users and include such settings for the overall website layout, typography, color scheme, and more. By default, when you install MediaWiki, the platform...

How to Create a Page in MediaWiki

Creating pages in MediaWiki is а core feature that allows you to add content to your MediaWiki website. Whether you are adding details for a project, contributing to a knowledge base, or anything else, learning how to create a page in MediaWiki is crucial for your...

How to Install MediaWiki Extensions

Now that you have installed MediaWiki and learned how to log in to the CMS, it is time to extend MediaWiki's functionality via extensions. MediaWiki extensions are sets of files that add various types of functionality to your MediaWiki website. You can use extensions...

How to Log In to MediaWiki

After you install MediaWiki, it is time to log in to the platform, so you can start working on your new MediaWiki website. To log in, you must open the MediaWiki login page and enter your credentials. Doing so will open the platform’s admin panel. In the following...

How to Install MediaWiki

You can quickly install MediaWiki on any of the AwardSpace web hosting plans. This includes our free web hosting, shared hosting, as well as advanced services such as semi-dedicated hosting and VPS hosting. You can install MediaWiki in a matter of minutes, whichever...


Create a website for free!


Free forever

Our Support Team is Here to Help


If you need any questions answered, don't hesitate and contact us. Click the button below and follow the instructions. You can expect an answer within an hour.


Contact AwardSpace


iNewest knowledge base articles

How to Install a MediaWiki Skin

In MediaWiki, skins determine the visual appearance of your wiki website. Skins define how content is presented to users and include such settings for the overall website layout, typography, color scheme, and more. By default, when you install MediaWiki, the platform...

How to Create a Page in MediaWiki

Creating pages in MediaWiki is а core feature that allows you to add content to your MediaWiki website. Whether you are adding details for a project, contributing to a knowledge base, or anything else, learning how to create a page in MediaWiki is crucial for your...

How to Install MediaWiki Extensions

Now that you have installed MediaWiki and learned how to log in to the CMS, it is time to extend MediaWiki's functionality via extensions. MediaWiki extensions are sets of files that add various types of functionality to your MediaWiki website. You can use extensions...

How to Log In to MediaWiki

After you install MediaWiki, it is time to log in to the platform, so you can start working on your new MediaWiki website. To log in, you must open the MediaWiki login page and enter your credentials. Doing so will open the platform’s admin panel. In the following...

How to Install MediaWiki

You can quickly install MediaWiki on any of the AwardSpace web hosting plans. This includes our free web hosting, shared hosting, as well as advanced services such as semi-dedicated hosting and VPS hosting. You can install MediaWiki in a matter of minutes, whichever...

How to Install an Elgg Theme

After you have installed Elgg core and logged in to the admin dashboard, you can search for themes that can help you customize your new website. Elgg themes are a set of files that help you customize the appearance of your website. Via themes, you can modify website...

Even more web tutorials

Check out our web hosting knowledge base and the WordPress tutorials to learn more, and be better prepared for your website creation and maintenance journey.