Having your own custom website is one of the most rewarding experiences you can have online, but from time to time, it can also throw seemingly random errors at you for no apparent reason. One of the more perplexing errors is MySQL error #1142 “INSERT command denied to user”. Unlike other errors, this particular issue can pop up in almost all content management systems, in phpMyAdmin, and even in code that you have written yourself. In this article, we will learn what causes the #1142 error and we will go over the possible solutions to this issue.
What Is Causing MySQL Error #1142 “INSERT Command Denied to User”?
As the error message ”INSERT command denied to user” suggests, the root problem is that the INSERT command fails. The INSERT command is used to add new information to your MySQL database. So, you can potentially run into this problem whenever you update your website with new information or when you try to manually insert new data into your database.
Since this is a database-related issue, it can pop up on any website that uses a database to store information. The issue can affect everything from world-renowned content management systems like WordPress, Joomla, and Drupal, to small PHP websites that you may have coded yourself.
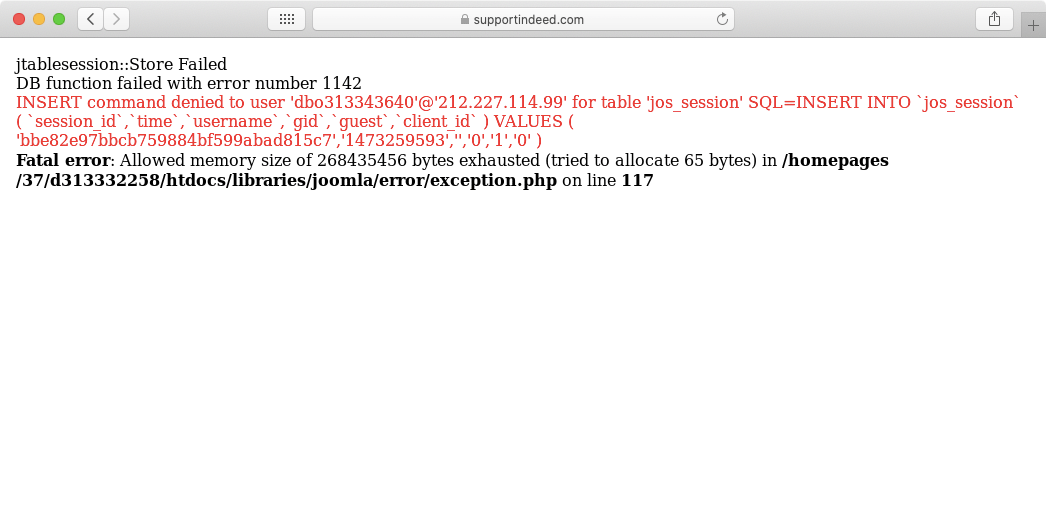
The #1142 error is most prevalent in shared hosting environments. Plans such as our free website hosting and our premium shared hosting packages fall into this category. The reason is that shared hosting plans often impose a limit, known as a quota, on the amount of information that can be stored in a single database.
What Is a Database Quota?
As more information is stored in a database, its size steadily grows. That is why hosting companies often impose a database quota which is essentially a storage limit for your database. When you reach this limit, you are no longer permitted to add new information to the database. In technical terms, when you reach your database storage limit, your database user loses its INSERT privileges.
How Can I Check My Database Quota and Current Space Usage?
You can easily check the current size of your MySQL database as well as the database quota imposed by your hosting plan using the Database Manager section of the Control Panel, as is shown below:
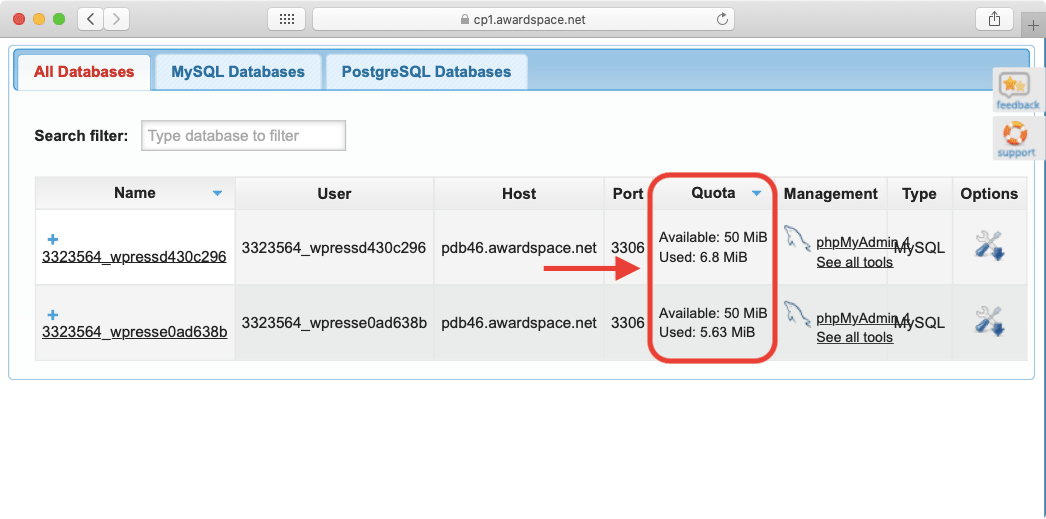
The only thing that we need to point out is that your current utilization statistics are not updated in real-time. As such, it may take an hour or so for any changes to the size of your database to be reflected in our Database Manager.
How Do I Fix MySQL Error #1142 “INSERT Command Denied to User”?
There are three approaches you can take to resolve the ”INSERT command denied to user” problem:
- you can optimize your database in order to reduce its size without sacrificing any of your data.
- you can delete information that you no longer need.
- you can upgrade to a better hosting plan that grants you additional database storage.
Below we will discuss the three options in greater detail.
Option 1: Optimize the Database
Optimizing the database is arguably the best approach to take as it allows you to instantly reduce your database’s size without sacrificing any data. The only downside to this option is that for large websites this can prove to be only a temporary solution.
To optimize your database, follow the steps below:
- Go to the Database Manager section of our Control Panel.
- Click on the name of the database that is over quota.
- Open the Management tab.
- Choose the 1-click Optimization option, as is shown in the screenshot below:
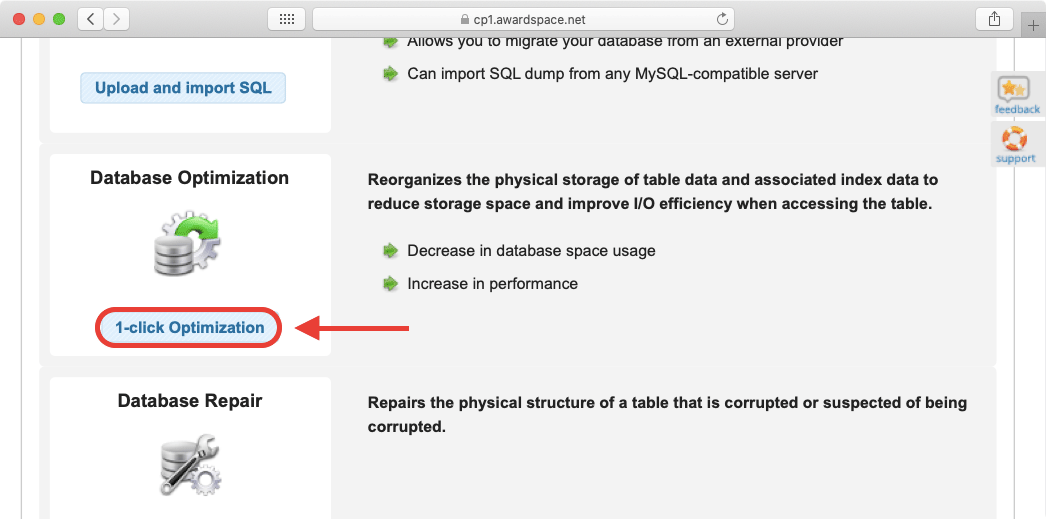
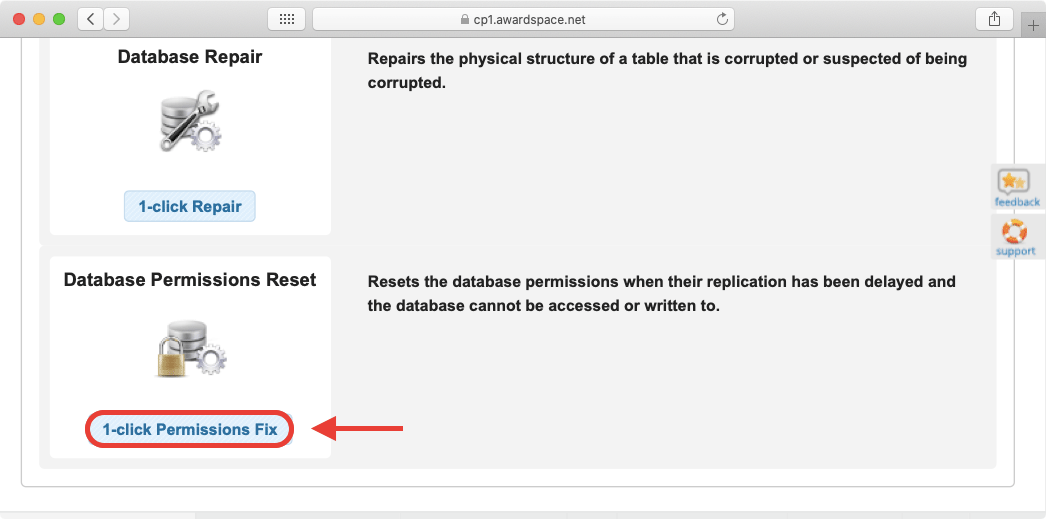
- At this point, your database is optimized. However, it may take some time for this optimization to be reflected. To speed up the process, scroll further down the list of management options and choose the 1-click Permissions Fix button. By doing so, you will be granted full access to your database immediately and you can continue working on your website.
For more information on how database optimization works and the different ways of optimizing your database that you have available, you can refer to our full guide on how to optimize a MySQL database.
Option 2: Delete Unnecessary Data
Your other alternative when it comes to reducing your database size is to straight-up delete any data that is no longer necessary. This can be achieved using phpMyAdmin to DROP (delete) any tables that you no longer need. An example of this can be seen below:
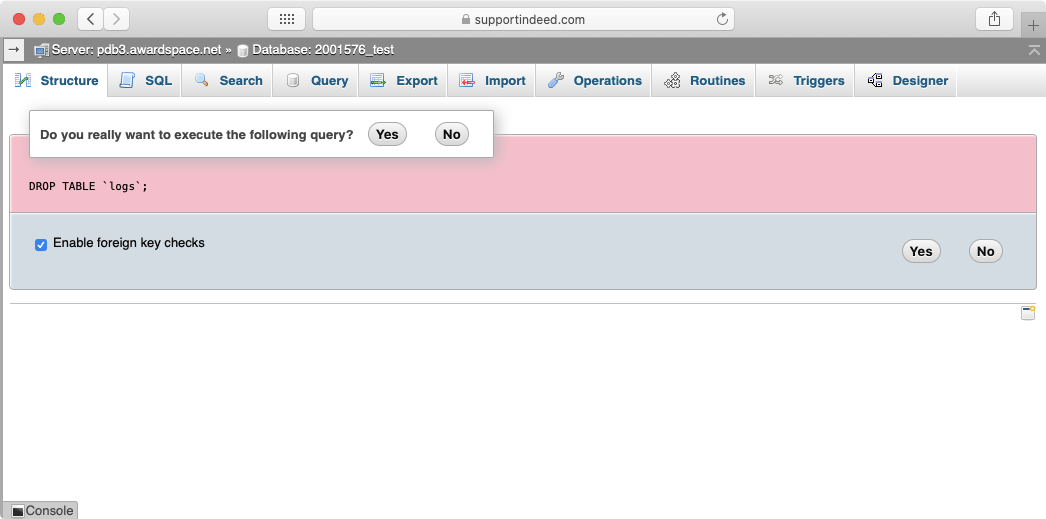
Some website software products offer the ability for you to log every site visit for further analysis at a later time. Such information is often stored in your database. While this may be a useful feature to some, it can very quickly take up the majority of your database, especially if you have regular site visitors who spend plenty of time on your site. Disabling this logging functionality and removing the existing logs from the database can free up hundreds of megabytes.
Another aspect of running a website that can consume a lot of database storage is user-generated content such as reader comments on a blog post. At the very least you should ensure that no SPAM comments are published as are not helpful in the slightest and take up valuable storage space. An even better approach would be to consider using a service like DISQUS as it not only helps protect you against SPAM comments, it even stores all comments on its own servers so they are not taking up any space at all in your database.
Option 3: Upgrade to a Better Hosting Plan
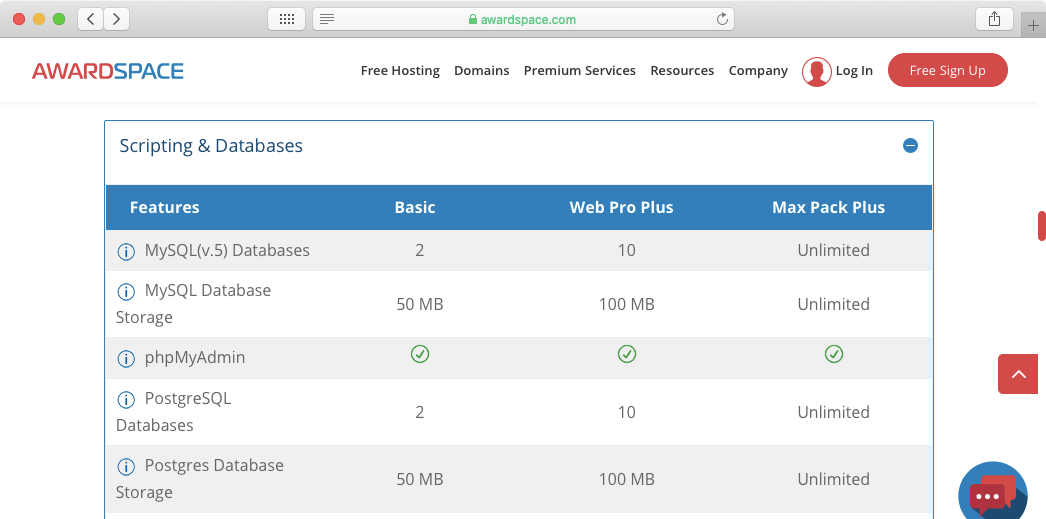
The last option that you have at your disposal is to upgrade to a better hosting plan. The next tier of hosting will always offer you more storage for your databases and our premier plans like the Max Pack Plus and all of our Semi-Dedicated web servers will provide you with unlimited storage, thus dealing with the #1142 error once and for all.
If you are using one of our Virtual Private Server packages and you run into the “INSERT command denied to user” error, it is possible that your VPS has run out of space and there is simply no room for additional information to be stored. Once you confirm that the lack of storage is indeed the issue, you can purchase additional disk space for your VPS through our Control Panel.
Conclusion
When you are using a shared hosting server, you can solve the MySQL error #1142 “INSERT command denied to user” by making sure that your current database utilization does not exceed your database quota. This can be done by optimizing the database, deleting data, or just increasing your database quota. Sadly, some content management systems use different wording for the exact same error, so if your hosting plan limits the maximum size of your MySQL database, it is always a good idea to regularly check that you are not reaching your storage limit.
