
You can install Zen Cart with any of the AwardSpace hosting plans—free web hosting, shared hosting, and advanced plans such as Semi-Dedicated Hosting and VPS hosting.
Each AwardSpace hosting service is tailored to run Zen Cart flawlessly and smoothly, regardless of your website’s size or requirements.
Read: How to Choose the Best Web Hosting Plan for Your Site
How to Install Zen Cart
To install the Zen Caet CMS, you need to sign up for an AwardSpace hosting plan. If you are not sure which plan is right for you, then simply register for the free one.
Then, log in to the AwardSpace hosting control panel. From there, you can browse and install various CMS platforms, including Zen Cart.
Keep in mind that to be able to install Zen Cart, you need to register a domain name. Here’s how:
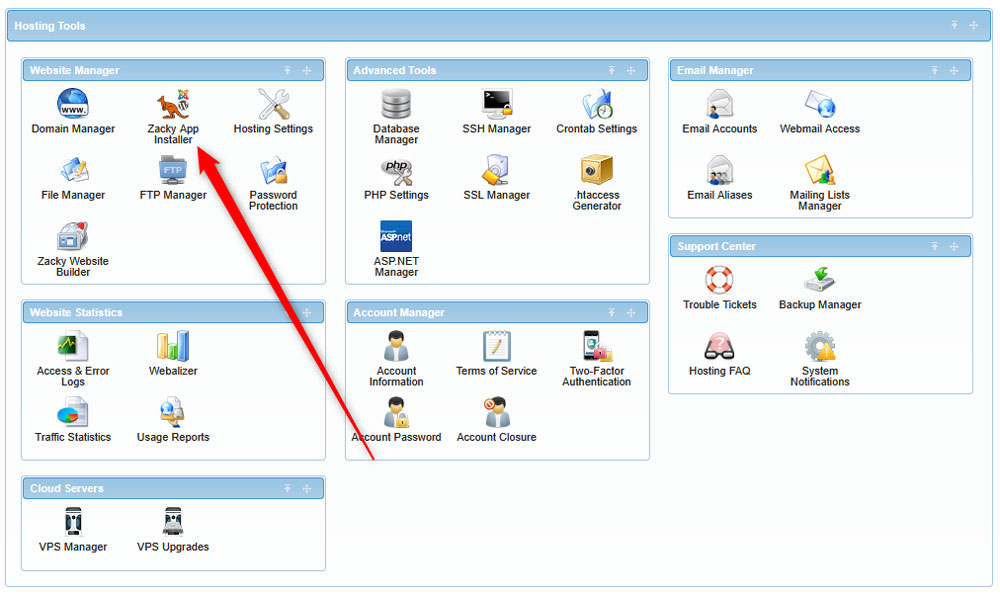
After you enter the hosting panel, click on the Zacky App Installer icon in the Website Manager box:
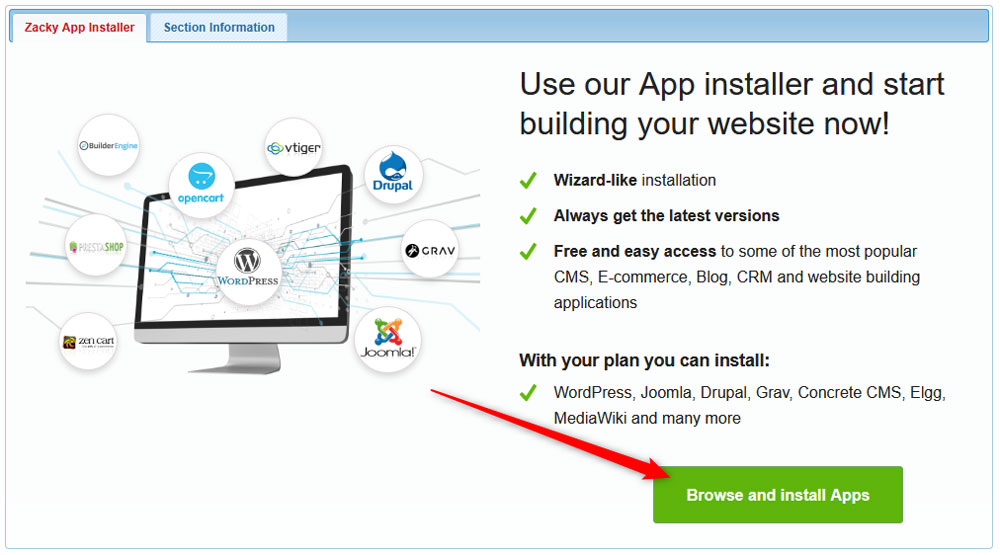
Once you click the Zacky App Installer, a new page will open – once you see it, click on Browse and Install Apps:
Then, from the window that pops up, select a domain name that you will be using with your Zen Cart project:
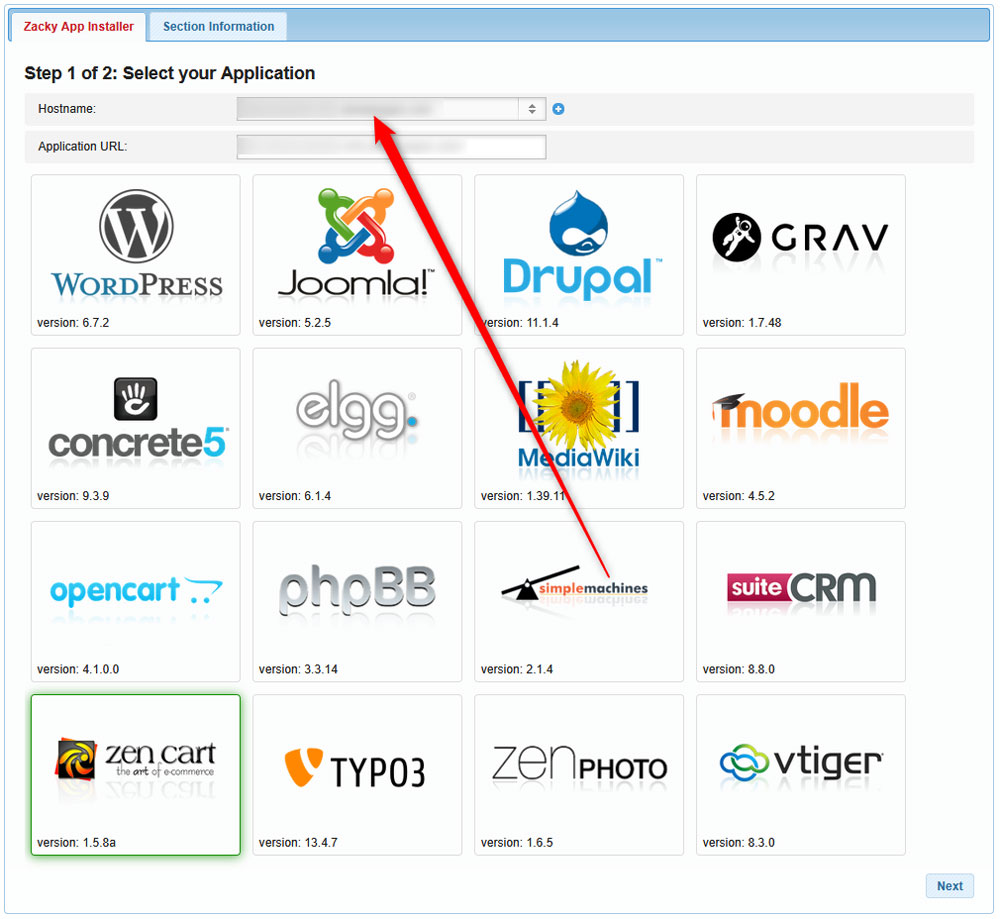
Then, click on the Zen Cart icon:
![]()
After that, you should choose a username, password, and email for your Zen Cart installation. Remember these credentials – you will use them to log in to the Zen Cart admin panel:

Once you fill in these credentials, follow the instructions and install the platform. The process takes a few minutes.
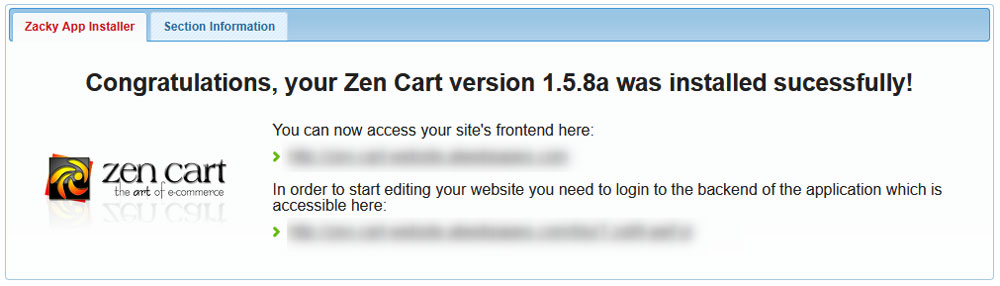
Once the process is completed. A confirmation window will appear:
Also, AwardSpace will send an email to the address you selected when choosing credentials.
Read the email thoroughly because it contains important information about your AwardSpace account and login details for your Zen Cart website. It is advisable to save this email for future reference.
Now, you have managed to install Zen Cart successfully.
The next steps are to log in to Zen Cart, configure your store, and add new products.
