
In this article, you will read how to install Joomla templates, so you give your website a unique appearance.
Joomla is a versatile content management system (CMS) that provides the ability to create fully functional websites with ease and without applying any advanced coding and programming skills.
One of the key advantages of Joomla is its ability to support a wide range of templates, allowing you to customize the look and feel of your Joomla website.
What is a Joomla Template
A Joomla template is a set of files and code snippets that shape the overall layout and functionality of your Joomla-powered website.
In short, it’s like the “skin” of your Joomla website, defining how content is displayed to visitors.
Key components of Joomla templates are:
Layout and Design: A Joomla template includes HTML, CSS, and optionally JavaScript files that shape the structure, styling, and visual elements of your website. This means that elements like headers, footers, navigation menus, content sections, typography, colors, and more are shaped in a way that the HTML, CSS, and JavaScript codes dictate.
Module Positions: Templates define the specific positions in which Joomla modules (such as menus, sliders, banners, etc.) can be placed on your website. These module positions allow you to customize the layout of your website according to your preferences.
Responsive Design: Joomla templates are designed to be responsive, meaning they can adapt and adjust their layout and styling in such a way that they provide an optimal viewing experience across various devices and screen sizes, including desktops, laptops, tablets, and smartphones.
Customization Options: Many Joomla templates come with built-in customization options that allow users to personalize the appearance and performance of their websites without the need for coding skills. This may include options to change colors, fonts, background images, and more.
Compatibility: Joomla templates need to be compatible with the version of Joomla you’re using. Templates designed for older versions may not work correctly or may lack support for newer features introduced in the latest Joomla releases.
Extensions and Overrides: Advanced users can further customize Joomla templates by creating template overrides or installing template-specific extensions. Overrides allow you to modify the default behavior or appearance of specific elements within the template without directly modifying the template files.
Joomla templates play a crucial role in shaping the visual identity and user experience of Joomla websites. They provide a foundation upon which you can build and customize your site to meet your specific needs and preferences.
Read further:
How to Install Joomla Templates
Installing a Joomla template is simple and requires only a few clicks here and there.
1. Choose and Download Your Template: Before you begin the installation process, you’ll need to choose a Joomla template that suits your website’s purpose and style.
There are numerous resources available online where you can find both free and premium Joomla templates. Ensure that the template you select is compatible with your Joomla version.
Once you select a suitable Joomla template, download it to your device.
2. Access Your Joomla Administrator Panel: To install a Joomla template, you’ll first need to log in to Joomla.
N.B! To be able to log in to Joomla and use the CMS, you should first install it, Here’s how to do so:
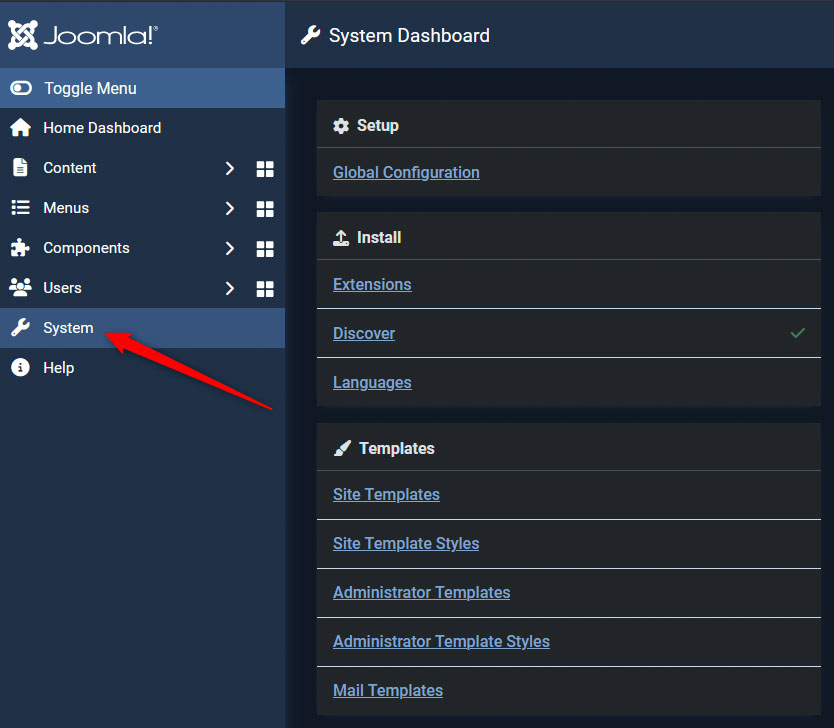
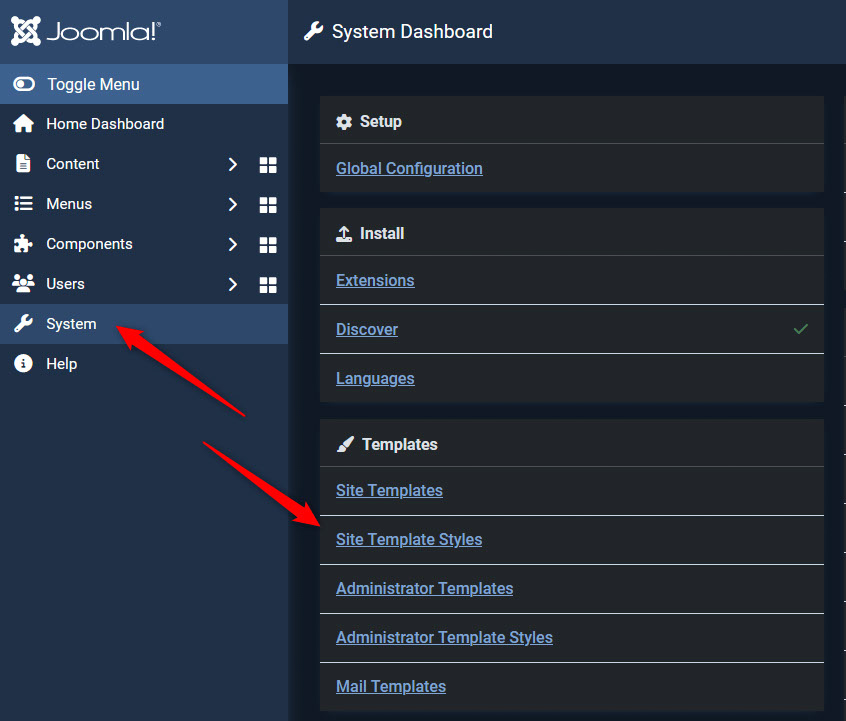
3. Navigate to Extensions > Extension Manager: Once you’re logged in to the administrator panel, click on the System button, located on the left side of the screen:
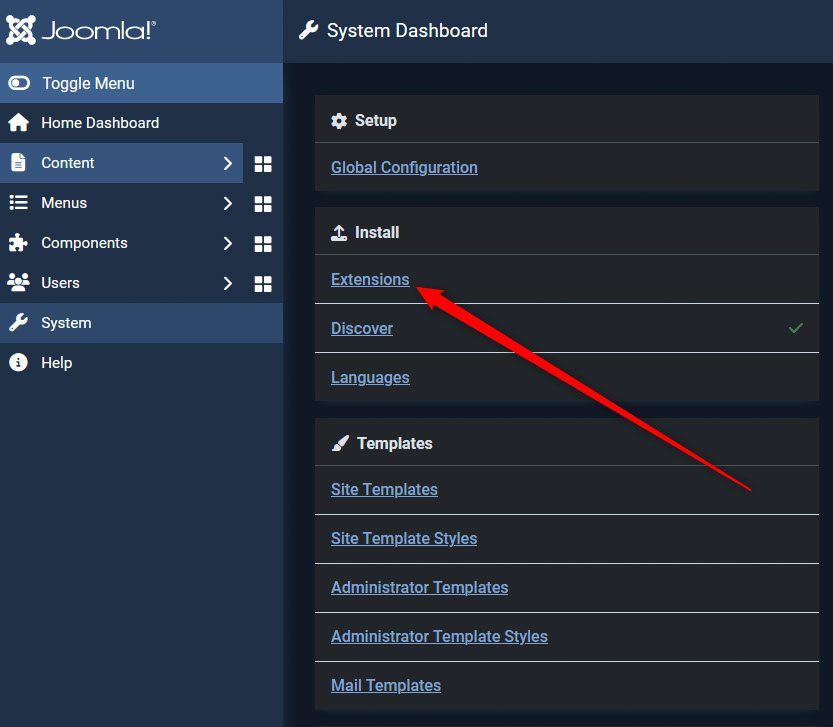
Then, click on “Extensions”:
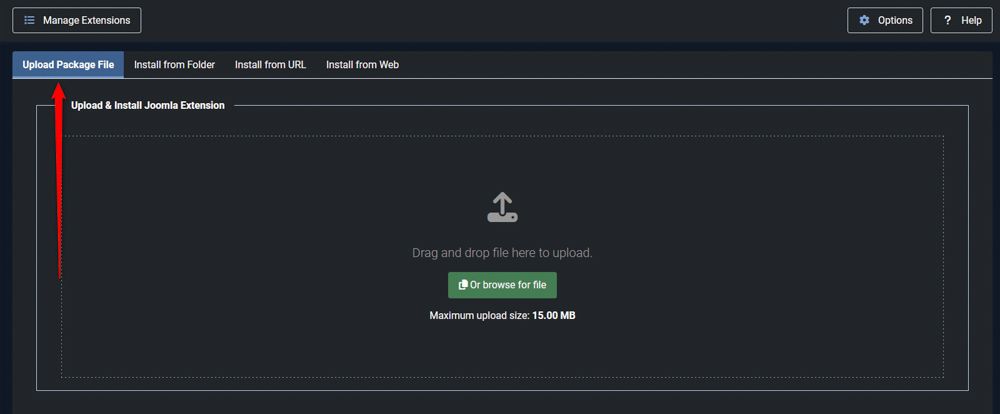
After that, you should upload the template package: In the Extension Manager, you’ll see several tabs at the top of the page. Click on the “Upload Package File” tab:
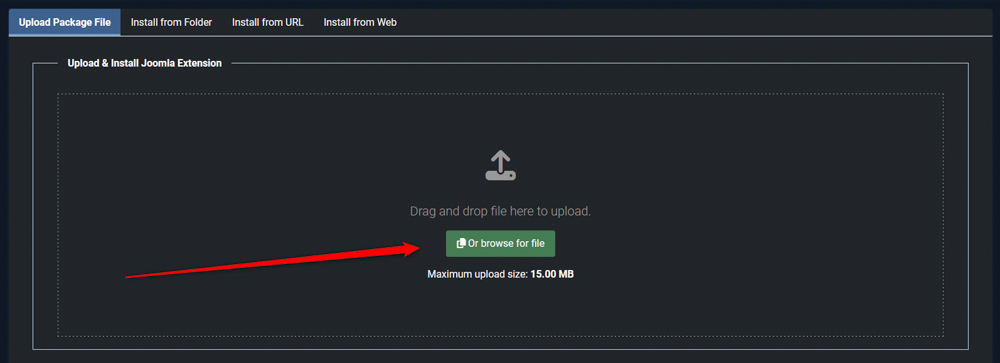
Here, you’ll find an option to upload the template package file that you downloaded earlier. You can either drag and drop the file or click on the green “Browse for file” button to select the file from your computer:
4. Install the Template: After selecting the template package file, click on the “Upload & Install” button. Joomla will then proceed to install the template on your website. This process may take a few minutes, depending on the size of the template and your server’s speed.
Once you install the template, Joomla will display a confirmation message such as this:
![]()
5. Set the Installed Template as the Default One: Once the template is successfully installed, navigate to “System”->“Site Templates Style”:
Here, you’ll see a list of installed templates. Find the newly installed template and click on the star icon next to it. This will set it as the default template for your website.
6. Preview Your Website: With the new template installed and set as a default, you can now preview your website to see how it looks with the new design.
To do so, simply visit your website’s front end in a new browser tab or window to view the changes.
How to Install Joomla Templates – Conclusion
By following these simple steps, you can easily install a Joomla template and give your website a fresh and appealing look. Whether you’re creating a personal blog, an e-commerce store, or a corporate website, Joomla’s flexibility and variety of templates make it a powerful choice for building your online presence.
