
In MediaWiki, skins determine the visual appearance of your wiki website. Skins define how content is presented to users and include such settings for the overall website layout, typography, color scheme, and more.
By default, when you install MediaWiki, the platform comes with several pre-installed skins that you can choose from when working on your wiki layout design. However, if none meet your preferences, you can browse and install other themes that fit your design requirements.
It is important to know that MediaWiki skins only change the front-end design of your MediaWiki site and do not change any core functionality of your wiki.
In this article, we share how to install a MediaWiki skin, how to activate it, and how to use it on your wiki project in several easy-to-follow steps.
Step 1: Download a MediaWiki Skin
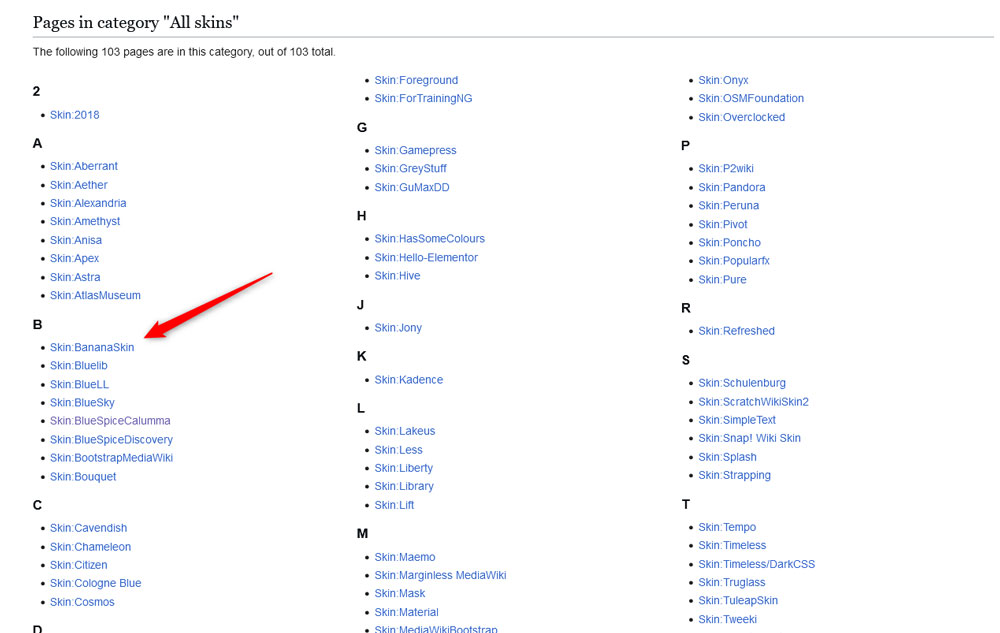
The first step in the process is to find and download a skin that best suits your design requirements. To do so, you can browse the vast Media Wiki Skin Library.
Browse the list of available skins and download the one you like the best on your computer device. To do so, browse the available MediaWiki skins, and click on the name of the one you wish to browse and eventually download:
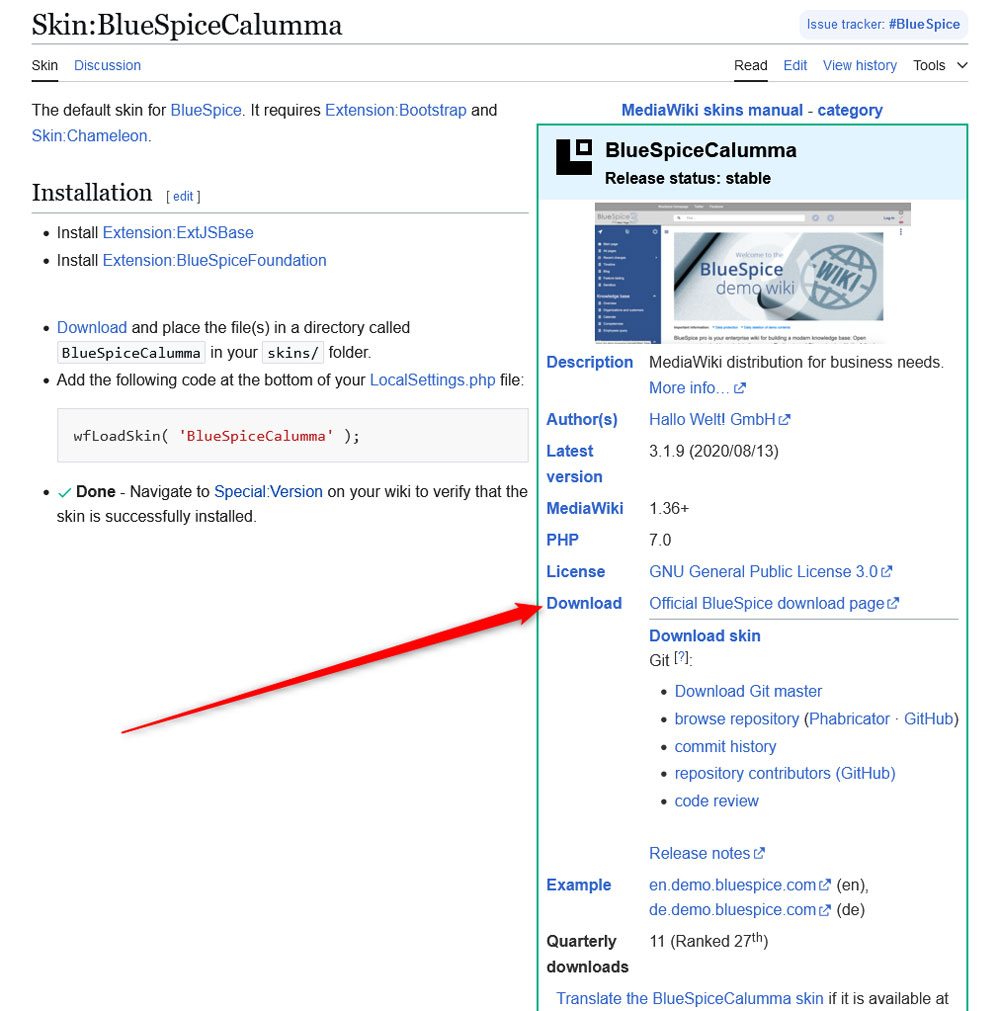
Once you open the Skin’s review page, click on the Download button:
After you click the Download button, an archived set of files will be downloaded on your computer device. The next step is to upload this file to the AwardSpace server where you have installed MediaWiki core. We share how to do so in the following paragraphs.
Step 2: Upload the Skin to MediaWiki
Now that you have the ZIP file on your device, it is time to upload it to the AwardSpace server where MediaWiki core is installed.
To do so, first log in to the AwardSpace Hosting Panel.
Once there, head to File Manager:

Then, open the root directory of your MediaWiki website by double-clicking on the folder with the website’s domain name:
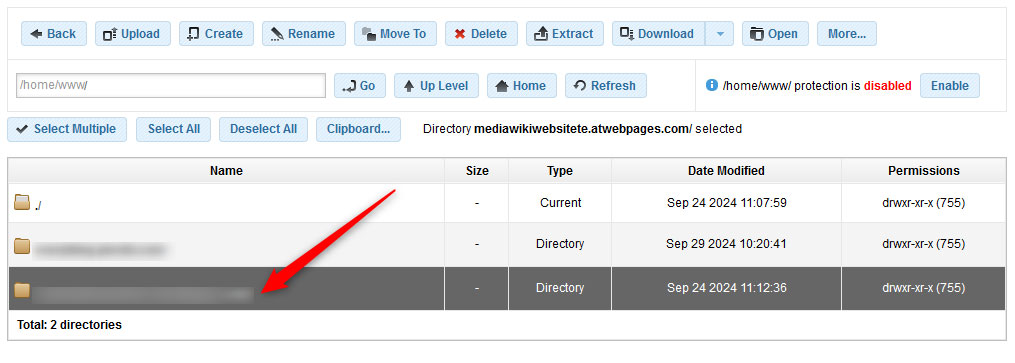
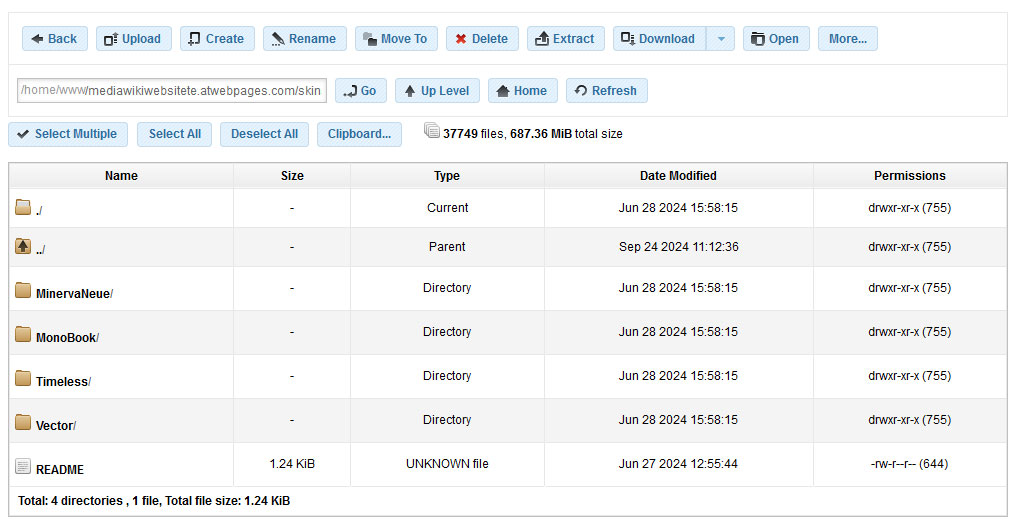
Then, within that folder, find another one called Skins/:

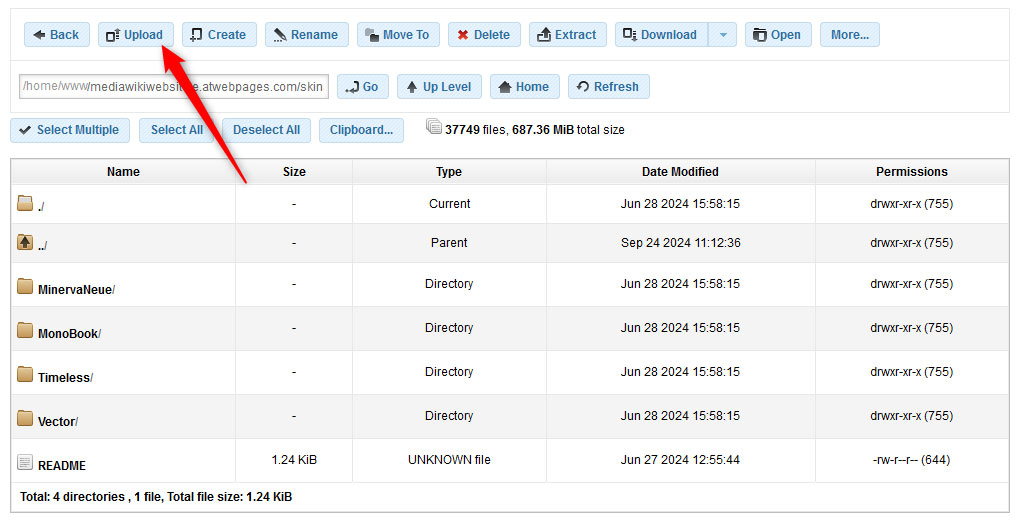
Double-click on the skins/ folder so that you can browse its content:
Now, it is time to upload the ZIP file with the skin you downloaded on your computer device. To do so, click on the blue Upload button at the top of the screen:
A new window will open. Once you see it, click on Click to Select Files:
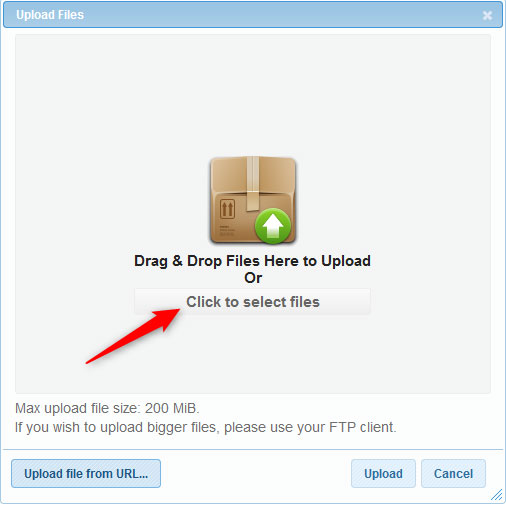
Then, browse your computer device and double-click on the ZIP file with your skin. Once you do, the system will upload it to the skins/ directory.
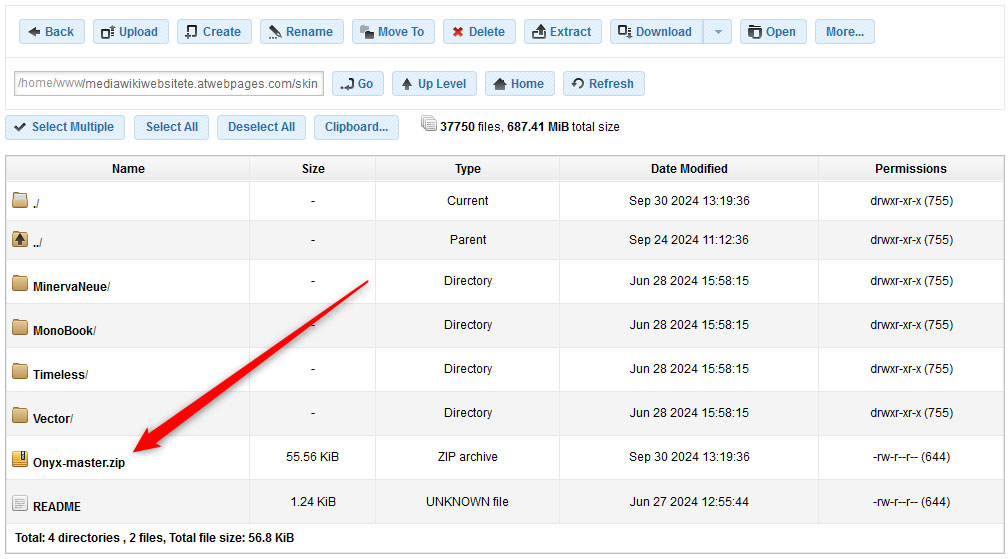
Once the ZIP file is uploaded, you can see it within the skins/ folder:
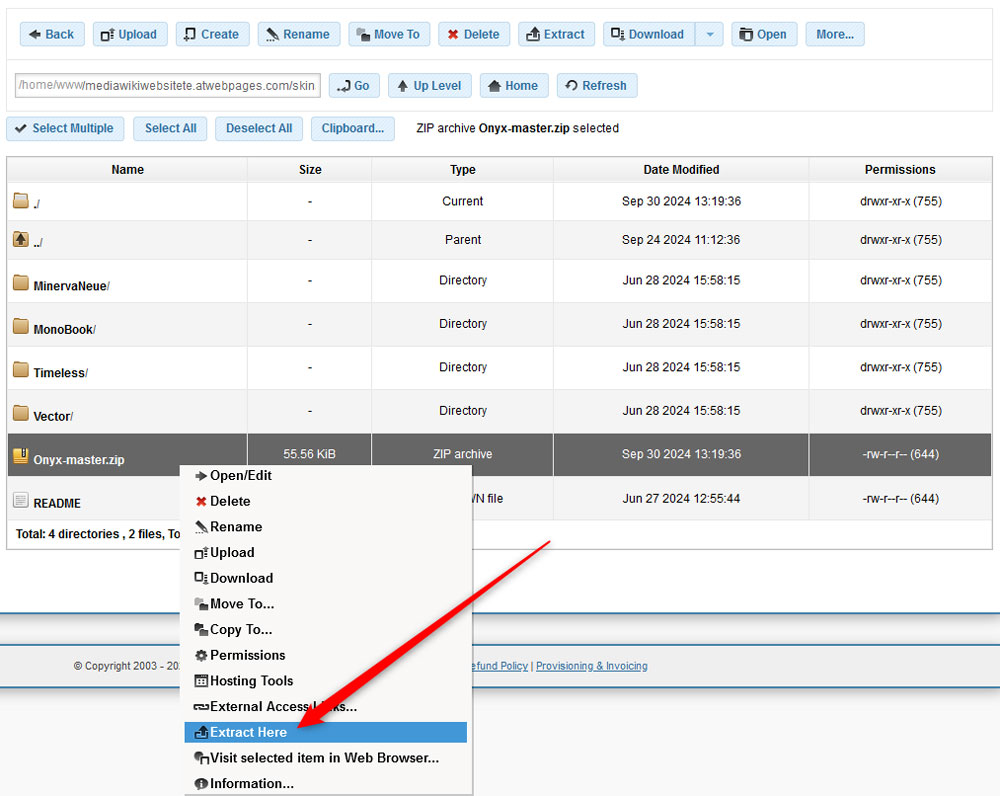
Now, it is time to extract the ZIP file, so MediaWiki can use the skin. To do so, right-click on the uploaded ZIP file and click on Extract Here:
Once the extraction process is finished, you will see a new folder with the skin files within it:
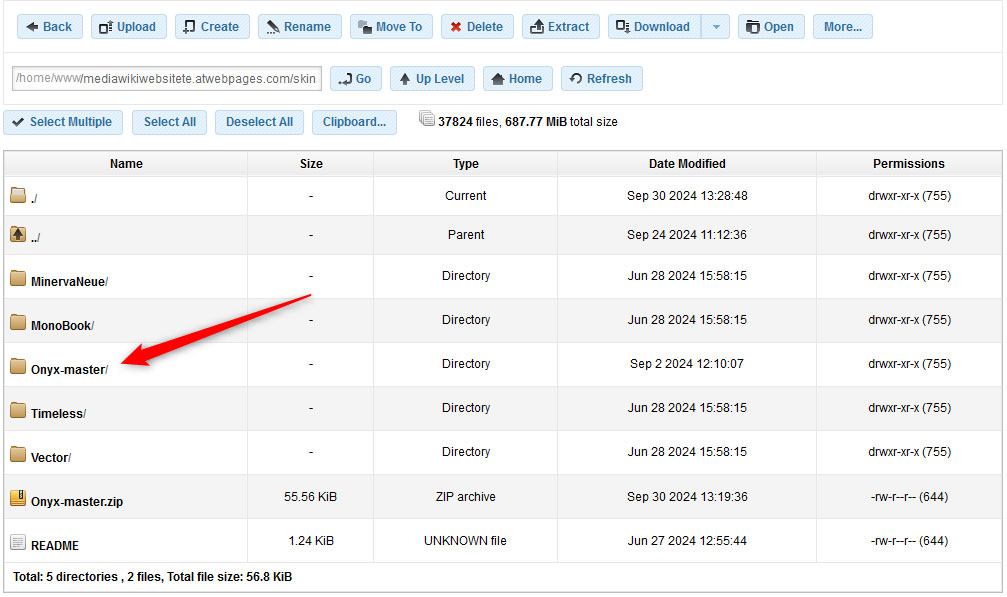
Now you have managed to upload your skin to the MediaWiki root folder.
The next step is to activate the theme, so you can start using it on your wiki website.
Step 3: Activate the Skin
Now that you have installed your new MediaWiki skin, it is time to activate it. To do so, you should open the LocalSettings.php file and add a code snippet inside.
The process is simple and requires only a few clicks here and there.
First, log in to your AwardSpace hosting panel. Then, head to File Manager, just as you did when uploading the skin to the system.
After that, open the root folder of your MediaWiki website, just as you did in the previous steps.
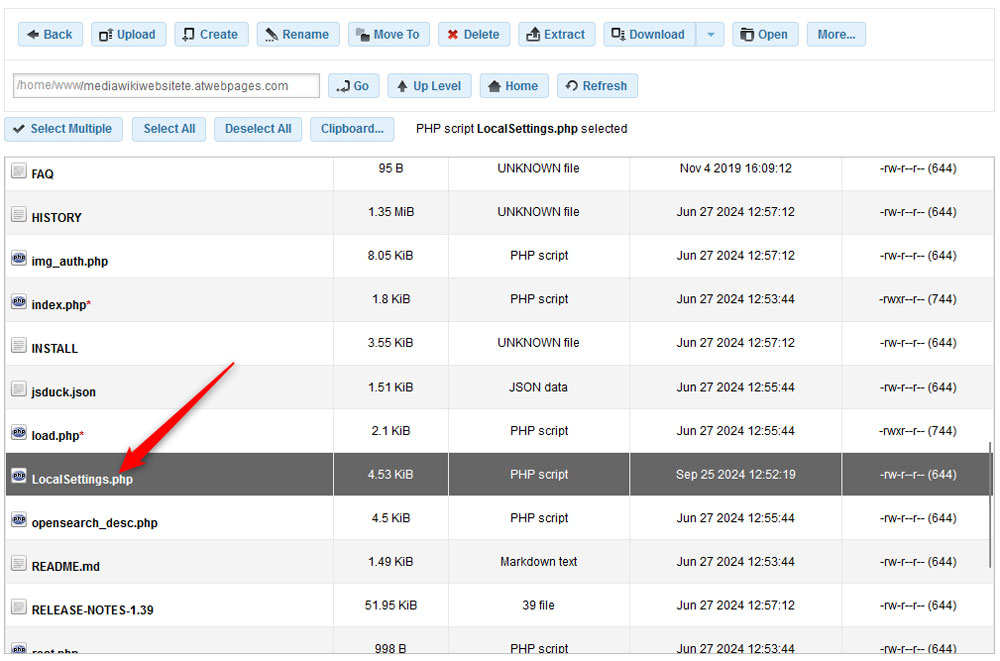
Then, within the root folder of your MediaWiki website, search for a LoacalSettings.php file and open it by double-clicking on its folder:
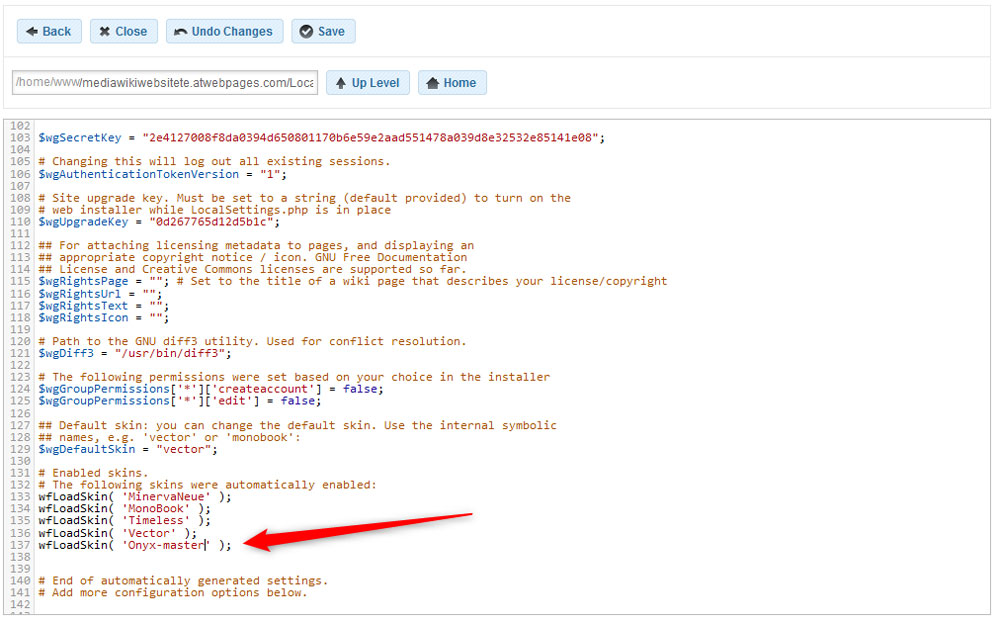
After you open the file, add this string at the end of the document:
wfLoadSkin( ‘SkinName’ );
However, replace ‘SkinName’ with the name of the skin you have downloaded. In our example, the snipped looks like this:
wfLoadSkin( ‘Onyx-master’ );
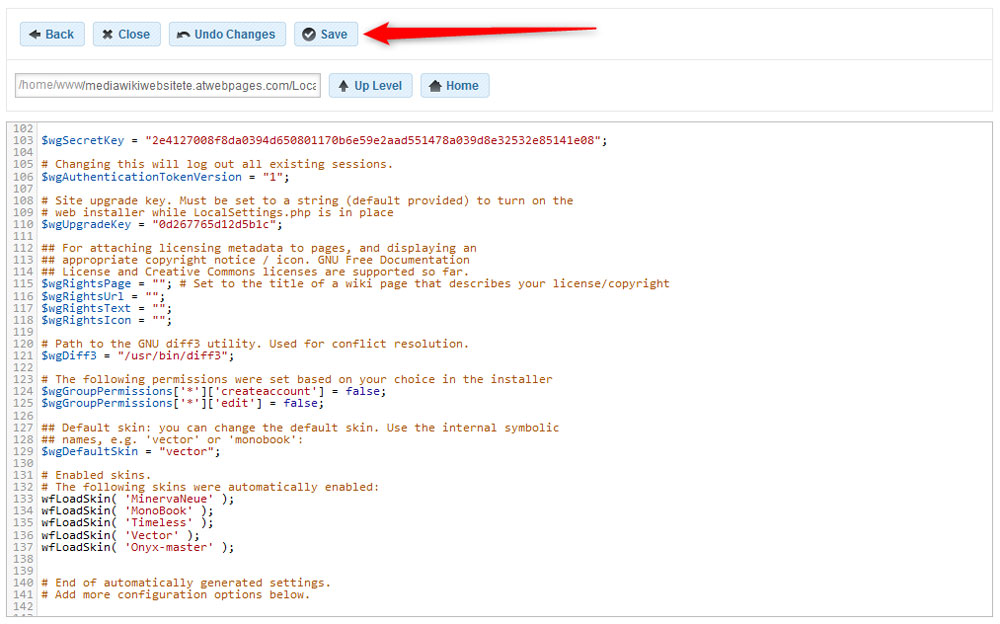
Once you add the snippet, click on the blue Save button at the top of the document, so AwardSpace saves and applies the changes you just made:
Now, you have activated the new theme.
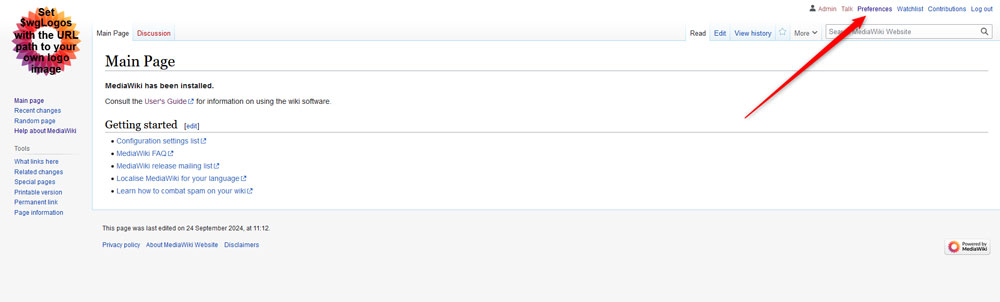
To use it, go to your website and log in to MediaWiki.
Once you do, go to Preferences:
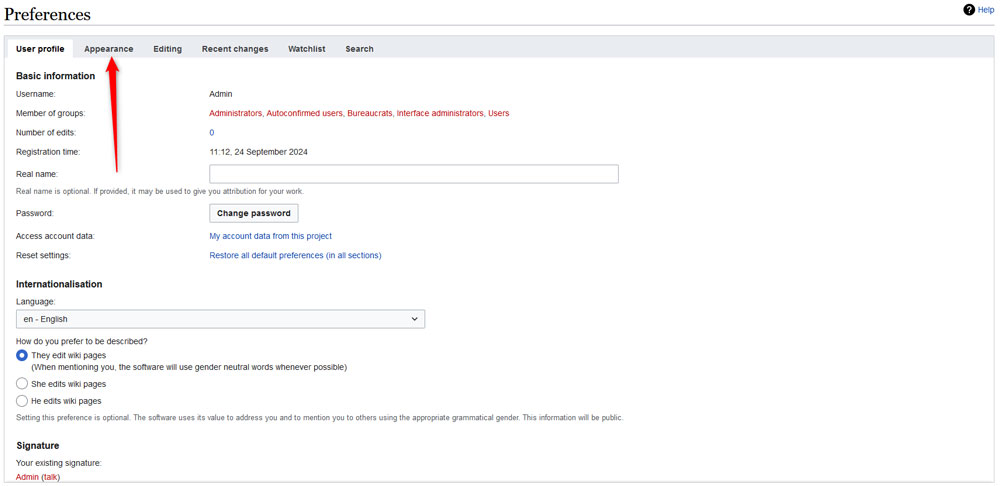
A new page should load. Once you see it, go to Appearance:
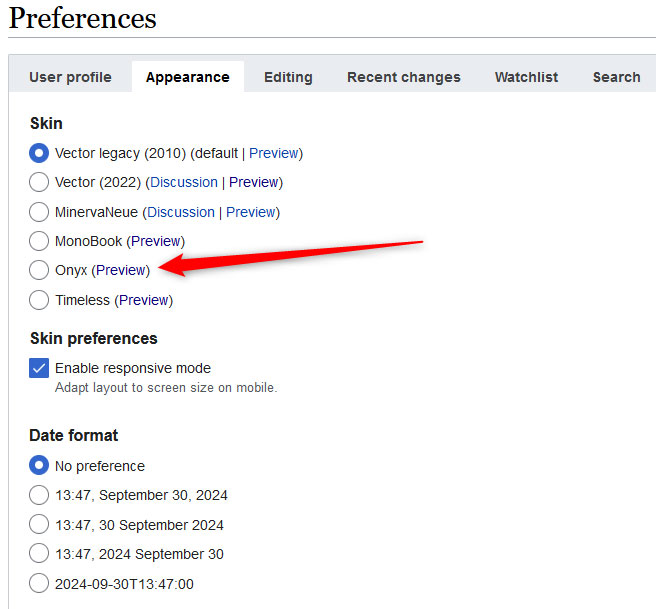
Once you open the Appearance tab, you should see a list of available skins for your MediaWiki website. Within this list, you will be able to see and select the theme you just installed and activated:
To use the theme, simply select it and then click on the blue Save button at the bottom of the page:
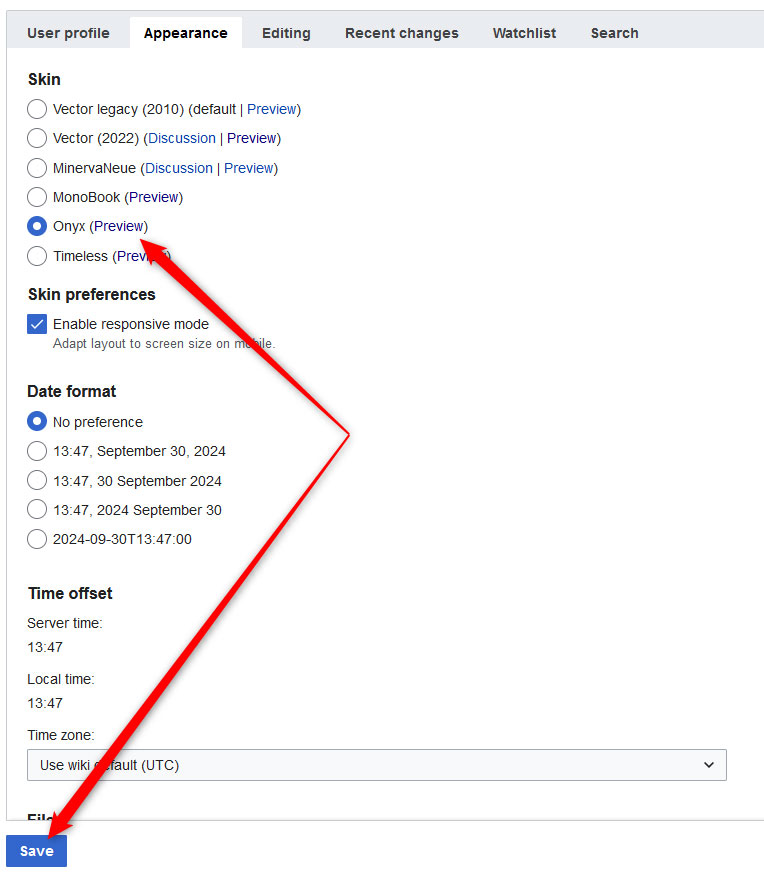
Now your MediaWiki website uses the new theme you just selected.
Conclusion – How to Install a MediaWiki Skin
Now you know how to install a MediaWiki skin, how to activate it and use it on your wiki project.
Read also:
- How to Install MediaWiki
- How to Log in to MediaWiki
- How to Install MediaWiki Extensions
- How to Create a Page in MediaWiki
- How to Add Infobox Module in MediaWiki
- How to Fix MediaWiki Internal Error
- How to Find Modules in MediaWiki
- How to Enable and Customize User Glow in MediaWiki
- How to View and Manage Recent Images in MediaWiki
- How to Check if SELinux is Enabled in MediaWiki
