
If you use WordPress to create your website, it is likely that you can stumble upon 413 Error Request Entity Too Large. This is a very specific error message that can stunt your workflow and progress. If you see such an error message on your website and search for ways of fixing it, then keep reading, as in this article you will understand what is 413 Error and what you can do to fix it.
What is 413 Error Request Entity Too Large
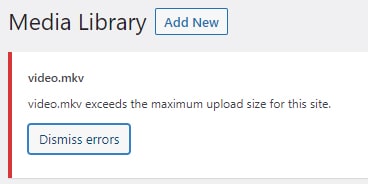
413 Error is an HTTP status code indicating that the client tries to upload a file to the requested web server that exceeds the set upload size limit. HTTP Error 413 is typical for WordPress-based websites and oftentimes appears when the client is using the CMS’s Media Library:
  413 Error is a part of the 4xx status codes. In indicates that there is a problem in the communication between a server and a client. More specifically, that the issue is rooted somewhere on the client side. Similar status codes include:
- Error 400 Bad Request
- Error 401 Unauthorized
- Error 402 Payment Required
- Error 403 Forbidden
- Error 405 Method Not Allowed
- Error 406 Not Acceptable
- Error 408 Request Timeout
- Error 409 Conflict
How to Fix 413 Error
There are two methods you can apply to fix the issue and upload your file to WordPress without encountering 413 Error.
Method 1: Modify the PHP.ini File
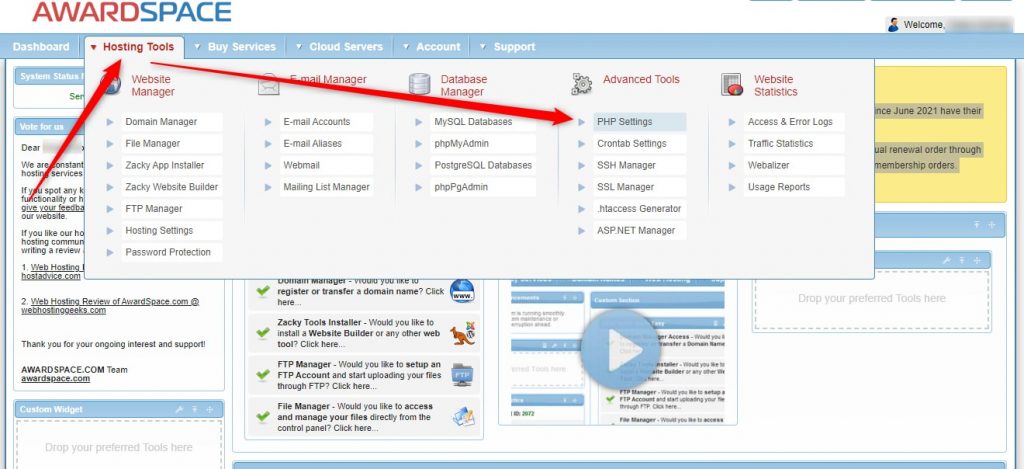
PHP.ini is a configuration file that controls different variables on the web server such as maximum upload file size, resource limits, time to execute PHP scripts, and others. You can modify this file’s script, so it increases the maximum upload file size limit and therefore enables the upload of large files. If you are using the AwardSpace hosting service, here’s how to do so: Log in to your hosting panel and head to Hosting Tools->PHP Settings:
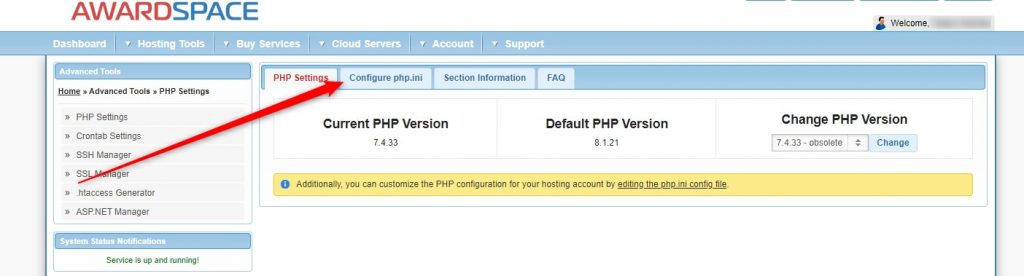
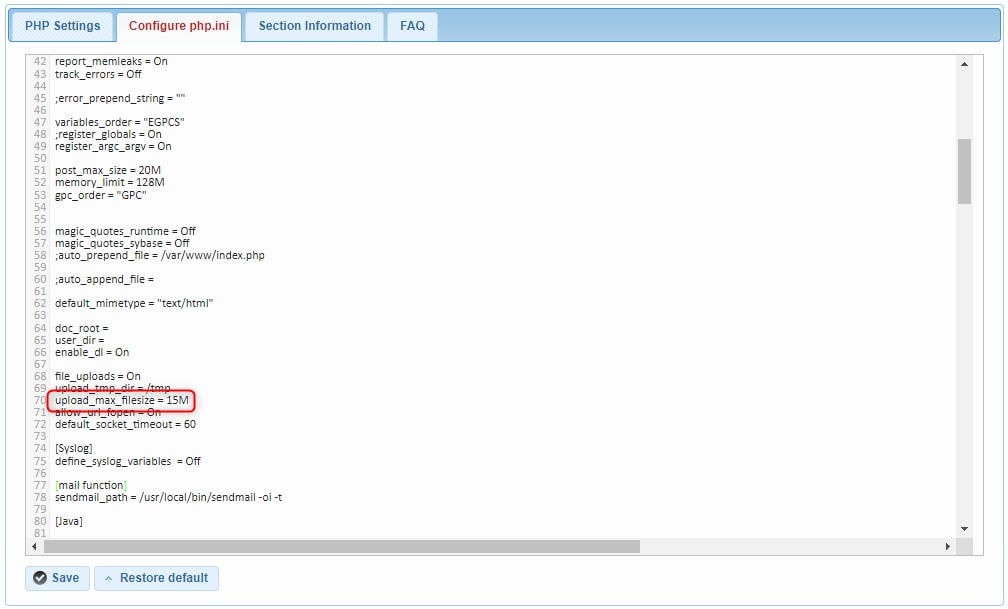

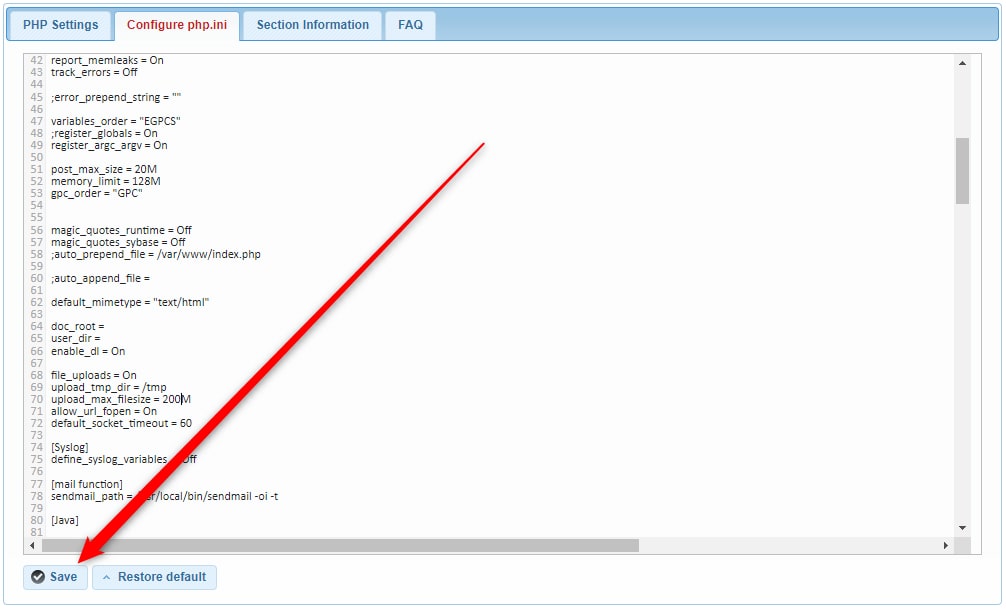
Once you make the changes, click on Save, so the system applies and saves the changes you just made:
Now you should be able to upload your file without encountering a 413 Error.
Via the PHP.ini file, you can also edit other variables related to the upload size limit:
- max_execution_time – this variable determines the maximum time to upload, measured in seconds.
- post_max_size – this variable determines the maximum post size, measured in megabytes.
- How to Edit the php.ini File
- Can I Edit my php.ini Settings and/or Switch the version of the PHP?
- How to Change the PHP Version
- How Do I Customize My PHP Settings?
Method 2: Use FTP Protocol
A second convenient method to upload large files to your WordPress website is to use an FTP client. FTP is an abbreviation for File Transfer Protocol. It makes transferring files between devices simple and intuitive. By using FTP you can upload very large files to WordPress and the only limit would be the one that comes from your hosting plan. Here are some resources that can get you started on using FTP for your WordPress website:
- What is an FTP Client?
- How to Download an FTP Client if You Don’t Have One?
- FTP Connection Settings
- What Is FTPS and How Does it Work?
- How to Establish a Connection with FileZilla?
Conclusion
413 Error is an HTTP status code informing users that a file exceeds the set server file upload size limits and therefore can’t be uploaded. This error is typical for WordPress websites and most commonly can be seen when a client is using the built-in WordPress Media Library to upload such large files.
