
As a website owner, there may come a time when you might prefer to hide your site’s contents from the public. Maybe you are in the process of redesigning your website, or maybe you are storing information meant for a particular person and you do not wish others to have access to this data. Whatever the case may be, enabling password protection for your website is one of the most convenient ways to limit who can access your website. Not sure what password protection is? You can check our in-depth article on what is password protection.
How Do I Add Password Protection to My Website?
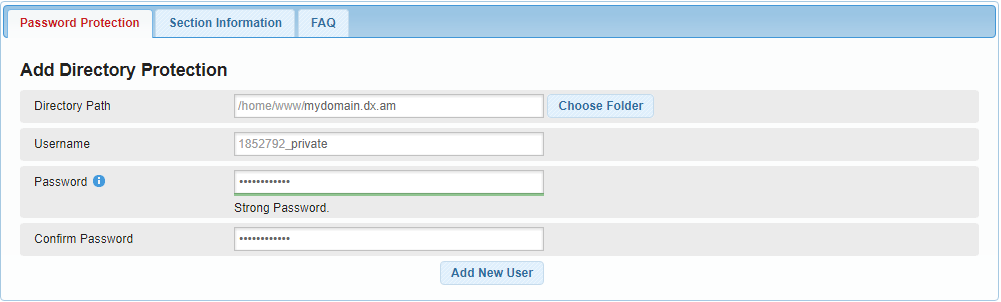
To enable Password Protection, simply follow the steps below:
- Log into the Hosting Control Panel of your AwardSpace account. Don’t have an account yet? Sign up for our service to get started!
- Navigate to the Password Protection section of the Control Panel.
- Specify a Directory Path using the Choose Folder button. The Directory Path represents the folder that will become password-protected.
- Add a custom username and password.
- Finish the process by clicking on the Add New User button.
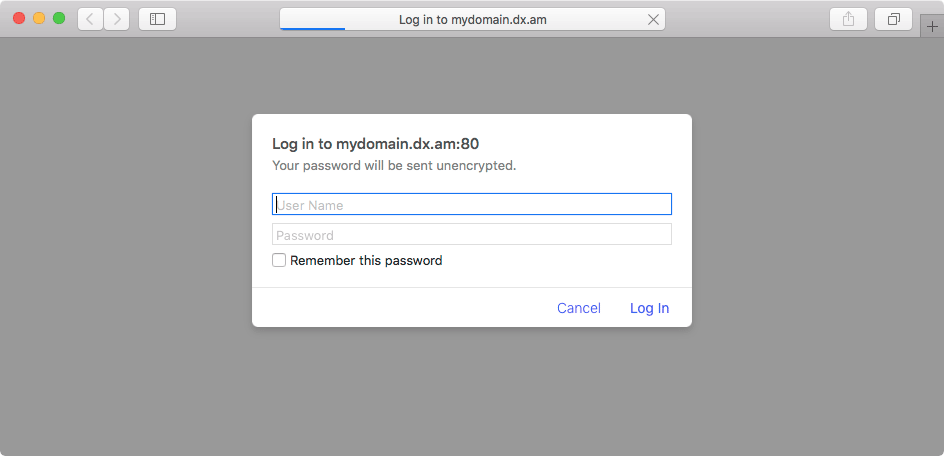
Navigating via your web browser to the directory you chose to protect should yield a page similar to the one below:
Does Password Protection Cover Sub-Directories As Well?
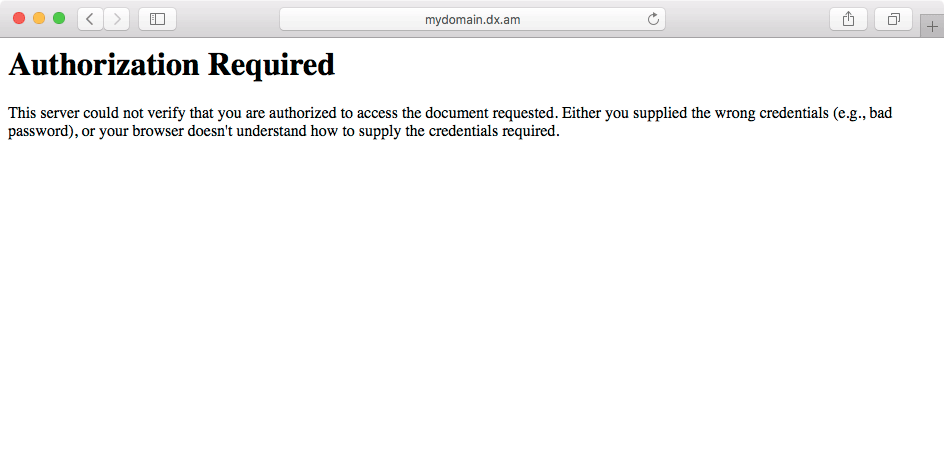
Yes, the website password protection covers all sub-directories which are located in the target protected directory. As such, if you secure the root folder for your domain name, all of your site contents will become private. If a visitor tries to gain access without knowing the correct username and password, they would be presented with the following page:
Can I Allow Additional Users to Access My Protected Directory?
Yes, it is possible to have multiple users for the same protected directory. You can create additional users in two ways:
Creating New Users via the Add Directory Protection Form
The process is essentially the same as creating a brand new website password protection – just make sure that you are using the same Directory Path:
- Log into the Hosting Control Panel of your AwardSpace account.
- Navigate to the Password Protection section of the Control Panel.
- Specify a Directory Path using the Choose Folder button. It should be the same as your existing protected folder.
- Add a new username/password combination.
- Finish the process by clicking on the Add New User button.
Creating New Users via the Add New User Feature for an Existing Directory Protection
The second approach is to adjust the setting for your existing directory protection:
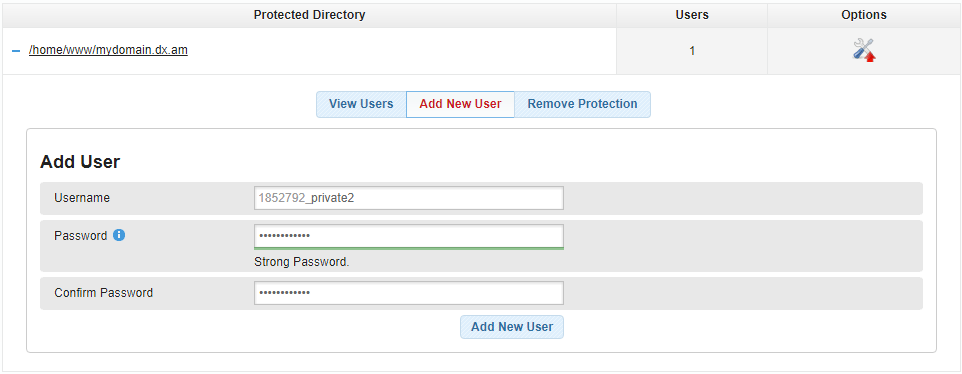
- Log in to the Hosting Control Panel of your AwardSpace account.
- Navigate to the Password Protection section of the Control Panel.
- Click on the Options button next to your existing protected directory.
- Open the Add New User tab.
- Fill in the new user’s credentials.
- Complete the process by clicking on the Add New User button.
Can I Protect Multiple Directories Using a Single Username-Password Combination?
If you wish to protect multiple directories with a single account, use the “Add Directory Protection” form and use the same username and password combination for every directory that you wish to protect.
Note: We do not recommend using the same credentials for multiple password-protected directories!
How Do I Revoke Access for a Specific User?
Removing users from a protected directory is a straightforward process:
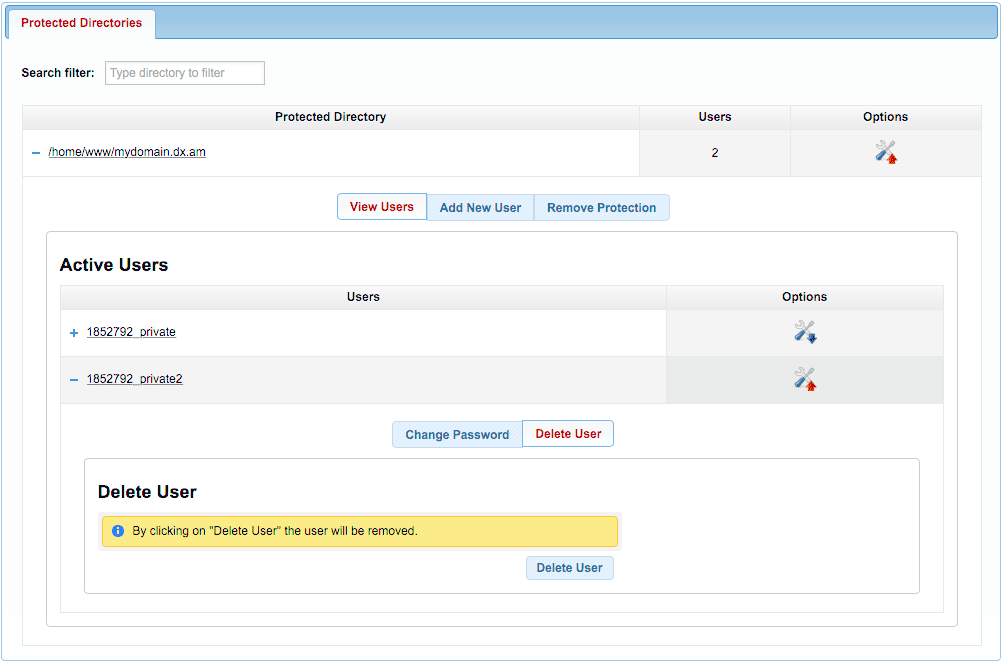
- Log in to the Hosting Control Panel of your AwardSpace account.
- Navigate to the Password Protection section of the Control Panel.
- Click on the Options button next to your existing protected directory.
- Open the View Users tab.
- Click on the Options button next to the user which you wish to remove.
- Open the Delete User tab.
- Click on the Delete User button.
- Confirm your choice by selecting Yes in the popup window that appears.
What Would Happen if I Delete the Last User for a Protected Directory?
The website password protection functions as long as there is at least one user associated with the protected directory. Removing the last user for a given directory will remove the password protection altogether and make your site contents freely accessible on the web.
