Arguably one of the most important aspects of having a successful website is registering a short and memorable domain name. As a domain owner, your personal contact information is listed on the public WHOIS database by default, which puts your privacy at risk. Fortunately, there is a legitimate way to hide your information from your domain’s WHOIS record and keep your data safe. For more information on how the Domain Privacy Protection works, you can check our in-depth article on what is WHOIS privacy protection.
How Can I Check If My WHOIS Information Is Protected?
Before you go ahead and purchase Domain Privacy Protection, it is a good idea to check whether your WHOIS information isn’t already protected thanks to the General Data Protection Regulation (GDPR) which went into effect in 2018. If your domain’s WHOIS info is already redacted, then in most cases you wouldn’t need to spend money for additional protection.
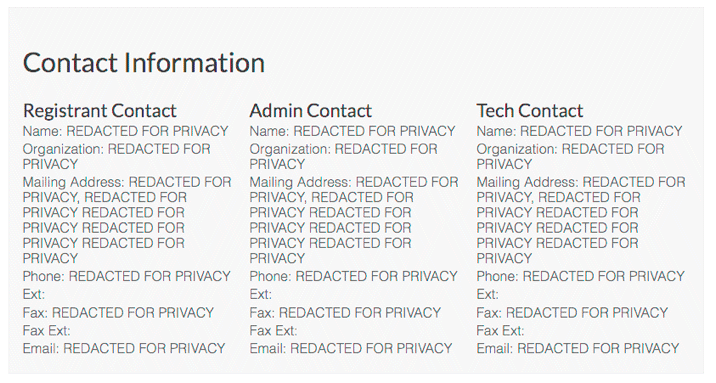
The contact details were returned by ICANN’s WHOIS Lookup tool. Since the domain in the example falls under the protection of the GDPR, all data is redacted.
To see your domain’s WHOIS information, you can use ICANN’s official WHOIS lookup tool. Simply enter your domain name and wait for the page to load with the results. If your personal information is redacted, as shown in the screenshot above, then you most likely won’t need to buy any additional protection. To learn more about the differences in the protection offered by the GDPR and the Domain Privacy Protection add-on, you can check our what is WHOIS privacy protection article.
How Do I Buy Domain Privacy Protection?
Purchasing Domain Privacy Protection is a straightforward process, but it varies depending on whether you have already purchased your domain name or not. We will cover both scenarios for your convenience.
How Do I Buy Domain Privacy Protection for a Domain That I Have Already Purchased?
Getting your WHOIS record protected takes just a few steps which we have outlined below:
- Log in to the Hosting Control Panel.
- Navigate to the Domain Manager section of the Control Panel.
- Click on the name of the domain which you wish to protect.
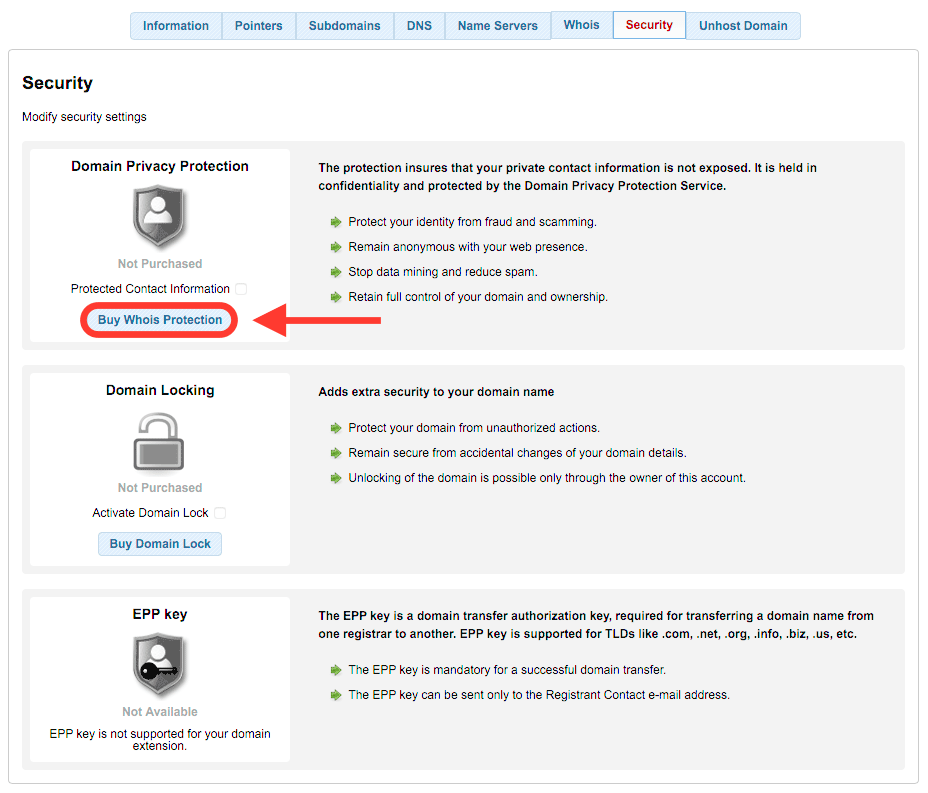
- Open the Security tab.

- On the next page, you will be presented with several options. Click on the Buy Whois Protection button to continue.
- From the Period drop-down menu, select the number of years for which you wish to purchase the Domain Privacy Protection.

- Click on the Continue button.
- Proceed to the checkout page and make your payment. After successfully ordering the Domain Privacy Protection, please allow some time for it to take full effect.
How Do I Buy Domain Privacy Protection for a New Domain Name?
If you are new to AwardSpace, you will not have access to our Control Panel yet. As such you can skip to the section that explains how to purchase a domain with Domain Privacy Protection directly from our Domains page. If you already have an AwardSpace registration, continue reading in order to learn how to add a new domain to your account:
- Log in to the Hosting Control Panel.
- Navigate to the Domain Manager section of the Control Panel.

- Use our domain registration form at the top of the Domain Manager panel in order to search for the domain name which you wish to register. Type in your desired domain name and click on the Check Domain button.
- The domain name you have entered will now be checked if it is available for registration.
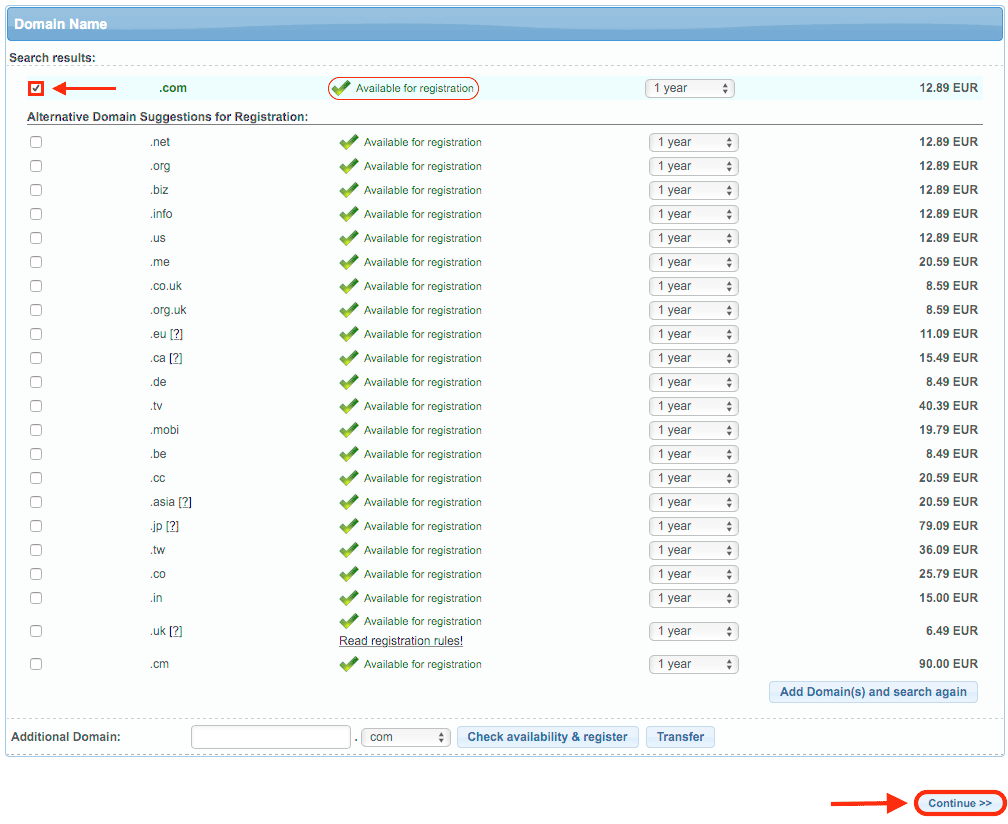
- You should now select the domain name you would like to register. Make sure that the domain name is listed as Available for registration, otherwise, you will not be able to gain control over the domain, even after making the purchase. The option to transfer a domain should be used only if you already own the domain. For more information, you can check our article on the differences between domain registration and domain transfer.
- Once you have made your selection, click on the Continue button.

- Click on the checkbox in order to include Domain Privacy Protection in your order and proceed by clicking on the Continue button.
- Complete the purchasing process by selecting a payment method and checking out.
Note: Domain Privacy Protection is an annual purchase that costs $10 per year. In most cases, you can purchase Domain Privacy Protection for a period of up to 10 years.
How Do I Buy Domain Privacy Protection for a New Domain Name If I Don’t Have an AwardSpace Account Yet?
If you are new to AwardSpace, you can get a domain name straight through our website. To do so, simply follow the steps below:
- Go to our Domains page.

- Use our search tool to find the right domain for you.
- Once you have found your domain name, select the checkbox before its name and click on the Order button.
- You will then be taken to our checkout page. At this time your shopping cart should only contain the domain name which you have just added.
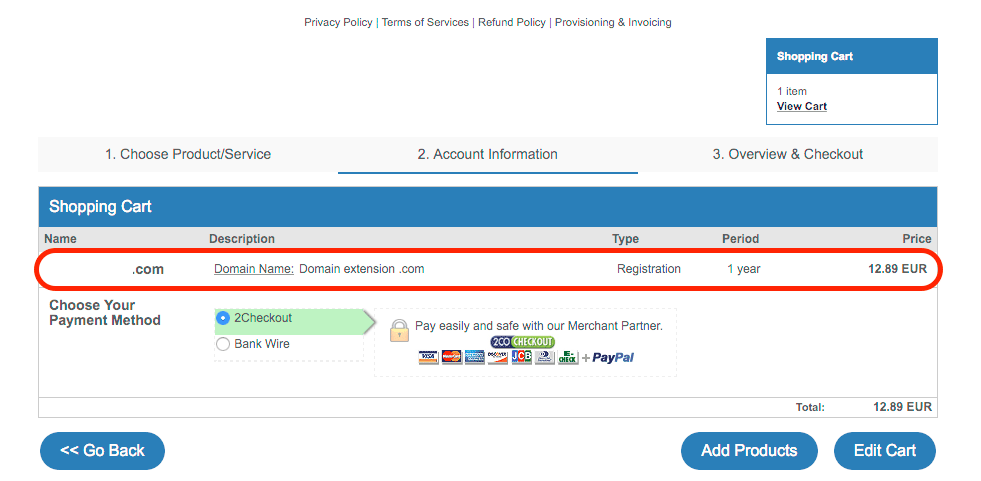
- Before filling out the billing details, you should include the Domain Privacy Protection add-on. To do so, click on the Add Products button.
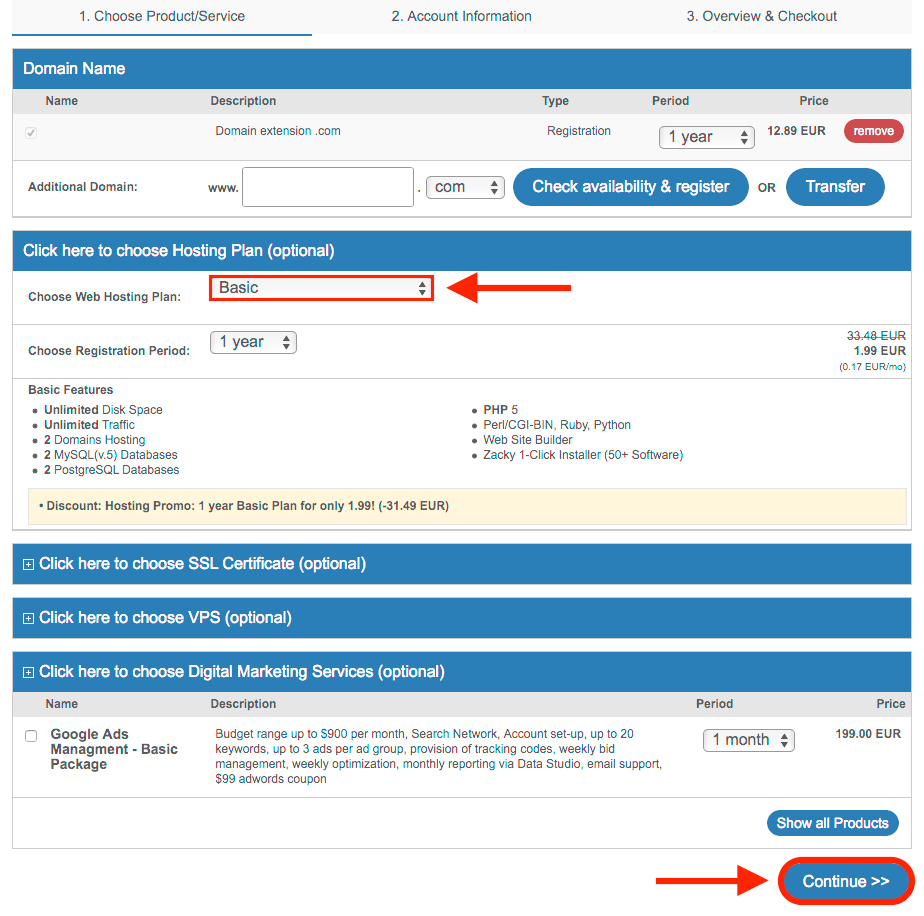
- You may notice that a hosting plan gets automatically added to your order. If you do not need a hosting plan at this time, use the dropdown menu shown above and select the option called I don’t need a hosting plan.
Tip: we also offer a free hosting plan that you can include in your order without increasing your total cost. If you would like to take advantage of our free hosting plan, you can select the FREE Web option from the dropdown menu.
- Once you have selected the plan you would like to use, click on the Continue button.
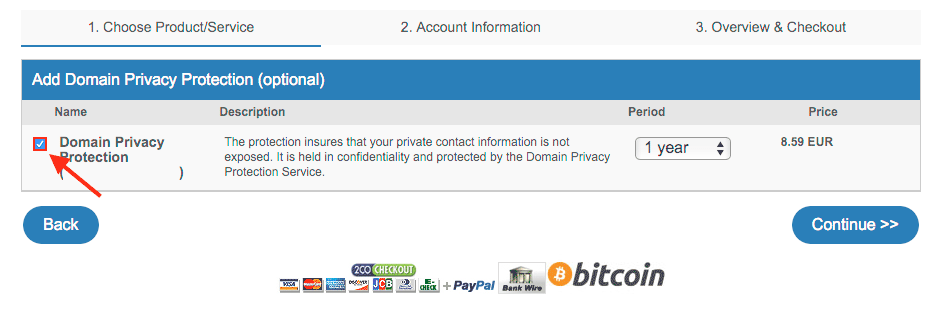
- You will now have the option to add Domain Privacy Protection to your order. Simply make sure to place a checkmark in front of the Domain Privacy Protection option. You can also adjust the duration of the purchase via the Period dropdown menu if you wish.
- Once you have made your selection, click on the Continue button. Doing so should return you to your checkout page where now you should see both your domain order along with the associated Domain Privacy Protection.
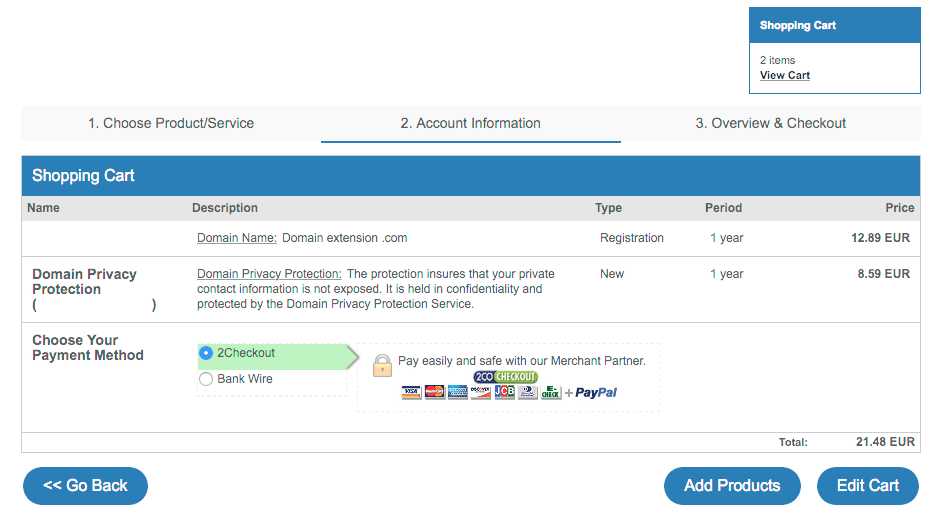
- Fill in the required information and then proceed to our payment options using the Continue button.
- Once you have successfully made your payment, you will be granted access to our Control Panel and our Domain Manager where you will be able to manage your new domain name.
Tip: Not sure how to use our Domain Manager? Take a look at the Domain Manager category of the Knowledge Base for information on how to take full advantage of all features the Domain Manager has to offer.
How Can I Further Protect My Website?
Protecting your public WHOIS information is just one aspect of securing your online presence. You can also opt to activate password protection for portions of your site which you do not wish to be publicly accessible. Last, but certainly not least, you may consider purchasing an SSL certificate for your website, so that your visitors can connect securely without worrying that their personal data may get compromised. You can check our article which outlines the differences between website password protection and SSL certificate encryption for even more information on the advantages each protective measure can offer.
