Add Image to Post in WordPress

Home » Knowledge Base » Design Tools » WordPress » Add Image to Post in WordPress

Adding media, such as images, videos, or audio files, to a WordPress post enhances the visual appeal and overall effectiveness of your content. WordPress makes this process straightforward. Here’s a step-by-step guide to embedding media into your posts:


1. Choose the Placement for Your Media

Navigate to the Post Editor: Open the post (or create a new one) where you want to add the media.
Position Your Cursor: Decide where in the post you want the media to appear. Click in the text editor at that spot to position your cursor.


2. Insert the Media

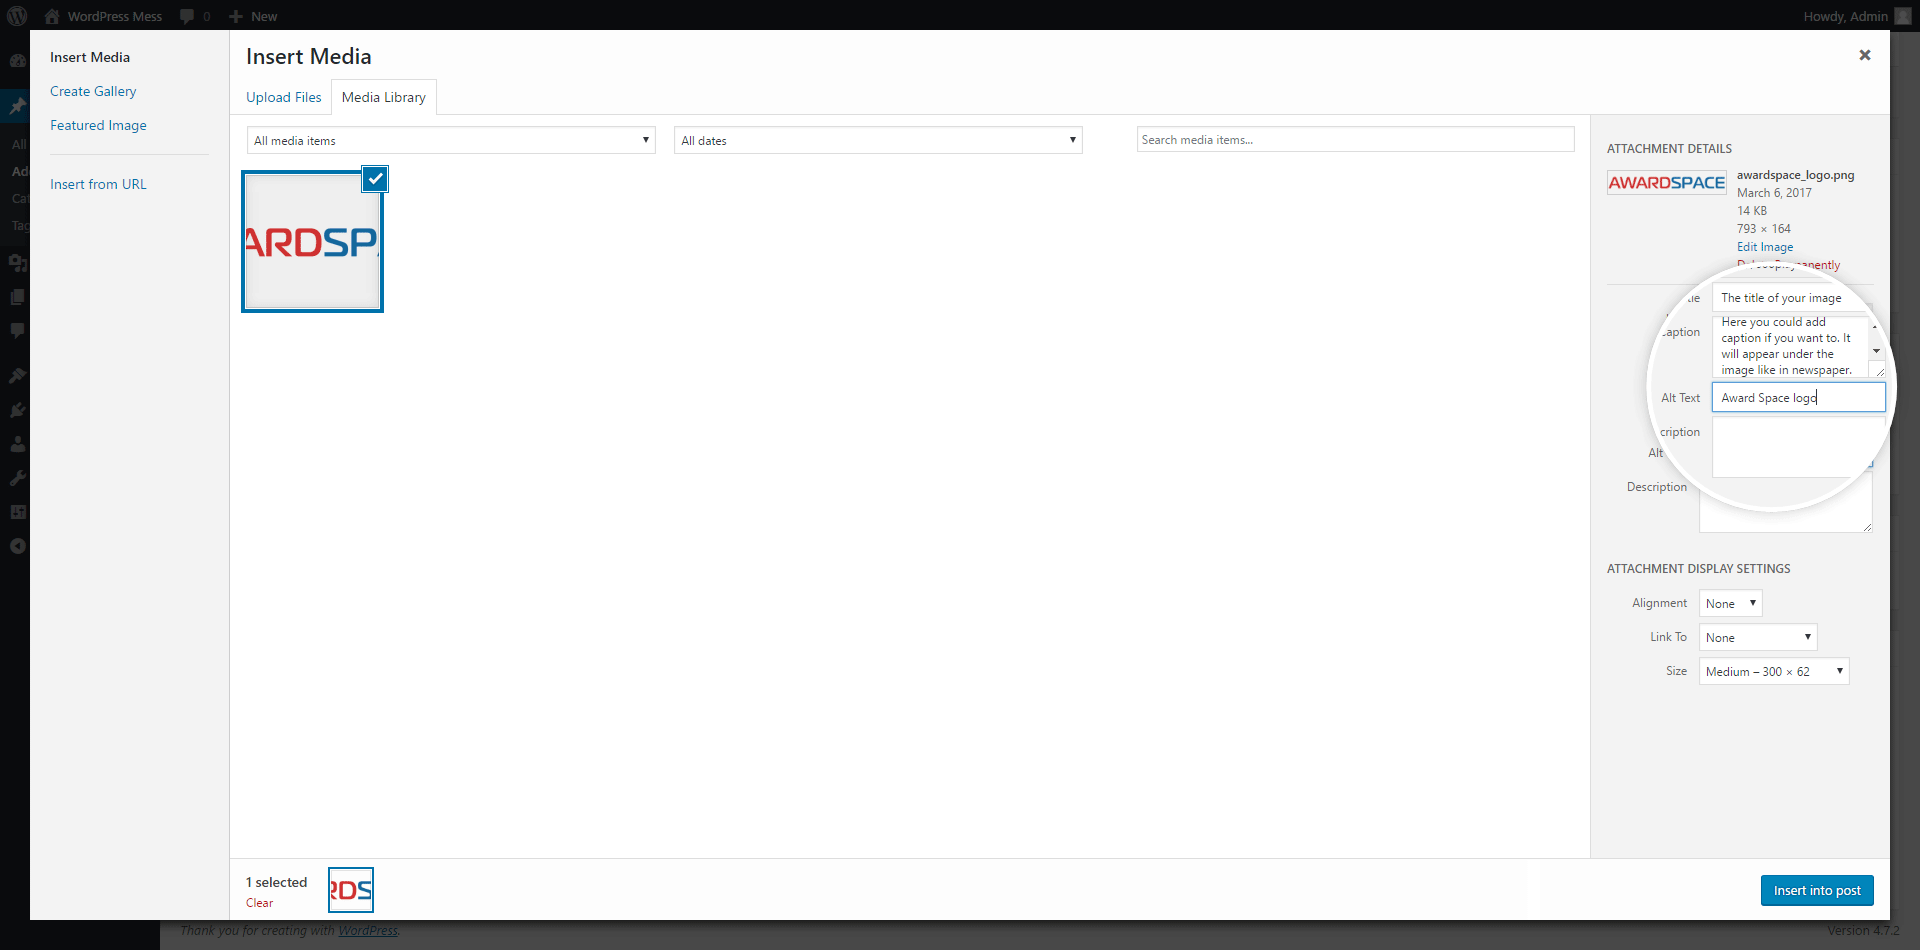
Click the ‘Add Media’ Button: Above the toolbar of the post editor, you’ll see an “Add Media” button. Clicking this button opens the WordPress Media Library, where you can choose from previously uploaded files or upload new ones.


3. Upload and Configure Your Media

  • Upload Files: In the Media Library, click on the “Upload Files” tab, then click “Select Files” to choose the media files from your computer you wish to upload.
  • Configure Media Details:
    • Alt Text: Essential for SEO and accessibility, the alt text describes your media’s content.
    • Title: The title of your media; it can be different from the file name.
    • Caption: A brief description of the media that will be displayed below it on your site.
    • Alignment: Choose how the media aligns with your text (left, center, right, or none).
    • Size: Select the display size of the media (thumbnail, medium, large, or full size, depending on the theme and media file).
    • Link To: If desired, you can set the media to link to a custom URL or to the media file itself, making it clickable.


Once you’ve configured the settings to your liking, click the “Insert into post” button to add the media to your post. The media will now appear in your post editor where you placed your cursor. You can further adjust the media’s position and settings directly from the post editor by clicking on the media to reveal alignment and editing options.

Now, just choose the file you want to upload from your computer.

As pictures are the most common media type, here is how to upload a picture

If you need more in-depth directions, check our previously published article on WordPress Images – How to Add Media to a Post.

If you feel like you are ready to go further in the CMS, feel free to browse our WordPress Tutorials section.

Was this post helpful?

i

Relevant tags:

Connect

Latest posts:

How to Check My Hosting Limits

To check your hosting limits, follow these steps: First, log in to the hosting control panel. Then, via the dashboard, head to Hosting Settings:   After that, click the Hosting Limits tab:   Then, you will access the information about your account's hosting...

How to Access the Security Settings of My Domains

Accessing the security settings of your hosted domains is easy with AwardSpace. You can access the settings in just a few minutes by following the steps below. First, log in to the AwardSpace hosting panel. Then, head to the Domain Manager page by clicking the...

How to Access The Name Servers Settings of My Domain

Accessing the name server settings with AwardSpace is quite simple. Just follow the next steps. First, log in to the AwardSpace hosting panel. Then, head to Domain Manager:   After that, locate the domain whose Name Server settings you wish to access and click...


Create a website for free!


Free forever

Our Support Team is Here to Help


If you need any questions answered, don't hesitate and contact us. Click the button below and follow the instructions. You can expect an answer within an hour.


Contact AwardSpace


iNewest knowledge base articles

How to Check My Hosting Limits

To check your hosting limits, follow these steps: First, log in to the hosting control panel. Then, via the dashboard, head to Hosting Settings:   After that, click the Hosting Limits tab:   Then, you will access the information about your account's hosting...

How to Access the Security Settings of My Domains

Accessing the security settings of your hosted domains is easy with AwardSpace. You can access the settings in just a few minutes by following the steps below. First, log in to the AwardSpace hosting panel. Then, head to the Domain Manager page by clicking the...

How to Access The Name Servers Settings of My Domain

Accessing the name server settings with AwardSpace is quite simple. Just follow the next steps. First, log in to the AwardSpace hosting panel. Then, head to Domain Manager:   After that, locate the domain whose Name Server settings you wish to access and click...

How to Access the DNS Settings of My Domains

Accessing the DNS settings of your domains is easy with AwardSpace. The process is comprised of a few simple steps and requires only a minute or two of your time. First, log in to the AwardSpace hosting panel. Then, head to the Domain Manager:   After that,...

Even more web tutorials

Check out our web hosting knowledge base and the WordPress tutorials to learn more, and be better prepared for your website creation and maintenance journey.