Add a Featured Image to a Post or Page in WordPress

Home » Knowledge Base » Design Tools » WordPress » Add a Featured Image to a Post or Page in WordPress

The featured images in WordPress will increase the visual appeal of your content both of posts and pages. Yet, adding a featured image is more important for the posts, as it will help engage the users on your website in the post itself as in the page with your latest posts.

Bear in mind that the process is absolutely the same for both pages and posts, but we will focus on the posts, as they benefit more from having a featured image.


1. Create or Edit the Post

Go to your WordPress dashboard, navigate to the post you want to add a featured image to and click on the edit link to open the editor. Alternatively, create a new post that you want to add a featured image to.


2. Locate the Featured Image Section

On the right-hand side of the Gutenberg editor, scroll down until you find the “Featured Image” section. This is typically found in the sidebar of the document settings.


3. Set Featured Image

Click on the “Set featured image” link within that section. This action will open the WordPress Media Library.


4. Choose an Image

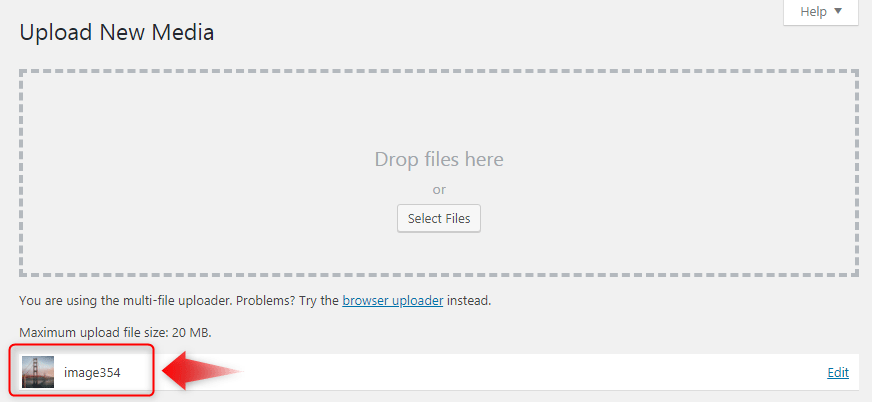
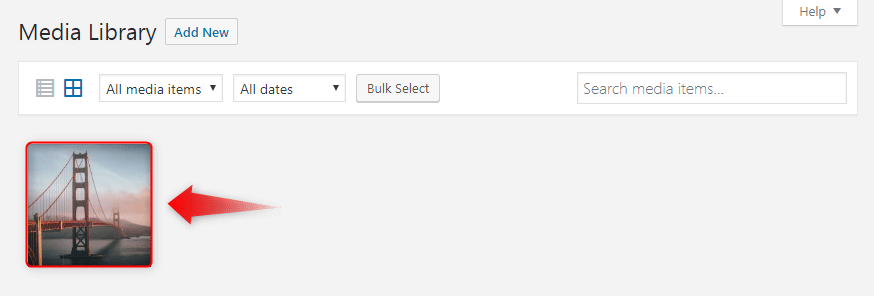
If you already have the image you want to use in the Media Library, simply click on it to select it.

If you need to upload a new image, switch to the “Upload Files” tab, click on “Select Files,” and navigate to the image file on your computer. After the upload is complete, click on the image to select it.


5. Confirm Selection

With the image selected, look for the “Set featured image” button in the bottom right corner of the Media Library window. Click this button to apply your selection.


6. Save or Publish

After setting the featured image, make sure to update or publish your post or page to save the changes.

The selected featured image will be linked to your post or page and can appear across different sections of your website, including your blog’s main page, in post summaries, or when shared on social media platforms, all based on the configuration of your theme and website settings.

Related: How to Add Media in WordPress Posts

If you need more in-depth directions, check our previously published article on WordPress Featured Images

If you feel like you are ready to go further in the CMS, feel free to browse our WordPress Tutorials section.


Was this post helpful?

i

Relevant tags:

Connect

Latest posts:

How to Fix 308 Permanent Redirect

308 Permanent Redirect is an HTTPS status code indicating that the requested resource has been permanently moved to another location. Similar to 301 Moved Permanently, 308 informs the user of the movement of a given online resource, and unlike the 301 redirect, 308...

How to Fix 301 Error Moved Permanently

The 301 Moved Permanently is an HTTP status code that indicates a permanent relocation of an online resource from a given URL to a new one. More technically, the moved resource has been moved to the new URL specified in the Location header. The HTTP 301 status code is...

How to Fix 307 Temporary Redirect

307 Temporary Redirect is a response HTTP status code that indicates the requested resource has been moved to a different URL for a limited period of time. Unlike a 301 permanent redirect, the 307 Temporary Redirect message indicates that the change is temporary and...

How to Access Crontab Settings

To access the crontab settings, first, you need to log in to your AwardSpace hosting panel. After you have logged in, head to Crontab Settings, located within the Advanced Tools category:   After you click the Crontab Settings icon, a new page should load. Once...

How to Check My Auto Renewals

To check your AwardSpace hosting plan auto-renewals, first log in to the admin dashboard. Then, head to Wallet, within the Orders & Invoices section:   After that, click the Auto Renewals tab, where you can check any relevant information about your hosting...


Create a website for free!


Free forever

Our Support Team is Here to Help


If you need any questions answered, don't hesitate and contact us. Click the button below and follow the instructions. You can expect an answer within an hour.


Contact AwardSpace


iNewest knowledge base articles

How to Fix 308 Permanent Redirect

308 Permanent Redirect is an HTTPS status code indicating that the requested resource has been permanently moved to another location. Similar to 301 Moved Permanently, 308 informs the user of the movement of a given online resource, and unlike the 301 redirect, 308...

How to Fix 301 Error Moved Permanently

The 301 Moved Permanently is an HTTP status code that indicates a permanent relocation of an online resource from a given URL to a new one. More technically, the moved resource has been moved to the new URL specified in the Location header. The HTTP 301 status code is...

How to Fix 307 Temporary Redirect

307 Temporary Redirect is a response HTTP status code that indicates the requested resource has been moved to a different URL for a limited period of time. Unlike a 301 permanent redirect, the 307 Temporary Redirect message indicates that the change is temporary and...

How to Access Crontab Settings

To access the crontab settings, first, you need to log in to your AwardSpace hosting panel. After you have logged in, head to Crontab Settings, located within the Advanced Tools category:   After you click the Crontab Settings icon, a new page should load. Once...

How to Check My Auto Renewals

To check your AwardSpace hosting plan auto-renewals, first log in to the admin dashboard. Then, head to Wallet, within the Orders & Invoices section:   After that, click the Auto Renewals tab, where you can check any relevant information about your hosting...

How to Check My Payment Requests

To check your payment requests, first log in to the AwardSpace hosting panel. Then, head to Wallet within the Orders & Invoices category:   Then, click the Payment Requests tab. There, you can browse all the information you need about your...

Even more web tutorials

Check out our web hosting knowledge base and the WordPress tutorials to learn more, and be better prepared for your website creation and maintenance journey.