Building a website is crucial for your online presence. It can help you attract a wider audience and create more streams of income for your business. A foundational step in the process of creating a good website is the registration of a domain name.
A domain name, in short, is a unique name that points to your website’s unique address on the Internet and helps users find it quickly and easily.
To be able to use a domain name for your website, you should first register one.
If you are new to the process of registering a domain name, it might feel overwhelming at first. However, the process is straightforward – in this guide, we share how to register a domain name for your website in a few easy-to-follow steps.
Table of Contents:
How to Register a Domain Name for Your Website
To register your domain name quickly and efficiently, follow the next steps.
1. Choose a Suitable Domain Name
The first step in the process is to select the domain name you would want to register. In most cases, it can resemble your brand, or business, and be easy to remember.
Remember that your domain name must be unique – there is no way two identical domain names exist at the same time!
To find out more, read how to choose a domain name.
2. Choose a Domain Name Registrar
A domain name registrar is simply the name of a business that is responsible for the reservation of domain names, and you need one to register a domain name.
When searching for a registrar, it is important to choose one with advanced security options and an extended list of domain management features. In the majority of cases, domain name registrars also provide clients with web hosting services.
One such registrar is AwardSpace – it provides you with domain registration services, and can also help you see the availability of any domain name for free. Furthermore, AwardSpace is known for its advanced and reliable web hosting services.
Also, if you are new to web hosting, have a look at everything you need to know about web hosting.
Read: The Difference Between Domain Hosting and Domain Transfer
Read also: How to Find Your Nameservers
3. Check Domain Name Availability
Once you have chosen a domain name for your website, and a registrar to help you register it, it is time to check its availability.
Availability simply means to check whether the domain is not already associated with a given IP address and a website. Usually, this allocation is done via a domain name system. If the domain is already allocated to a given IP, with points to a given website, then you can’t use it and you have to choose a different domain name. This is due to a simple fact – all domain names should be unique, as the infrastructure of the contemporary Internet, and ICANN doesn’t allow two identical domains to point to the same IP address and website.
In short, the domain name you chose to register, should be unique, otherwise you won’t be able to register it.
There are two quick ways to see whether your chosen domain is available.
- Check availability directly on AwardSpace.com. A very fast and easy way to check availability is to use the free AwardSpace tool, which you can instantly use without registration, or any other type of engagement.
Simply visit the AwardSpace domains page and from there type in your domain within the checker tool:

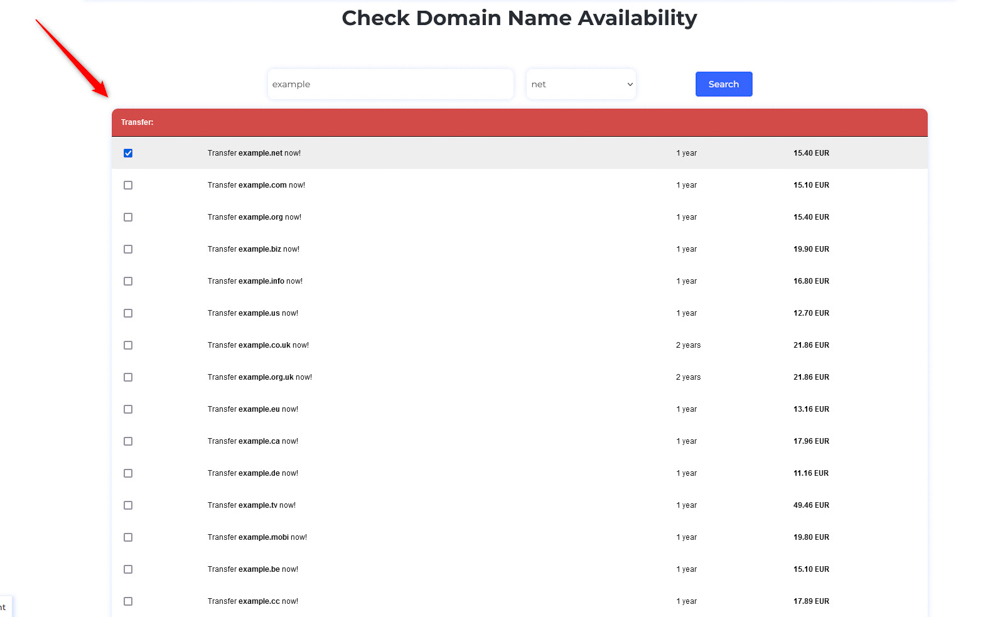
Once you type in the preferred domain name, a list of suggestions will appear:
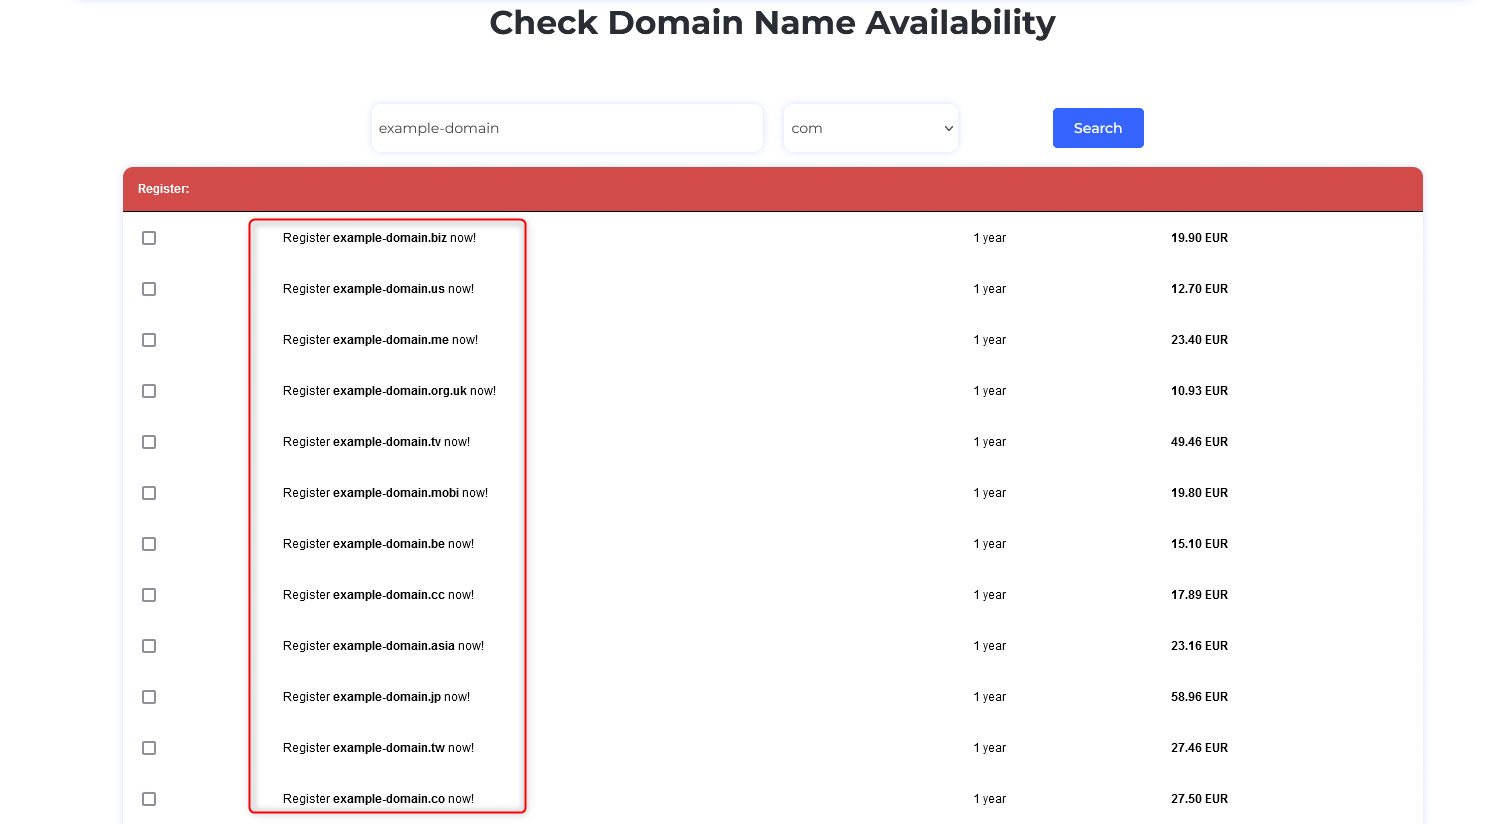
If a given domain name is available, the text will prompt you to register it:
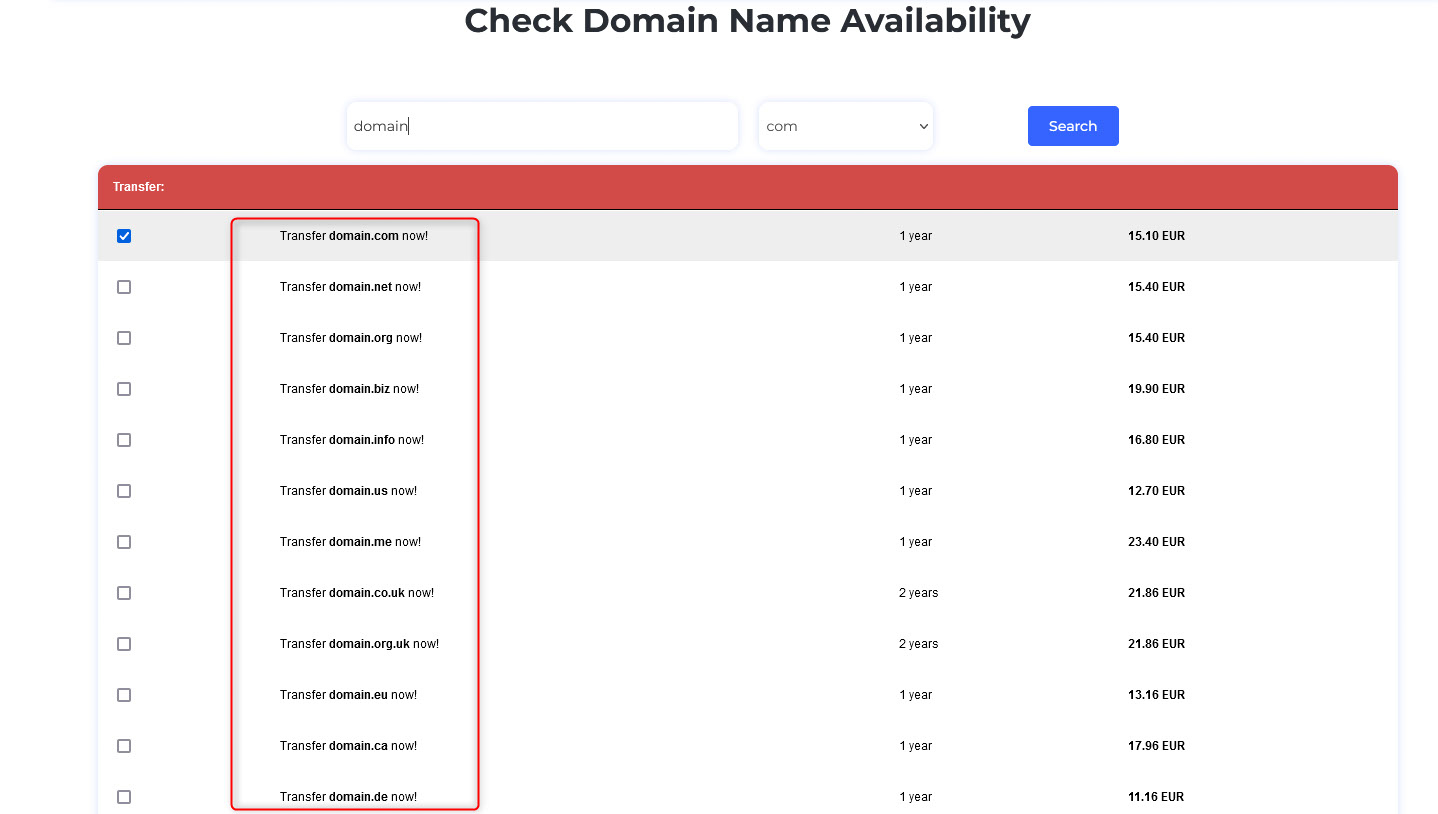
However, should the text prompt you to transfer the domain name, then this particular one is already taken and you should think of another domain name for your website:
- Check Domain Availability Via AwardSpace Hosting Panel. If you have already registered to any of the AwardSpace hosting services, then you can check domain availability via the AwardSpace hosting panel.
To do so, via the AwardSpace homepage, click the white Login button at the top right of the page:

Clicking the button will lead you to another page. It will require your AwardSpace login credentials. Type them in:

Then click on the blue Login button:

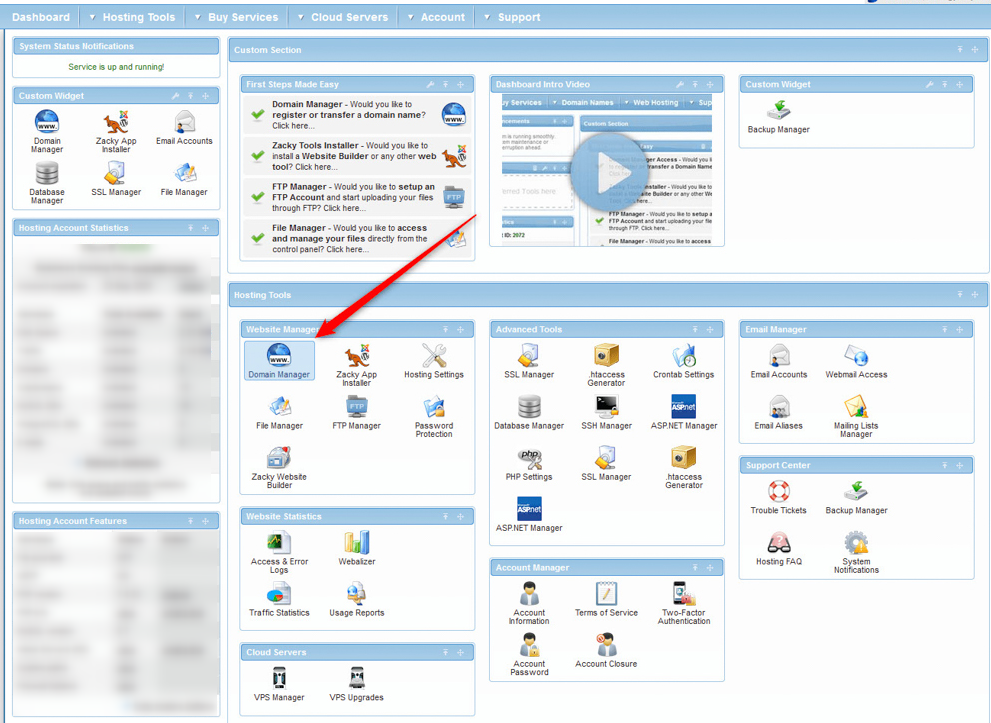
Clicking the Login button will lead you to the AwardSpace hosting panel. It looks like this:
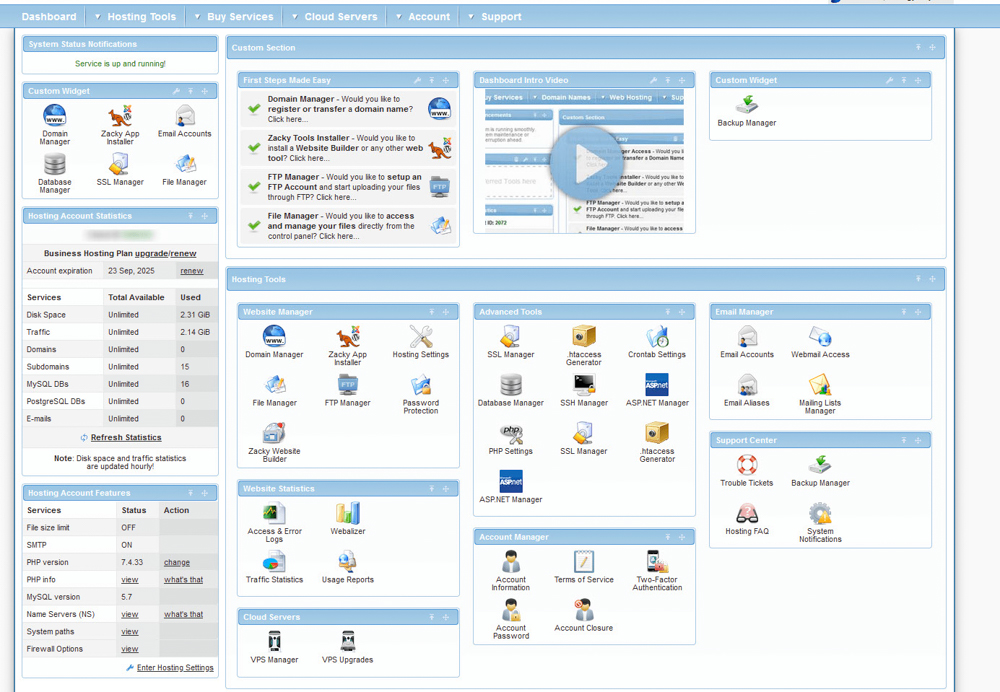
From this panel, click on the Domain Manager icon:
Once you do, a new page will open. It should look like this:
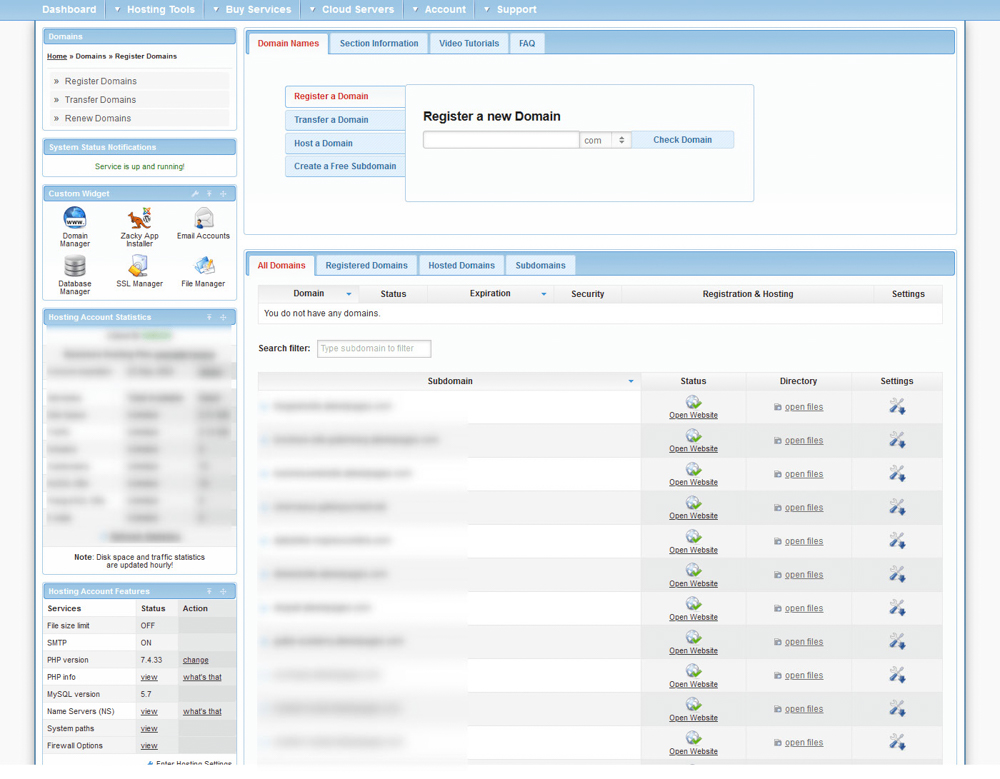
While on this page, within the Register a Domain tab, located at the top of the screen, type your chosen domain name:

Then, choose a domain extension by clicking the button pointed at the image and select your preferred extension:

Once you type in your domain name and extension, click on the blue Check Domain image:

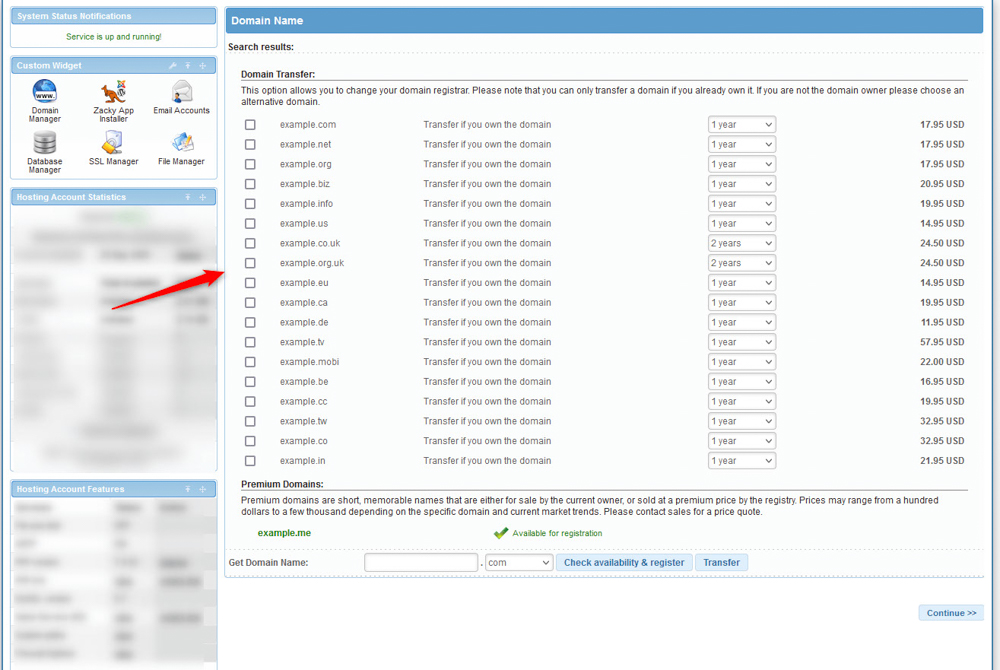
A list with domain names will appear.
The ones that can be transferred are already taken, and you can’t use them, unless they are yours, and managed by a different registrar:
However, if the text prompts you to register a domain name, then it is available and you can register it right away:
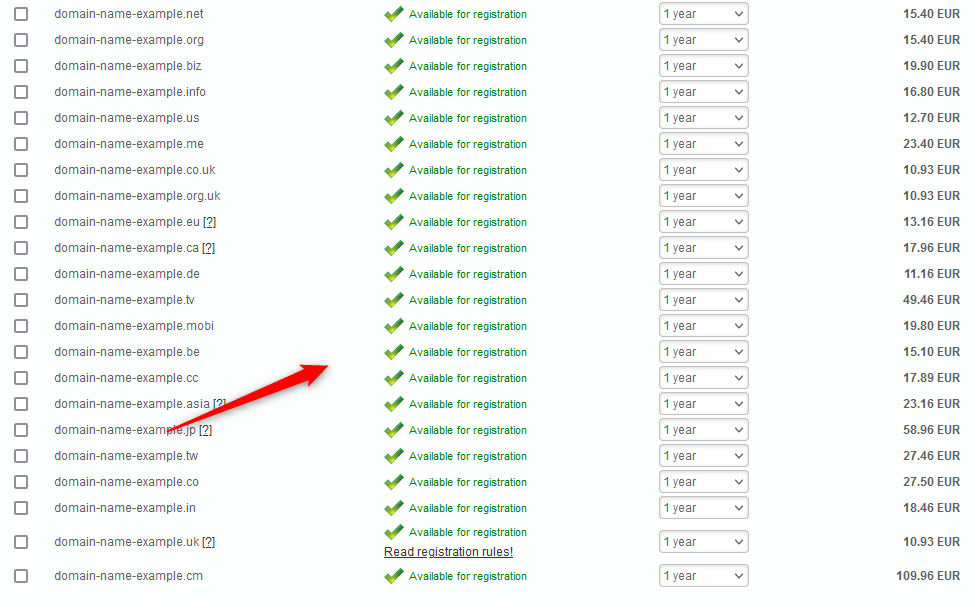
Now, you can choose any of the suggested available domain names to register.
4. Register The Domain You Chose
Now that you have filtered out the available options, it is time to register your chosen domain name.
Depending on which way you prefer to check domain availability, there are two ways of registering your chosen domain name.
Via the AwardSpace Domain Availability Checker. If you have checked the domain availability via the Domains page,(check the previous section of this article for more details) then follow these steps:
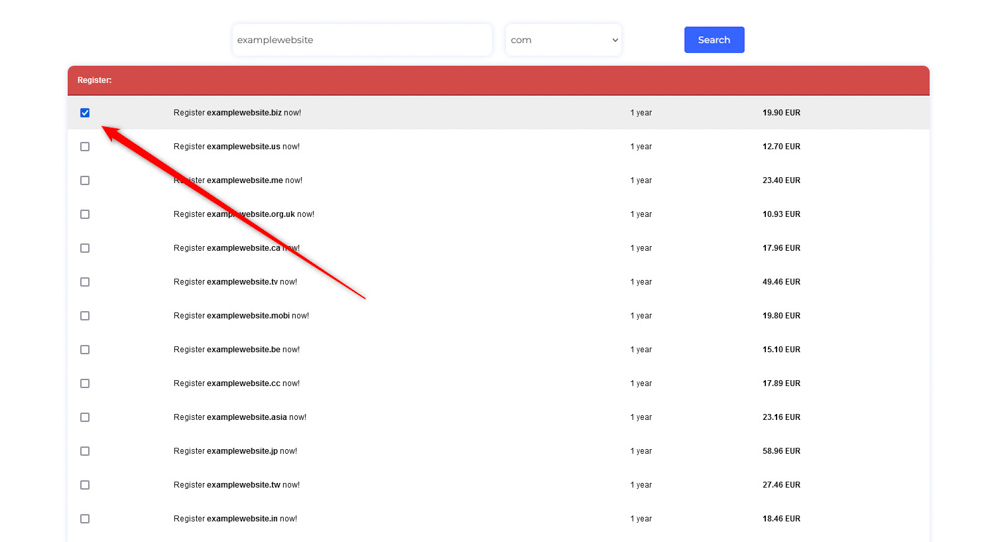
Once the list with available domains appears, add a tick to the left of the domain name you wish to register:
Then, scroll down to the bottom of the list with available domain names and click on the red Order button:
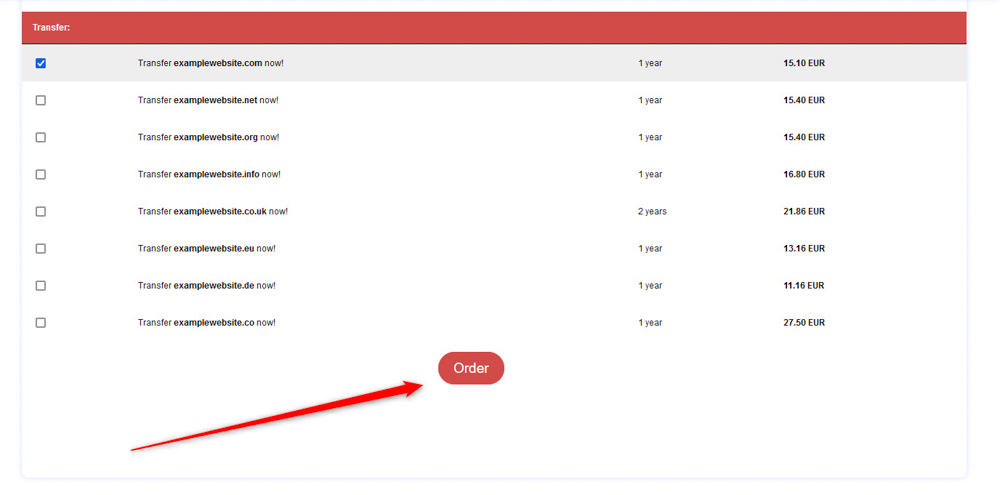
Once you click the button, а new page with a list of your purchases and a payment method will appear:

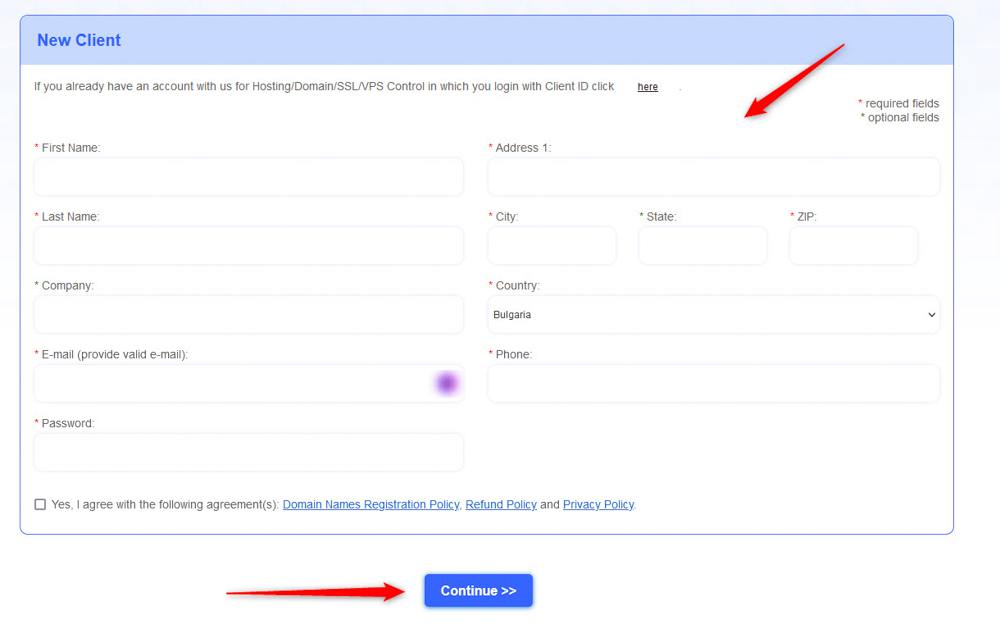
Also, you will be asked to register on AwardSpace.com. To do so, fill in the required credentials on this page and click the blue Continue button at the bottom of the page:
Once you fill in your credentials and click on Continue, a new page will open. It will sum up all the information you just typed in:
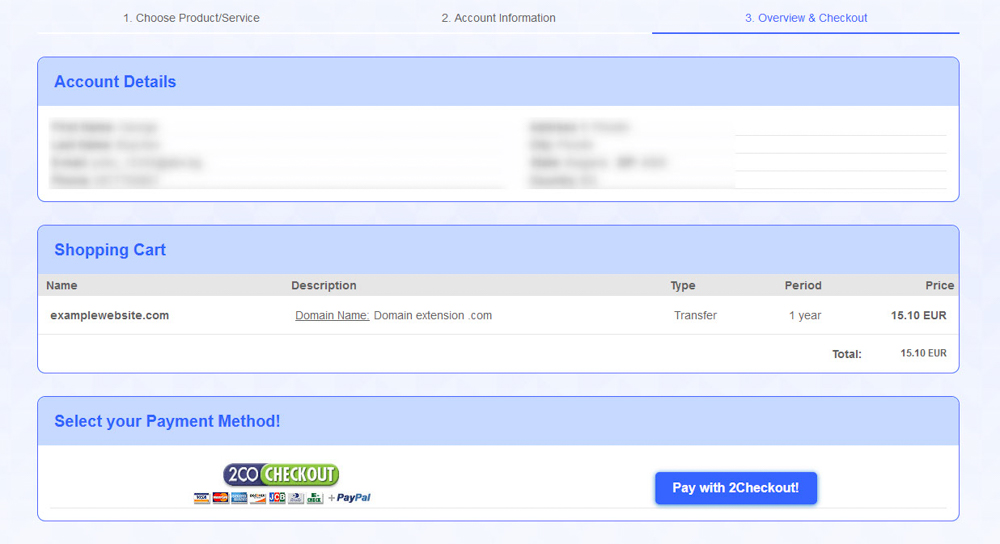
Check whether all the information is correct and click the blue Pay with 2Checkout! at the bottom of the page:
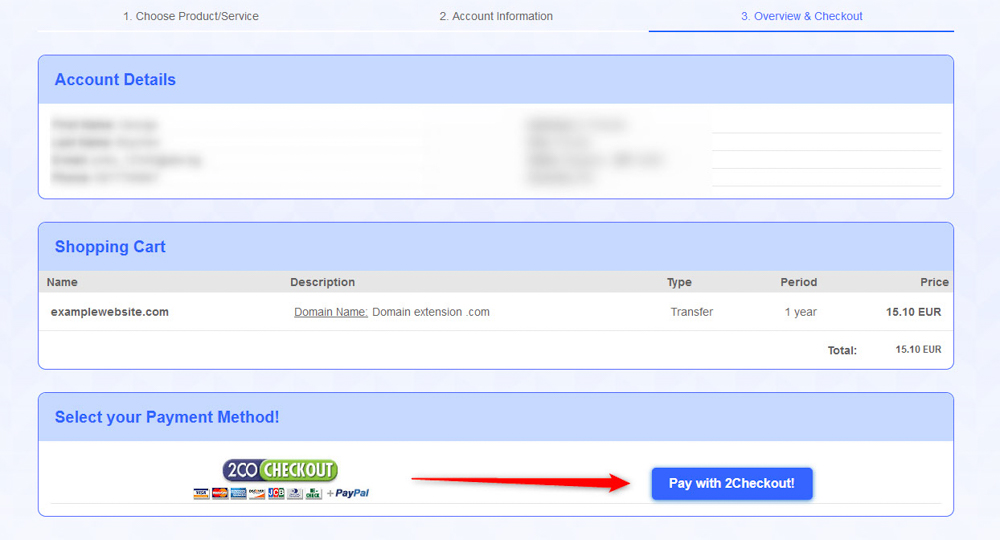
Then, continue with the checkout and billing. Once you finish the process, you will have registered the domain name.
Via the AwardSpace Hosting Panel. This method is very useful if you have registered for any of the AwardSpace services. To register a domain, log in to your hosting panel, as described in the domain availability section of this article.
Once you accessed your AwardSpace hosting panel, click on Domain Manager:
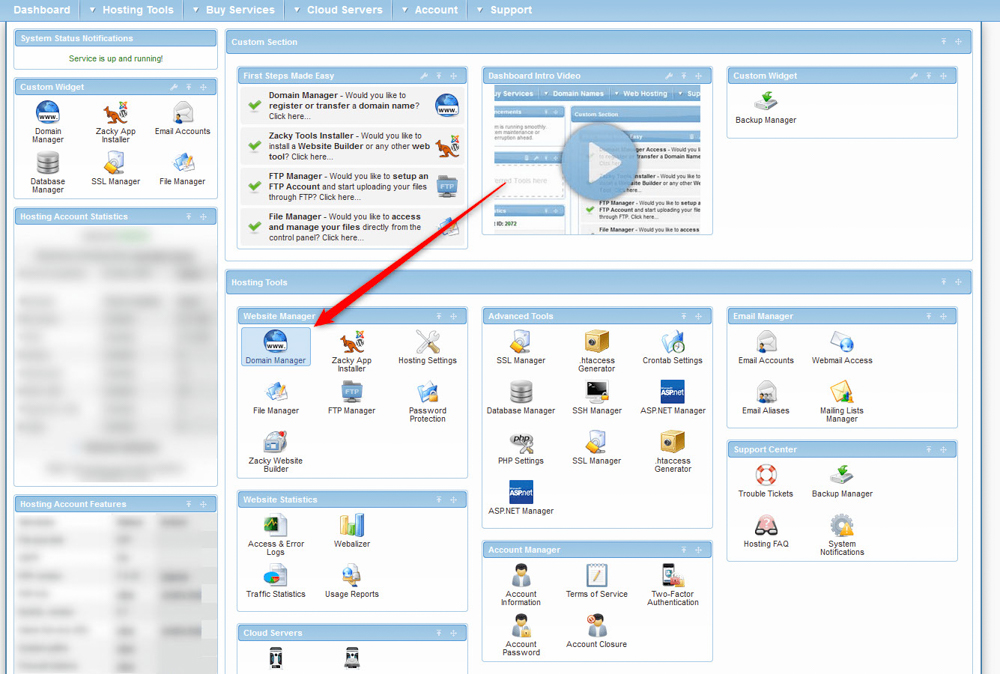
Once you do, within the Register a Domain tab, type down your preferred domain name and select a domain extension:

Once you select these, click on the blue Check Domain button:

Once you do, a list with details about the domain name will appear – whether it is available or not, and different available variations of the initial suggestion:
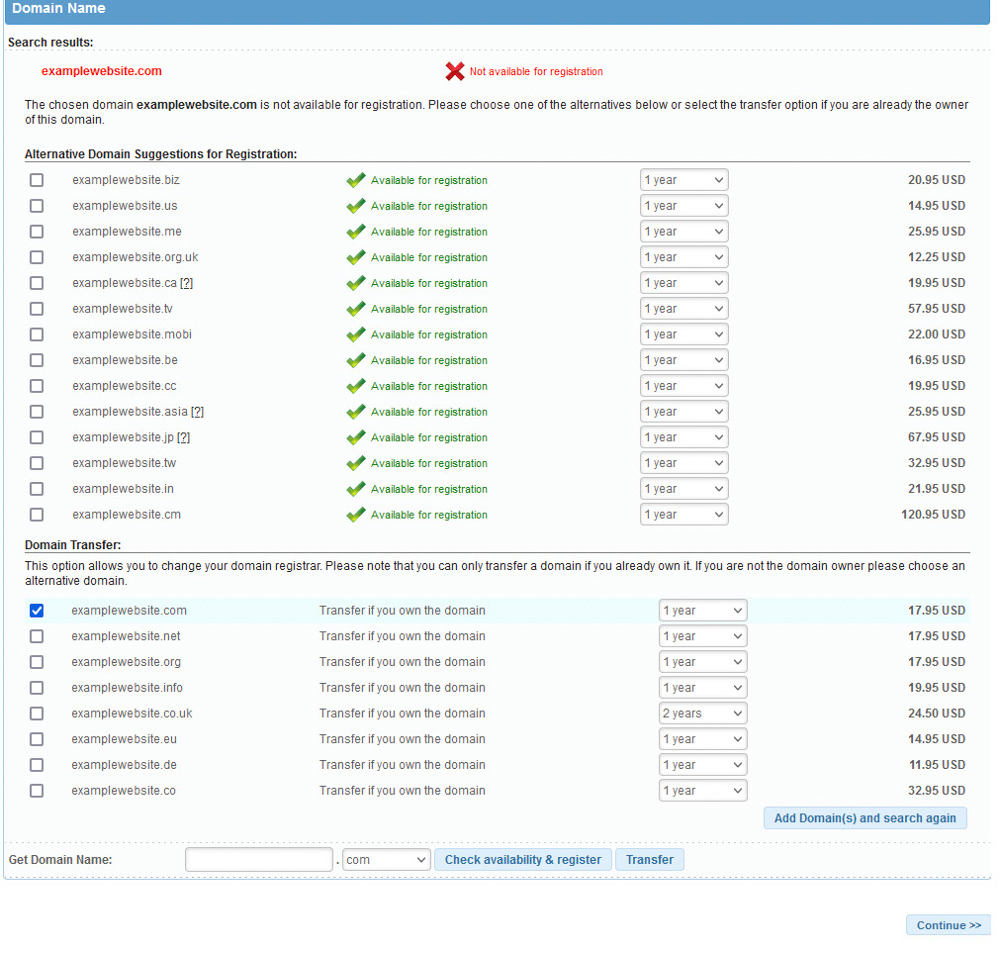
Check the results and if there is a domain name you like, add a tick to the box at the left of the name: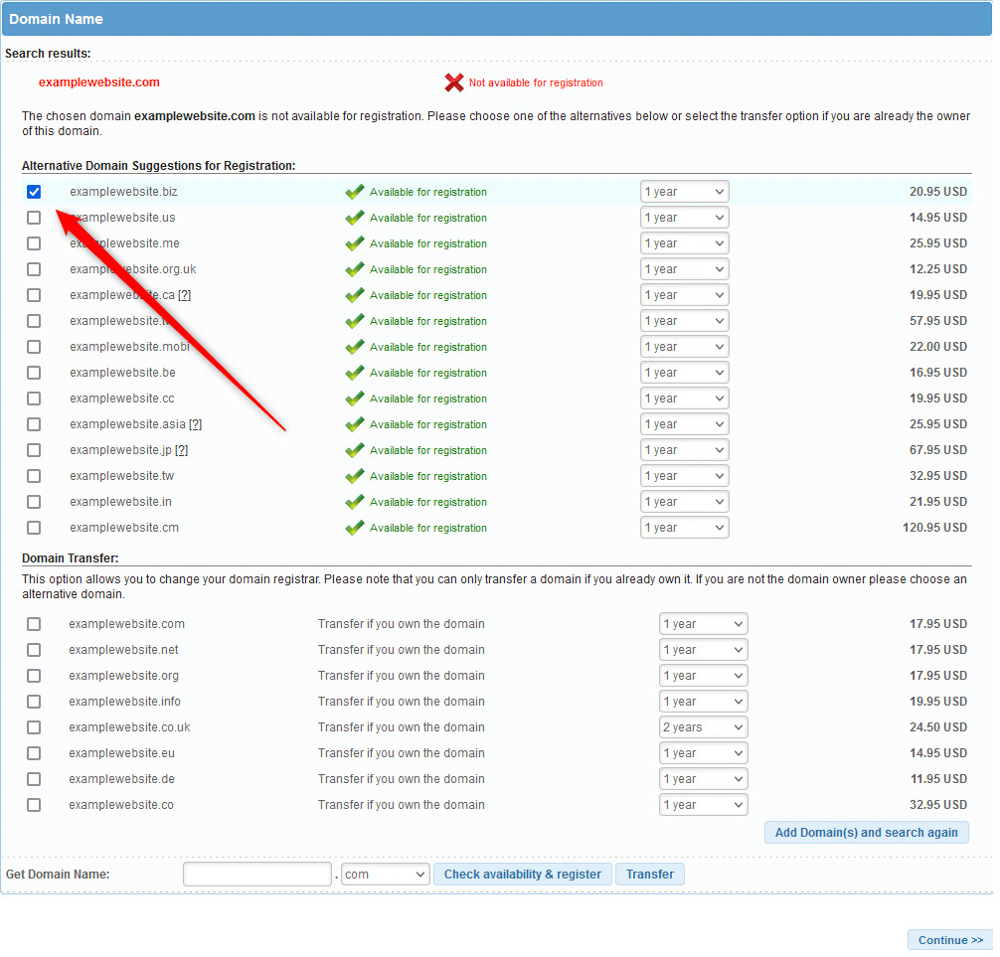
Then, click on the blue Continue button, located at the bottom right of the page:
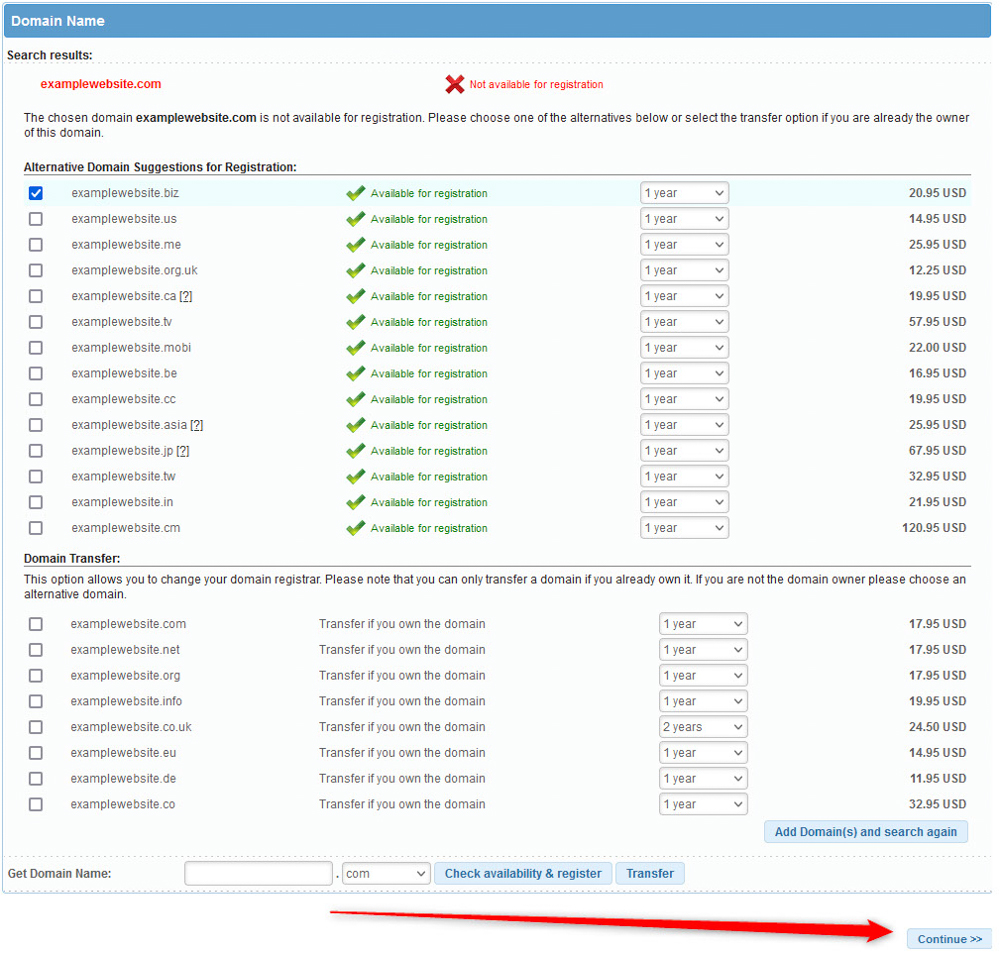
Then, follow the next steps, check whether all the information is correct, choose a payment option, and proceed with payment.
Conclusion
Registering a domain name is not as hard as it sounds. It requires only a few minutes of your time and a few clicks here and there.
