There are so many things you need to think about when starting a website with WordPress. Not only you should keep the core idea in mind at all times, but you shouldn’t forget to give your users the opportunity to communicate with you.
Communication is essential. This is true when trying to build a sustainable business or a community, a blog, and virtually any type of website, as well in life. As you can imagine, for you to connect with your audience, especially if the comments are disabled on your website, you have to have a contact form. Virtually, it doesn’t matter what type of website you are building. For every type of website, no matter whether it is a blog, portal, magazine, business card, or anything in between, the purpose is to engage its users. What better way to achieve that than letting them talk directly to you?
How to Add a Contact Form in WordPress
The easiest way to add a contact form to your website is by adding a plugin.
For the purpose of this tutorial, we’ll use the Contact Form 7 plugin.
There is no specific reason for us to choose this plugin.
You may or may not use Contact Form 7 when adding a contact form to your own website. There are a lot of plugins serving the purpose of creating a contact form. The process of adding is pretty much the same for most of them.
There are a lot of plugins serving the purpose of creating a contact form. And the process of adding is pretty much the same for most of them.
Step 1: Install and Activate the Chosen Contact Form Plugin
Search and find the plugin that you like the most. Again, we will use Contact Form 7.
We already covered how to search, install and activate a plugin.
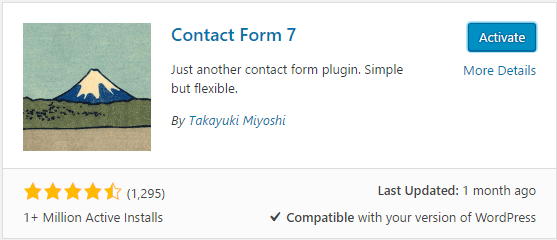
This is what the Contact Form 7 plugin should look like:

Step 2: Customize the Contact Form to Serve Your Purposes
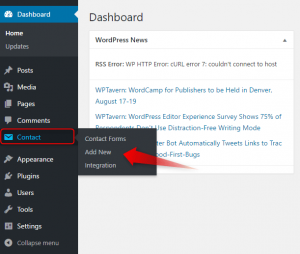
After you’ve installed and activated the Contact Form 7 plugin, an additional button will be added to the main menu of the Admin Panel.

Click the Add New button.
You’ll be presented with a page that resembles the one where a post or page is created.

You can add or remove parts of the contact form that you need or don’t like.
Step 3: Copy the Contact Form Shortcode
Once you’ve set the contact form to your liking, click Save. It is located in the top right corner of the page, much like the Publish button when creating a page or post. After you’ve saved the contact form a shortcode will appear under the title bar. Upon clicking anywhere on the blue field the shortcode will be marked so you should only copy it.

Step 4: Paste the Shortcode into the Contact Page
If you want to have a dedicated Contact Us page, you should create one. To do this create a new page, title it “Contact Us”, and copy the shortcode in the text field. Click Publish. If you want to add text above or under the contact form, do it under or above the shortcode.
Check if the result is what you expected.

Bear in mind that the color of the contact form will be the same as the main color of your theme. The way that the contact will be presented also depends on the theme customizations you’ve made.