How to Install a Drupal Module

Home » Knowledge Base » Design Tools » Drupal » How to Install a Drupal Module

Drupal modules are sets of code that extend the functionality and features of a Drupal website. Each module in Drupal can add new features or alter the existing functionality of the core system.

In the following paragraphs, you will read how to install a module on your Drupal website.


How to Install a Drupal Module

Several easy-to-follow steps will help you install a Drupal module on your website.


1. Download the Drupal Module on Your Device

You should first log in to your Drupal admin dashboard to install a Drupal module.

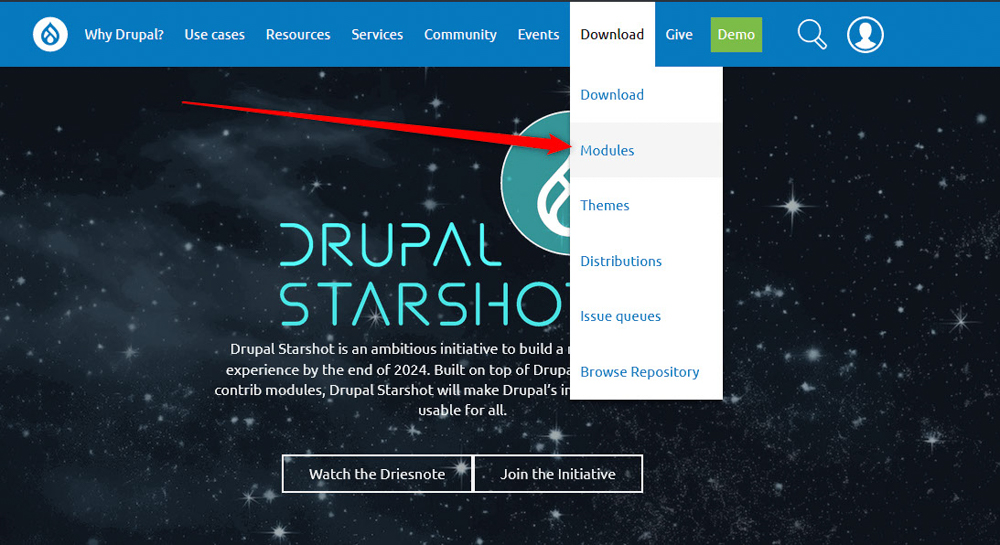
Once you do, head to Drupal.org and navigate to Download->Modules via the main menu:

Browse Drupal website for modules


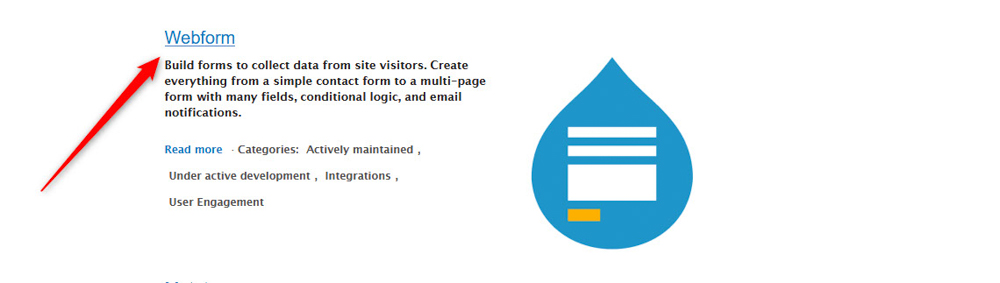
Then, browse the rich library of Drupal modules and find the one that fits your needs.

For this demonstration, we will be using Webform.

Once you find a suitable module, click on its name on the Drupal modules page:

Drupal module name


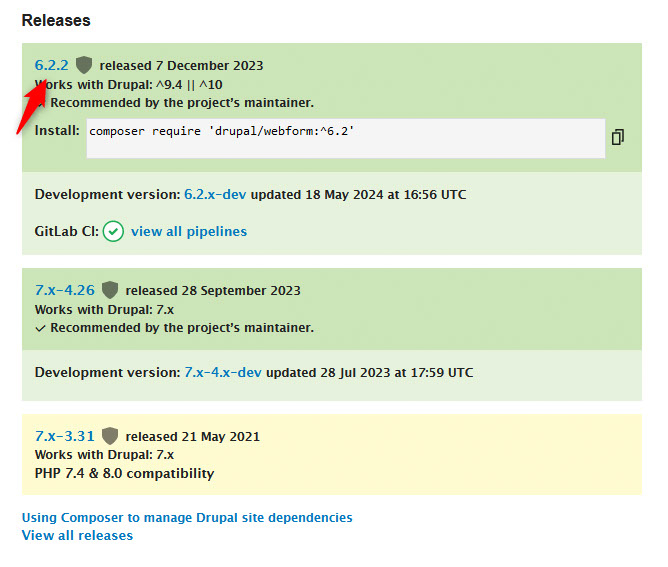
Once you click on the module’s name, a new page with information about the module will open.  Scroll down to the bottom of this page and select a release that suits your version of Drupal:

Select module release


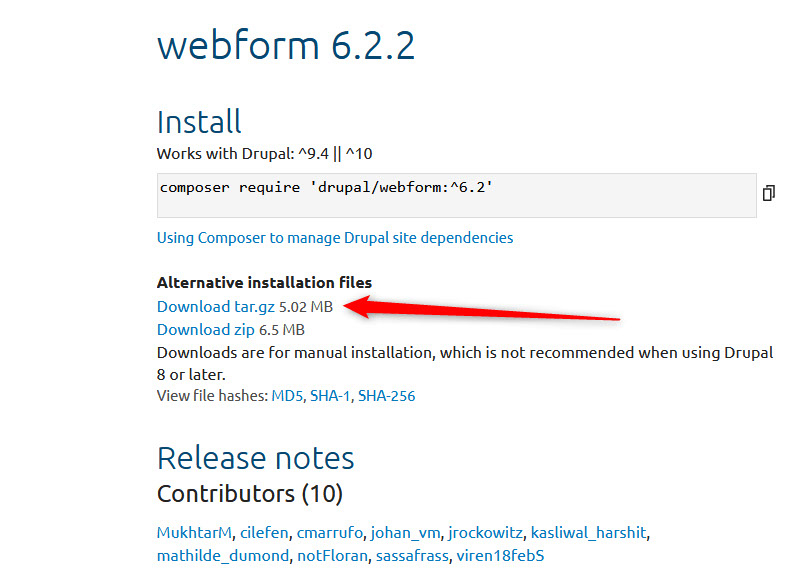
A new page will load after you click on the suitable release version. From there, you should download the module to your computer device. To do so, simply click on the Download tar.gz button and the download process will begin automatically:

Download Drupal module to your computer device


2. Upload the Drupal Module to Your Website

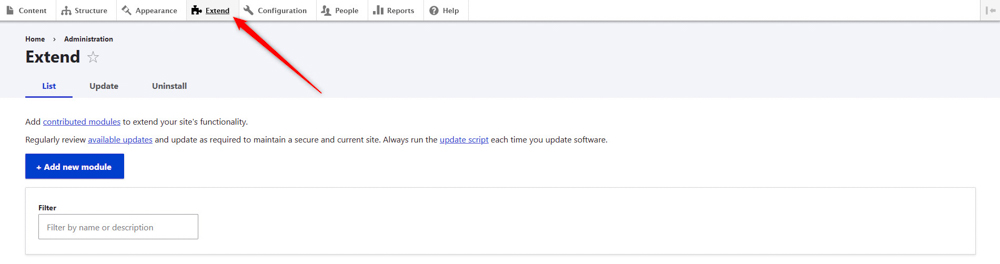
After you download the module on your computer device, log in to Drupal.

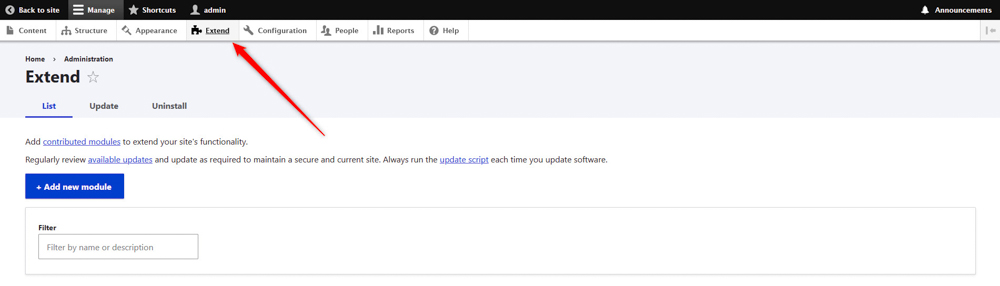
Once you do, head to Extend via the main menu:

Drupal Extend menu item


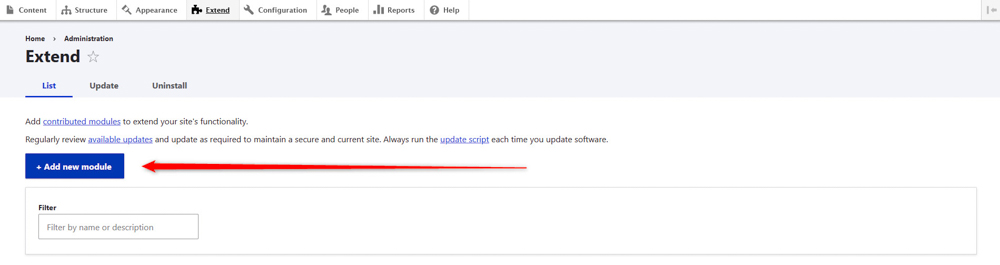
Then, click on the blue + Add new module button:

 Add new Module Button in Drupal


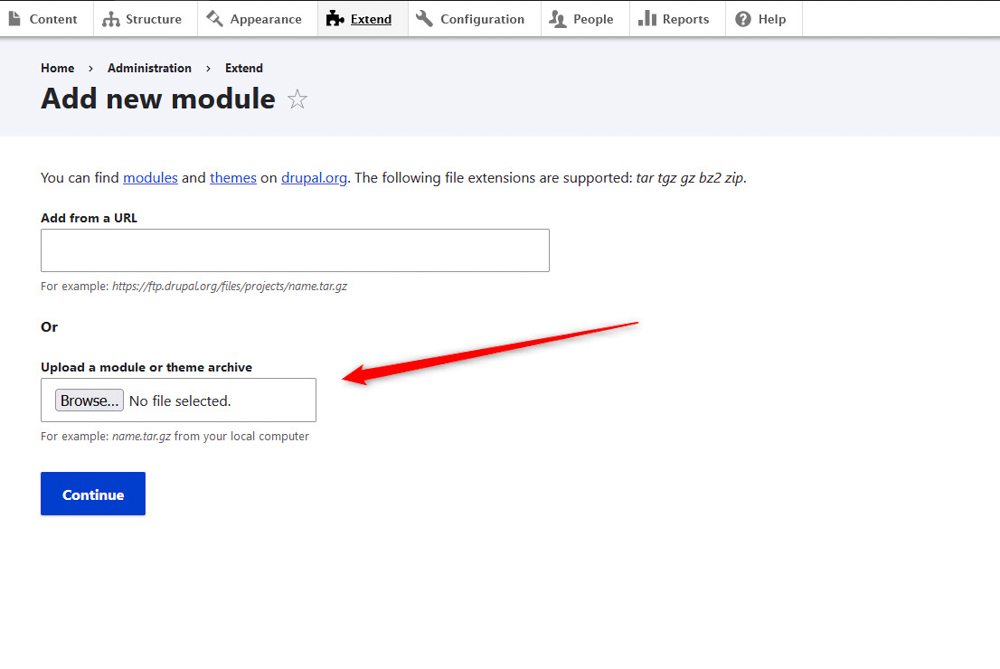
After that, click on Browse…, so you can find the downloaded module on your device and upload it to Drupal:

Browse for the module on your computer device

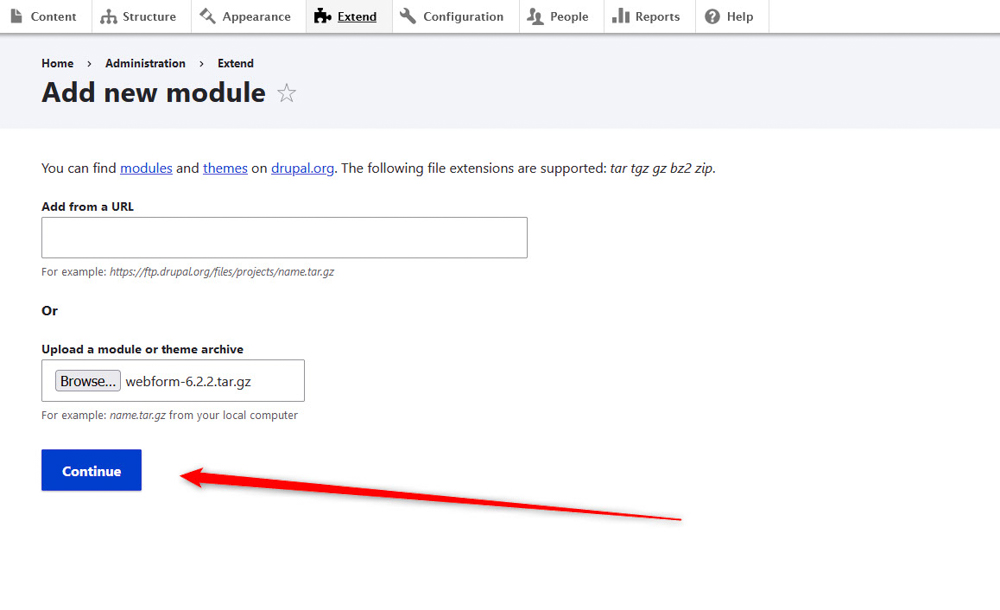
Once you select the module from your computer device, click on the blue Continue button at the bottom of the page. This will prompt the upload process:

Continue the installation process of the Drupal module

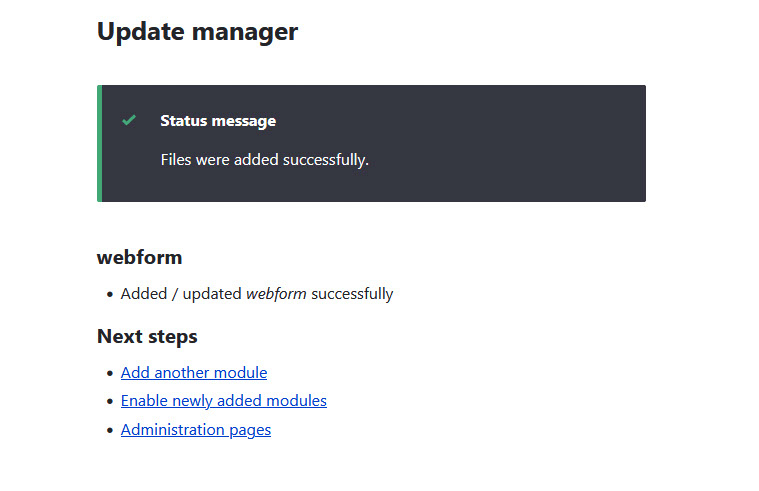
Once the upload process is finished, Drupal will display a confirmation message:

Drupal confirmation message


3. Install the Drupal Module

Now that you have uploaded a Drupal module, head back to the admin panel and head to Extend:

Drupal extend menu


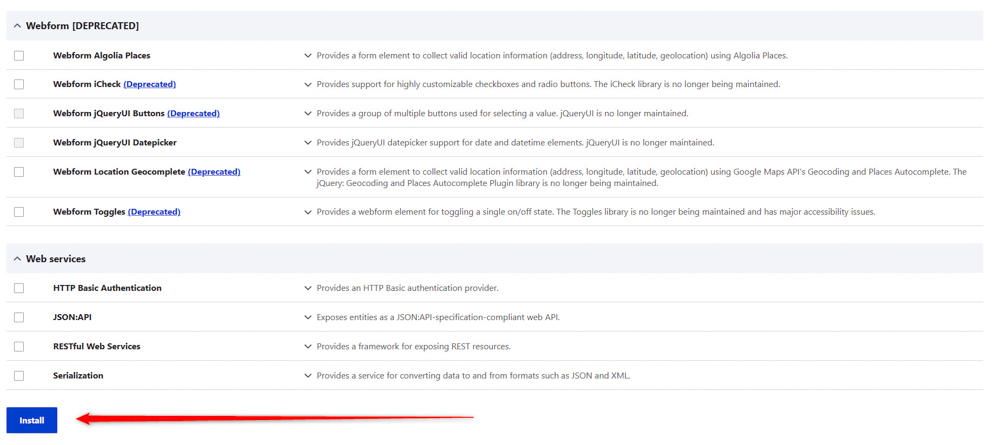
Find the module in the list, and check the boxes next to its components:

Add ticks to all module items


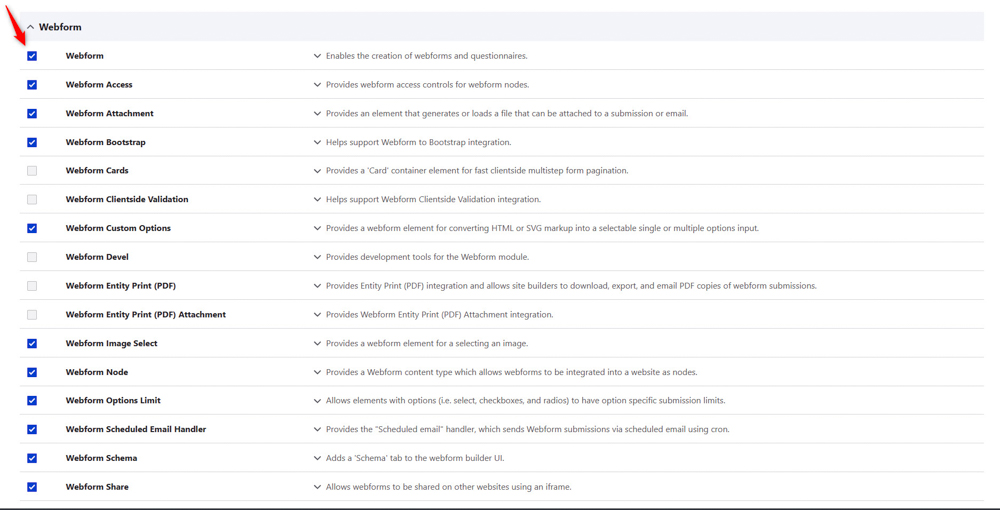
Once you check all the necessary boxes, scroll down to the bottom of the page and click on the blue Install button. This will prompt Drupal to install the module you just selected:

Prompt Drupal to install the new module


Once the installation process is finished, Drupal will display a confirmation message:

Installation confirmation message


4. Post-Installation Steps

After installing and enabling the module, you might need to configure it. This typically involves:

Configuration: Navigate to the configuration page of the module, which can usually be found under the “Configuration” menu in the admin toolbar.

Follow the instructions provided by the module to set it up properly.

Permissions: Set the appropriate permissions for the module by going to “People” -> “Permissions”. Assign roles and permissions as necessary.

By following these methods, you can successfully install and enable modules in Drupal, extending your site’s functionality.


Conclusion

Drupal modules are a fundamental aspect of the CMS, providing the flexibility and power needed to create complex and feature-rich websites.

Installing modules is straightforward and won’t take you more than a few minutes.

Read also:

Was this post helpful?

i

Relevant tags:

Connect

Latest posts:

How to Back Up Your SuiteCRM Project

Making regular backups of your SuiteCRM project is crucial. Backups help keep any kind of data safe, and also provide a quick recovery after a crash, hacking attack, or any user error. Because of how important backups are for your SuiteCRM website, in this article, we...

How to Install Themes in Zenphoto

Zenphoto allows you to customize the look of your online gallery by incorporating various themes. If you are interested in learning how to install themes in Zenphoto, then this article will guide you through the entire process - from browsing and downloading, through...

How to Add Tags in Zenphoto

Tags are a handy feature for organizing your Zenphoto images and albums. Tags not only help you and your visitors navigate more easily and quickly through your website, but also improve its discoverability in search engines, and can also help you generate more organic...

How to Upload Files in Zenphoto

Knowing how to upload files in Zenphoto is a fundamental skill. In this guide, we share how to go through the process and manage your project and media library quickly and easily.   Step 1: Log in to Zenphoto The first step in the process is to log in to...

How to Back Up your TYPO3 Project

In this article, we outline the step-by-step process for backing up your TYPO3 project, ensuring that all your data, settings, and other essential information are safely stored. Regardless of your level of expertise, this method is simple to follow and provides...


Create a website for free!


Free forever

Our Support Team is Here to Help


If you need any questions answered, don't hesitate and contact us. Click the button below and follow the instructions. You can expect an answer within an hour.


Contact AwardSpace


iNewest knowledge base articles

How to Back Up Your SuiteCRM Project

Making regular backups of your SuiteCRM project is crucial. Backups help keep any kind of data safe, and also provide a quick recovery after a crash, hacking attack, or any user error. Because of how important backups are for your SuiteCRM website, in this article, we...

How to Install Themes in Zenphoto

Zenphoto allows you to customize the look of your online gallery by incorporating various themes. If you are interested in learning how to install themes in Zenphoto, then this article will guide you through the entire process - from browsing and downloading, through...

How to Add Tags in Zenphoto

Tags are a handy feature for organizing your Zenphoto images and albums. Tags not only help you and your visitors navigate more easily and quickly through your website, but also improve its discoverability in search engines, and can also help you generate more organic...

How to Upload Files in Zenphoto

Knowing how to upload files in Zenphoto is a fundamental skill. In this guide, we share how to go through the process and manage your project and media library quickly and easily.   Step 1: Log in to Zenphoto The first step in the process is to log in to...

How to Back Up your TYPO3 Project

In this article, we outline the step-by-step process for backing up your TYPO3 project, ensuring that all your data, settings, and other essential information are safely stored. Regardless of your level of expertise, this method is simple to follow and provides...

How to Install Themes in TYPO3

Learning how to install themes in TYPO3 is essential, as it enables you to personalize your website fully. Whether you are working on a personal blog or a complex business website, the process of installing a theme in TYPO3 is the same. In this article, we share how...

Even more web tutorials

Check out our web hosting knowledge base and the WordPress tutorials to learn more, and be better prepared for your website creation and maintenance journey.