How to Create a Joomla Sitemap

Home » Knowledge Base » Design Tools » Joomla » How to Create a Joomla Sitemap

Learning how to create a Joomla sitemap is important for improving your website’s SEO and visibility to search engines like Google, Bing, Yahoo, and others.

The Joomla sitemap is a simple file that helps search engines understand and index your website more effectively, and eventually list your website’s pages in more prominent search result positions.

However, to benefit from using a sitemap, you should use a Joomla extension. This is why, in this tutorial, we will guide you through the process of creating a sitemap for your Joomla website.


What is a Sitemap

A sitemap is a file that acts as a blueprint of your website that lists all its pages. The sitemap facilitates search engines to crawl and index your site more effectively.

Furthermore, the sitemap details the page hierarchy and structure, which is crucial for search engine optimization (SEO), helping your site rank better in search results.


What is an XML Sitemap

An XML sitemap specifically uses XML (Extensible Markup Language) to detail information about a website’s pages, images, and other contents. It includes URLs, last update dates, and change frequencies, making it ideal for search engine algorithms.

In short, XML sitemaps give more detailed information about your website to search engines. In this article, we will show you how to create an XML sitemap for your Joomla website.

Read also:


How to Create a Joomla Sitemap

In this tutorial, we will be using the OSMap extension, however, you can use any other Joomla extension of your choice. Keep in mind that the setup process is the same, regardless of the extension.


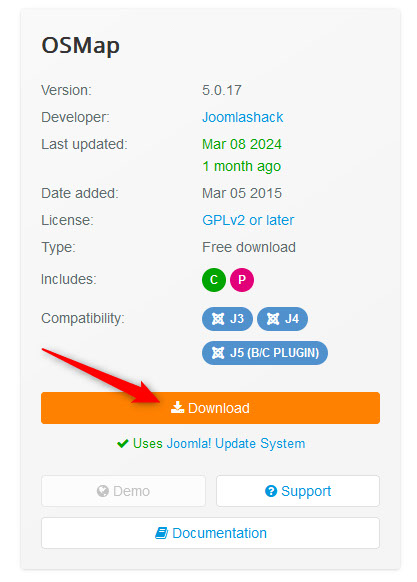
Step 1: Download OSMap on your computer device. To do so, visit the OSMap official page and select a package that suits your needs.

Once you select the OSMap version that suits your needs, click on the orange Download button on the right of the screen and wait until the downloading process is completed:

Create Joomla Sitemap download extension


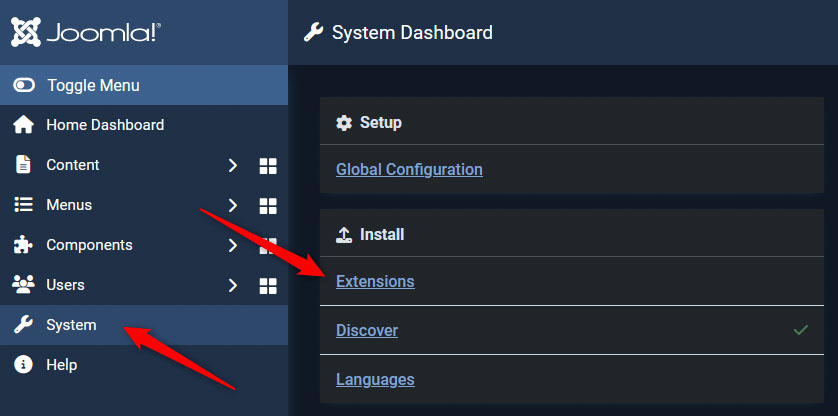
Step 2: Install the OSMap Extension on your Joomla website. To do so, log into your Joomla administration panel, and then navigate to System -> Extensions:

Create Joomla Sitemap add extension


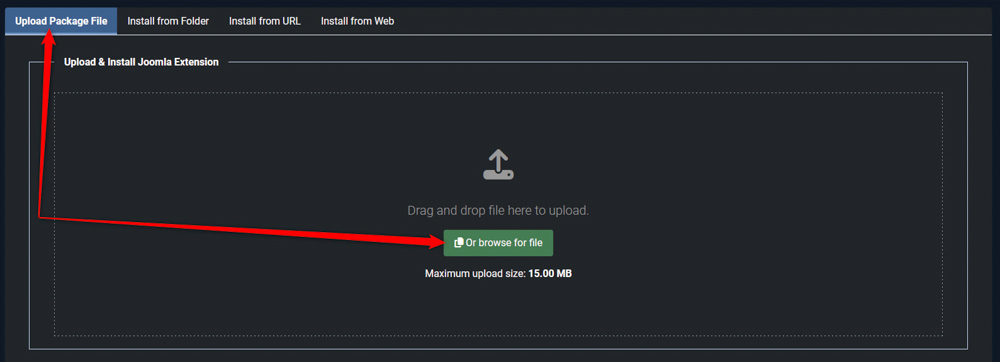
Then, via the Upload Package File tab, drag and drop the downloaded sitemap extension, or click the blue Browse for File button and select the files:

Create Joomla Sitemap upload extension


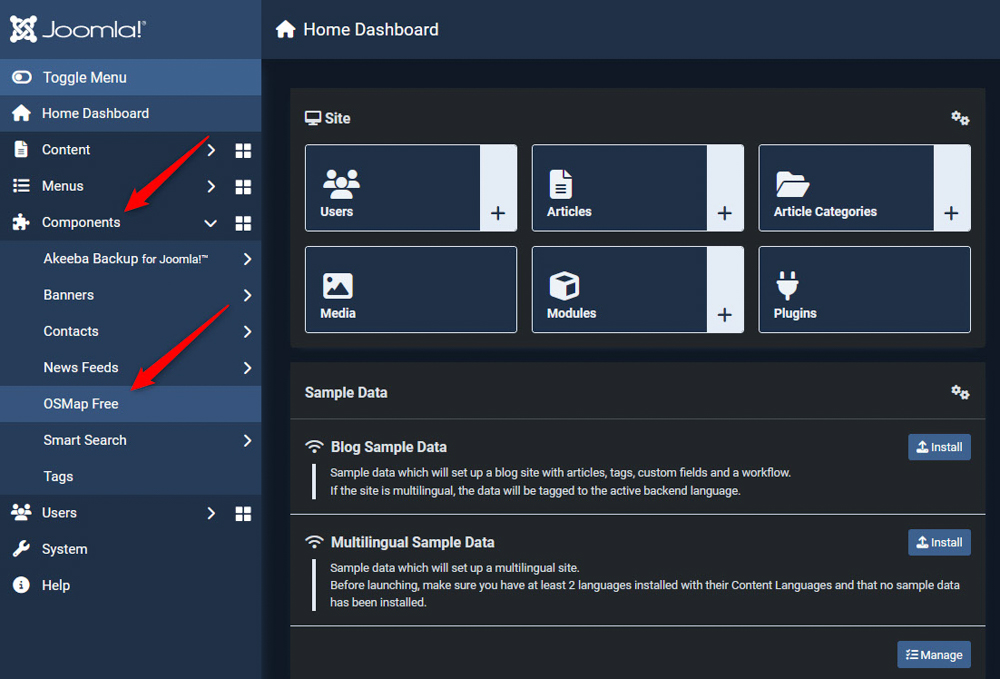
Step 3: View and manage your sitemaps via the Sitemap Manager. To do so, via the Joomla admin panel, go to Components -> OSMap:

Create Joomla Sitemap find extension menu


In the Sitemap Manager, you’ll find links to different sitemap formats:

Create Joomla Sitemap links


There are 3 types of sitemaps that the extension generates for your website:

  • XML Sitemap: Ideal for search engines. You can submit this link to Google Search Console.
  • HTML Sitemap: Visible to visitors, helping them navigate your site.
  • Images Sitemap: Helps submit images to Google.


Step 4: Display an HTML Sitemap on Your Website Navigation

Go to Menus -> Main Menu -> Add Site Menu Item:

Create Joomla menu items


Select a name of the new item, for example, “Sitemap”:

Create Joomla menu items name


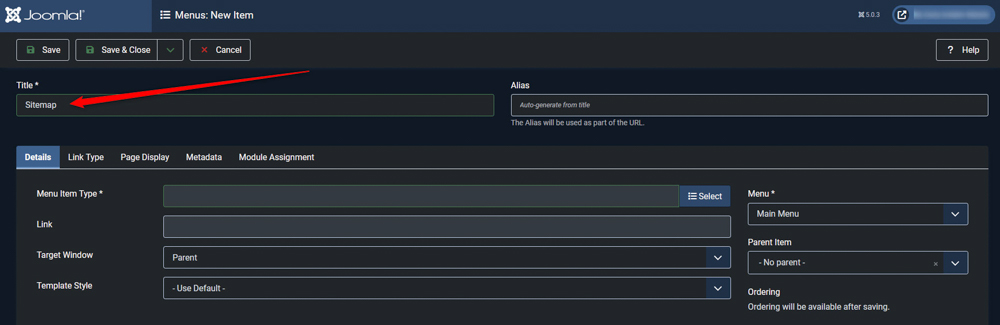
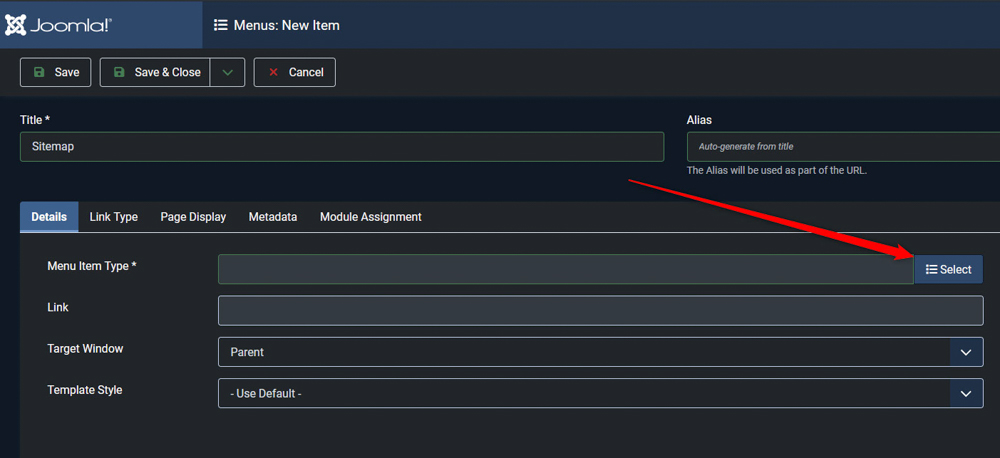
Then, click the blue Select button on the left of the Menu Item Type element:

Create Joomla sitemap menu item


A new window will pop up. Once it does, find OSMap (or the name of the sitemap extension you installed):

Create Joomla sitemap menu item extension name


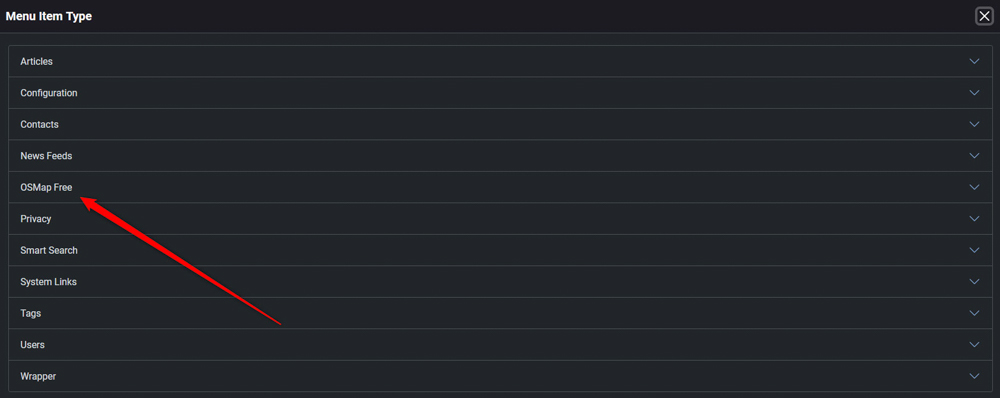
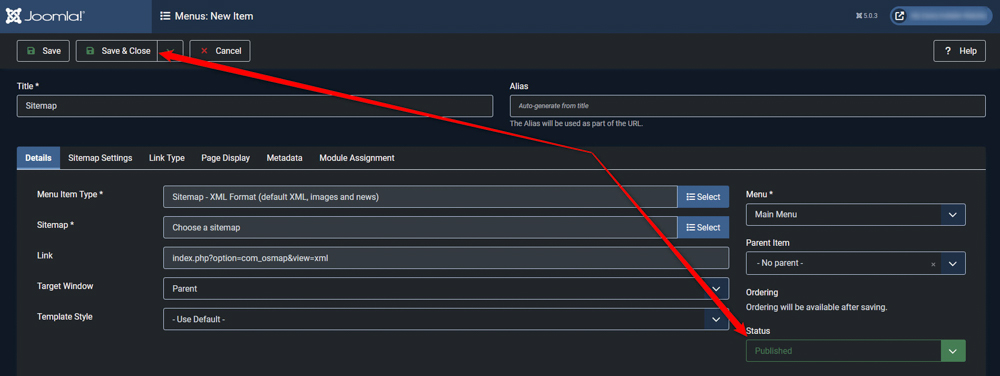
Then, a drop-down menu with options will appear. From there select Sitemap -> XML Format:

Create Joomla sitemap menu xml extension


Ensure it is published, then save and close. This menu item will link to your HTML sitemap, enhancing site navigation for users:

Create Joomla sitemap save changes


Now, every time a crawling bot enters your website, it can use the installed sitemap, so it gets to index and understand your website better.

Remember, this is important, as it would improve your Joomla website’s SERP rankings.


How to Create a Joomla Sitemap – Conclusion

Sitemaps can be generated using a variety of tools, including Joomla extensions. A sitemap is important for SEO as it helps search engines understand the structure and content of your website, allowing it to rank higher in search results.

In this article, we share how to install a sitemap on your Joomla website.

Was this post helpful?

i

Relevant tags:

Connect

Latest posts:

How to Install MediaWiki

You can quickly install MediaWiki on any of the AwardSpace web hosting plans. This includes our free web hosting, shared hosting, as well as advanced services such as semi-dedicated hosting and VPS hosting. You can install MediaWiki in a matter of minutes, whichever...

How to Install an Elgg Theme

After you have installed Elgg core and logged in to the admin dashboard, you can search for themes that can help you customize your new website. Elgg themes are a set of files that help you customize the appearance of your website. Via themes, you can modify website...

How to Log in to Elgg

After you install Elgg, it is time to log in to the CMS, so you can start working on your Elgg website. To log in, you should load the Elgg login page and type in your credentials to access the platform’s admin dashboard. In the following paragraphs, we share how to...

How to Install Elgg

You can quickly install Elgg with any of the AwardSpace web hosting plans. You can use our free web hosting, shared web hosting, or advanced hosting plans such as semi-dedicated hosting and VPS hosting.   How to Install Elgg To install Elgg, you should first sign...

How to Change the PHP Timezone

Setting the correct timezone in PHP is crucial for ensuring that date and time functions in your scripts operate accurately. AwardSpace offers a range of hosting plans that provide easy management of PHP settings, including timezone configuration. This article will...


Create a website for free!


Free forever

Our Support Team is Here to Help


If you need any questions answered, don't hesitate and contact us. Click the button below and follow the instructions. You can expect an answer within an hour.


Contact AwardSpace


iNewest knowledge base articles

How to Install MediaWiki

You can quickly install MediaWiki on any of the AwardSpace web hosting plans. This includes our free web hosting, shared hosting, as well as advanced services such as semi-dedicated hosting and VPS hosting. You can install MediaWiki in a matter of minutes, whichever...

How to Install an Elgg Theme

After you have installed Elgg core and logged in to the admin dashboard, you can search for themes that can help you customize your new website. Elgg themes are a set of files that help you customize the appearance of your website. Via themes, you can modify website...

How to Log in to Elgg

After you install Elgg, it is time to log in to the CMS, so you can start working on your Elgg website. To log in, you should load the Elgg login page and type in your credentials to access the platform’s admin dashboard. In the following paragraphs, we share how to...

How to Install Elgg

You can quickly install Elgg with any of the AwardSpace web hosting plans. You can use our free web hosting, shared web hosting, or advanced hosting plans such as semi-dedicated hosting and VPS hosting.   How to Install Elgg To install Elgg, you should first sign...

How to Change the PHP Timezone

Setting the correct timezone in PHP is crucial for ensuring that date and time functions in your scripts operate accurately. AwardSpace offers a range of hosting plans that provide easy management of PHP settings, including timezone configuration. This article will...

How to Disable PHP Error Messages

When running a PHP-based website in a production environment, it's crucial to disable PHP error messages to prevent sensitive information from being exposed to users. AwardSpace offers a variety of hosting plans tailored to different needs, all of which support...

Even more web tutorials

Check out our web hosting knowledge base and the WordPress tutorials to learn more, and be better prepared for your website creation and maintenance journey.