Once you know how websites work and what makes a great website, it is time to start your website building project.
Whether you want to make a site for your small business, a portfolio, or a personal website, the process is not as complex as you might think. In fact, it is quite simple, given that there are various site builders and systems that can help you with the task.
Quick Starting Guide: Website Building 101
The site-building project is comprised of several steps:
- Applying for a hosting service
- Registering a domain name for your website
- Choosing a CMS
- Adding content
Each step in the process is as important as the rest, so keep close attention to every suggestion.
Apply for a Hosting Service
Each website building project begins with a good hosting plan.
To be able to launch your website, you should apply for a hosting service.
Hosting is a business service that allows you to store your website files on a powerful computer, called a server. The idea is that servers are always working and connected to the Web and are well-protected from malware and viruses.
Read more about hosting:
Usually, web hosting companies provide subscription plans with various features that you can choose from.
For example, AwardSpace offers shared hosting plans, semi-dedicated hosting, and VPS cloud hosting among other services.
The idea is to chttps://www.awardspace.com/web-hosting//semi-dedicated-hosting/hoose a plan that suits your needs and doesn’t limit you when working on your pages.
If you are wondering how hosting works in practice, then start with our free hosting solution – it is ideal for your first website and various types of experiments.
Simply sign up for free and you are good to go.
Register a Domain Name
The domain name, or simply a domain, is the unique name of your website that sets its unique place on the web. Domains are a fundamental part of every website and without one, you can’t publish your website on the Web.
In technicality, domains are meaningful phrases and words that mask the Internet Protocol address. The latter is a string of numbers and dots that precisely tell browsers and DNSs where your website is hosted and therefore can access it.
Read more about domain names:
When it comes to choosing a domain name, you should consider these tips:
- Your domain name should be unique
- If you are focusing on a business website, choose a domain that matches your brand’s name
- If you are focusing on a personal website or a portfolio, add your personal name as a domain
- If you want to create an online blog, then choose a descriptive name, so visitors know what to expect when they see it.
If you need further advice on how to choose the perfect domain name for your website, then check out our key tips:
How to register a domain name
Registering a domain name is quite a simple process.
Once you have registered to any of the AwardSpace hosting plans, you have access to a hosting panel. From there you can quickly register your chosen domain.
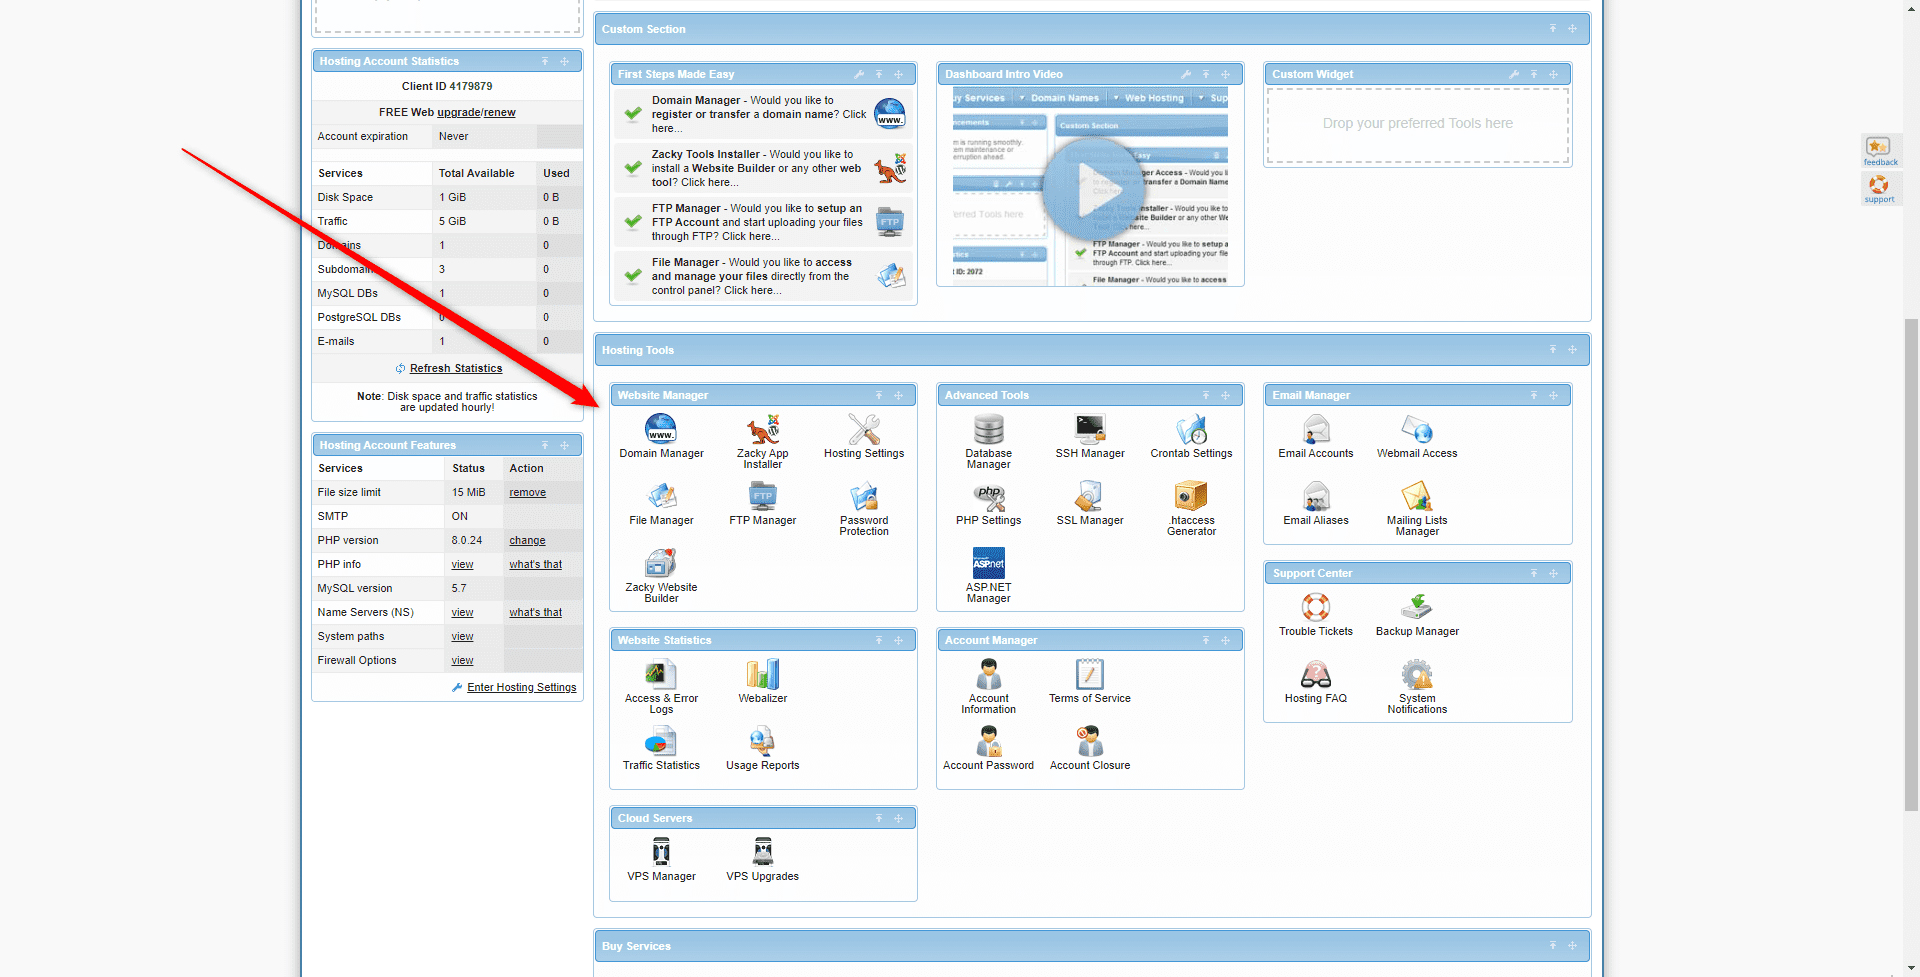
Once you enter the hosting panel, click on Domain Manager:
This will lead you to the domain registration page:
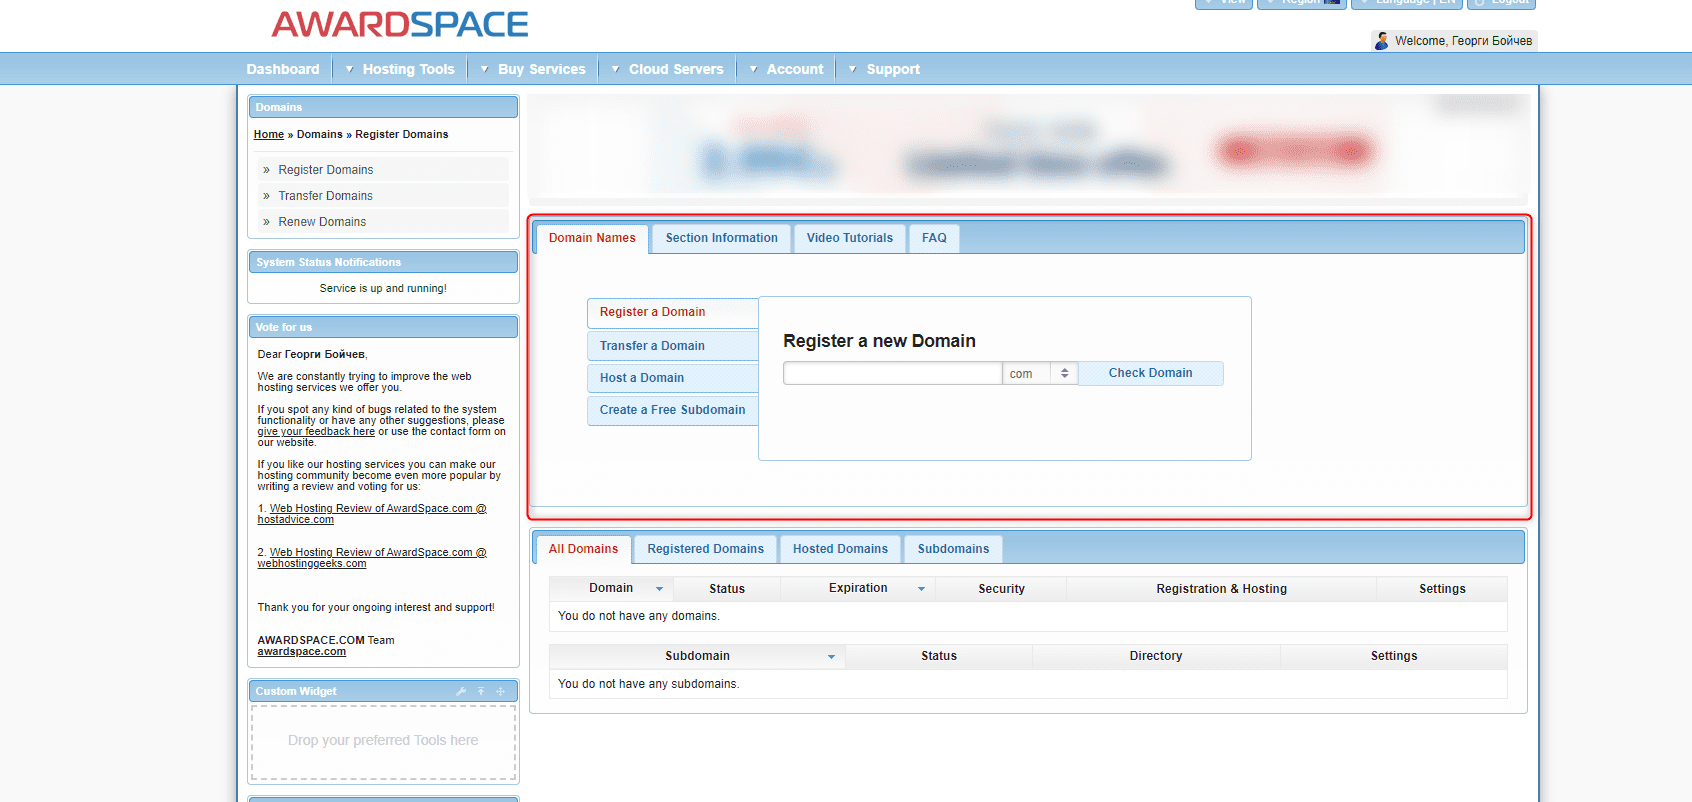
Now, add your preferred domain name, and click the Check Domain button. This will show you all the available options with the phrase you selected:
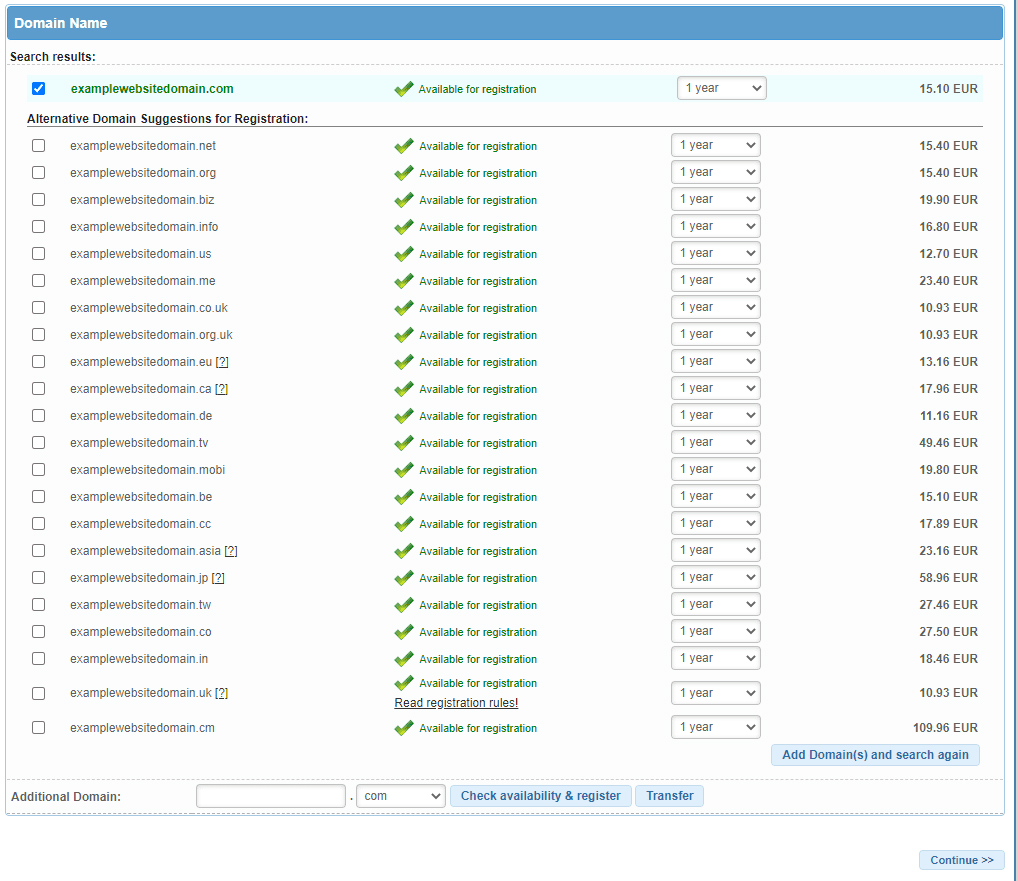
Select the option that fits you the most and follow the instructions.
Website Building with a CMS
Once you have subscribed to a hosting plan and have registered your domain name, it is time to take the next step – choose how to start your website building project.
Since using a CMS is by far the most popular and flexible way of constructing a website, we will show you this method in this guide.
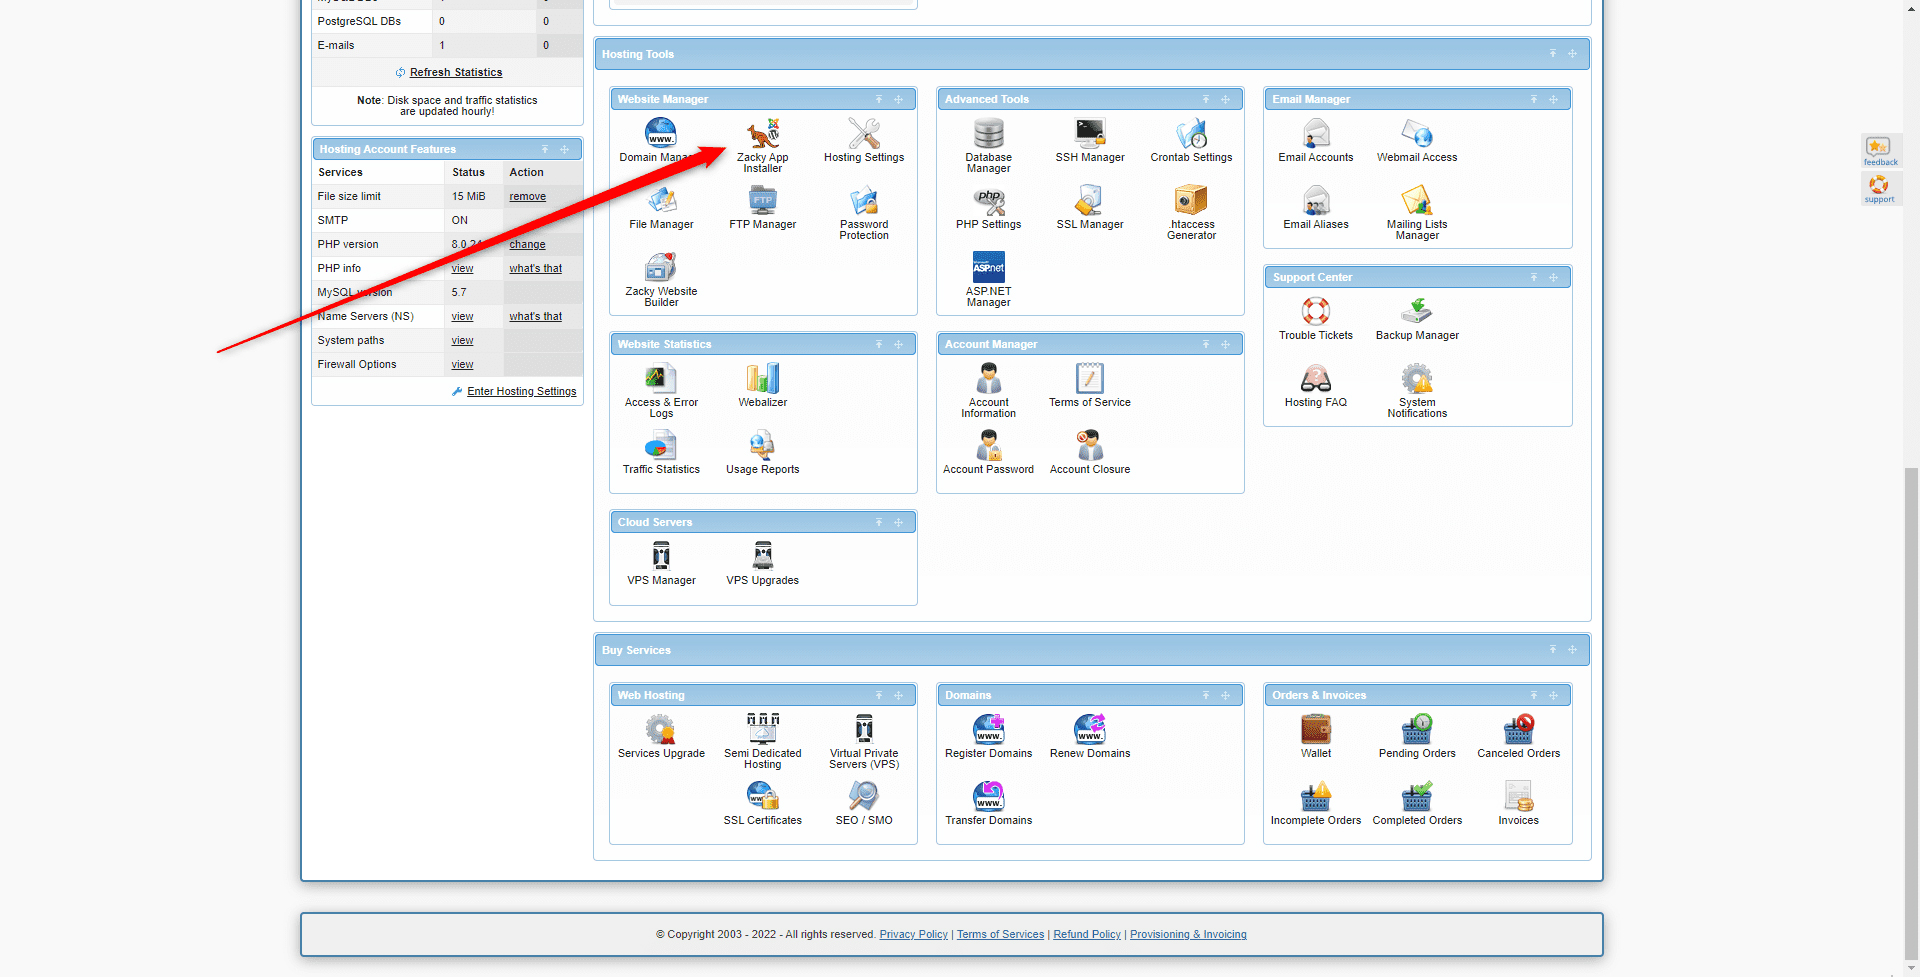
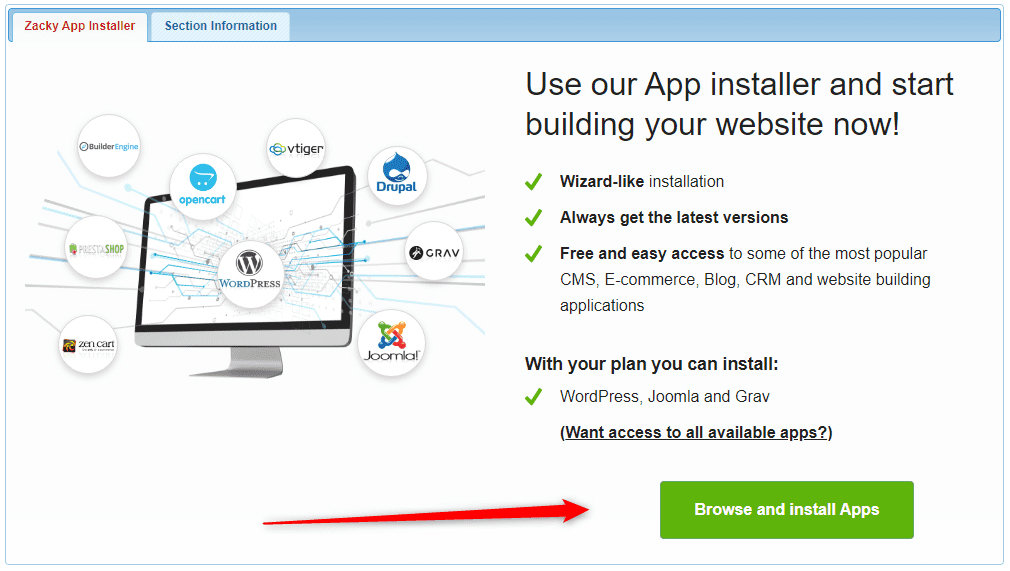
The first thing you should do is log in to the AwardSpace hosting panel and head to Zacky Installer:
Then, click on the green Browse and Install Apps button:
This will open a list of available CMS platforms that you can quickly install for free:
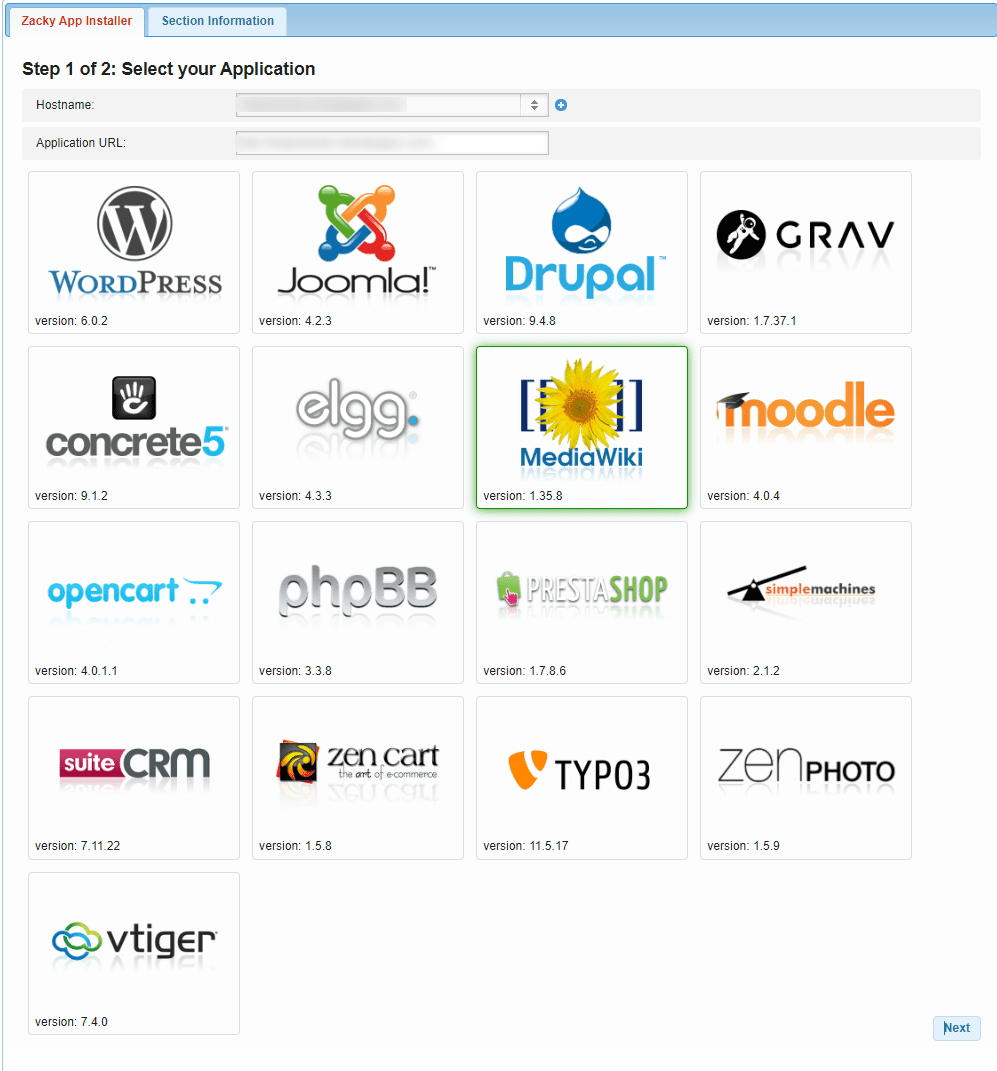
Select one and follow the instructions. At the end of the installation process, you will receive an email with login details.
NB! In another article, we talk about more details on how to log in to your preferred CMS:
Add Website Content
Once you have received an email and opened your CMS of choice, it is time to add content to your new website.
By content, we mean including text and various media files such as images and videos. Also, you can distribute your content into static pages and blog posts, should you decide to create one.
Add New Pages
Here are some quick tips that you can use when working on your pages:
- Distribute your content logically into several web pages. For example, if you want to create a business website, you can distribute your content into such web pages – Homepage, Services, About Us, and Contact Us.
- Don’t add too much content to your pages, as this might be distracting for your visitors.
- State the point of the web page and stick to it. If you want to create a web page with your products and services, include content regarding them and nothing else.
- Add high-quality images and other media files, as they make a good impression.
Add Blog Posts
- If you focus on creating a blog or simply want to include such a section, then have a look at these suggestions:
- Distribute your blog content into logical categories. This will help you and your visitors browse more easily.
- Stick to the point when working on your posts – If you are writing an article about the characteristics of a new smartphone, keep to the point and don’t include anything unrelated to the main topic.
- Add media files, as they make your content easier to digest and also add a kick to the overall visual aesthetics of your posts.
If you wish to elaborate, then check out what makes a website great.
Website Building is Easy
Website building is surely a thrilling experience.
Also, it can be simple, given that modern software allows quick setup and easy maintenance.
If you wish to publish a website, then all you need to do is subscribe to a hosting service, register a domain name, and select a CMS.
Then, you can start experimenting with various layouts, text ideas, topics, and everything else that you believe will contribute to the World Wide Web.
Read also:
