Sometimes the server your website is hosted on can become the source of various issues. Such is the case with 504 Error Gateway Timeout – although your website can work flawlessly, visitors still can’t access it, because of issues with the server. Should a Gateway TImeout error message appear on your website, you should fix it as soon as possible, as it can negatively impact your online presence – leaving 504 Error code appear on your website can lower site traffic, visitors’ satisfaction, and rankings in search engine result pages.
What is 504 Error
504 Error is an HTTP status code. It indicates that the upstream web server takes too much time to process the request sent by the main server. That is why it returns an error message to the web browser instead of the requested online resource.
- Server connectivity issues.
- Server overload.
- DNS Server issues.
- General Internet connectivity issues.
- Errors in your website’s code.
- Faulty website extensions/add-ons/plugins.
Regardless of what prompts the 504 Error, there are various methods you can apply to fix the problem.
How to Fix 504 Error Code
504 Error, like the rest of the HTTP status codes that begin with 5xx, indicates that the issue is rooted somewhere on the server side.
Similar error messages include:
However, there are cases in which the Gateway Timeout message can be prompted by a problem on the client side.
This is why, the suggested methods focus on fixing problems on both the server- and client-side.
Method 1: Refresh the Web Page
504 Gateway Timeout can be prompted by a temporary problem with the server or Internet. The first thing you should try when you see 504 Error is to refresh the page and see whether it loads properly.
If the 504 Error is still present, try to refresh the page and delete its cache simultaneously by pressing CTRL/CMD+F5 on your keyboard.
If this doesn’t fix the problem, then proceed with the next method.
Method 2: Restart Internet Devices
HTTP Error 504 might be prompted by some temporary issues with your Internet devices such as computers and routers. Switch them off, and then turn them on again and check whether you can open the requested page.
If it is still unavailable and the Gateway Timeout message is still present, then the issue lies elsewhere.
Method 3: Clear Web Browser Cache
Sometimes too many cache files can prompt error codes such as Gateway Timeout. Delete your browser cache and see whether you can access the requested resource. If you don’t know how to do so, follow the steps in this article: How to Delete Browser Cache
If the 504 Error code is still present after deleting the cache, then the problem lies elsewhere.
Method 4: Flush DNS Cache
Similar to web browser cache, sometimes DNS cache can cause connectivity problems. Flush the DNS cache and try reloading the page. How to flush the DNS cache on Windows? If you still see the Gateway Timeout message on your website, proceed with the next method.
Method 5: Check Error Logs
Error logs contain information about various issues on your website and can give you an insight into what exactly causes HTTP Error 504. If you are using an AwardSpace hosting plan for your website, here’s how to open your error log: The first thing you should do is go to AwardSpace.com and click the red Login icon at the top right corner of the web page:
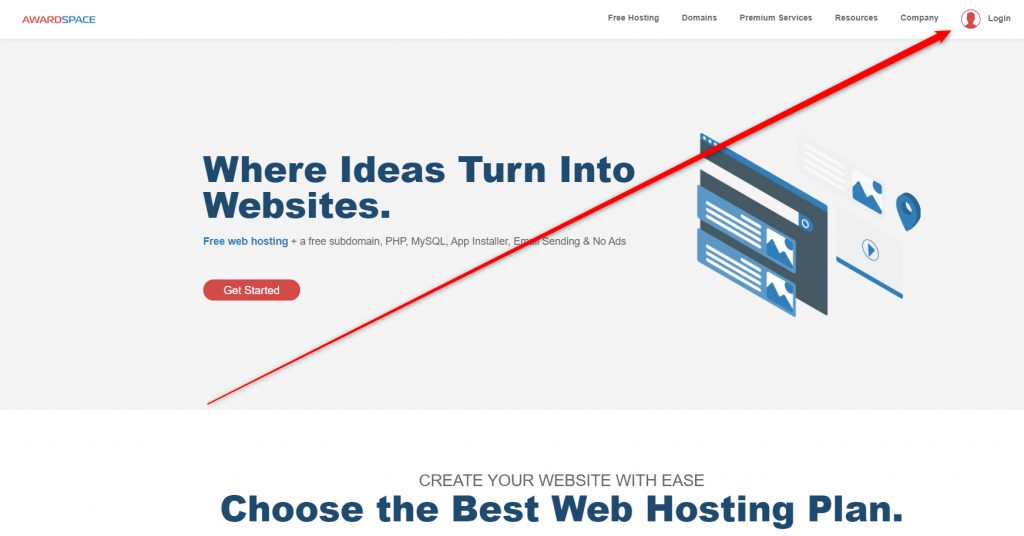
Once you click the Login icon, a new web page will open. It should look like this:
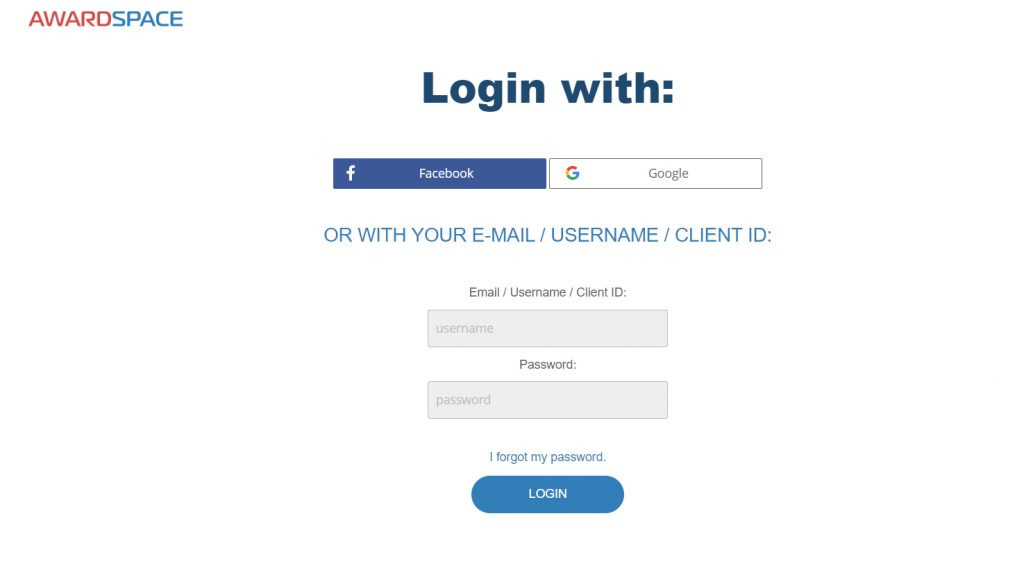
On this page, type in your login credentials and lick the blue LOGIN button located below the login box:
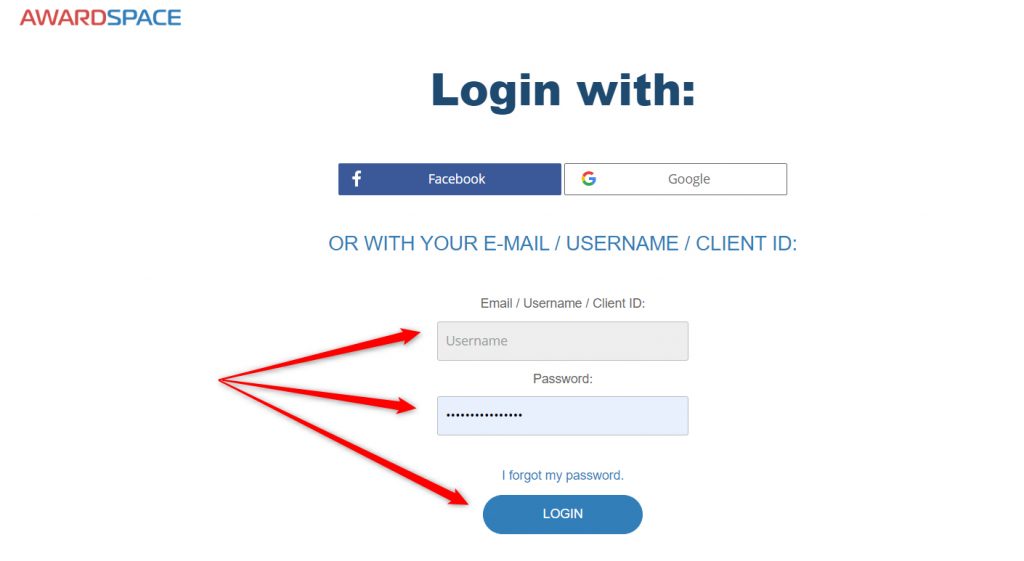
Once you enter your credentials and click on LOGIN, you will enter the AwardSpace hosting panel. It looks like this:
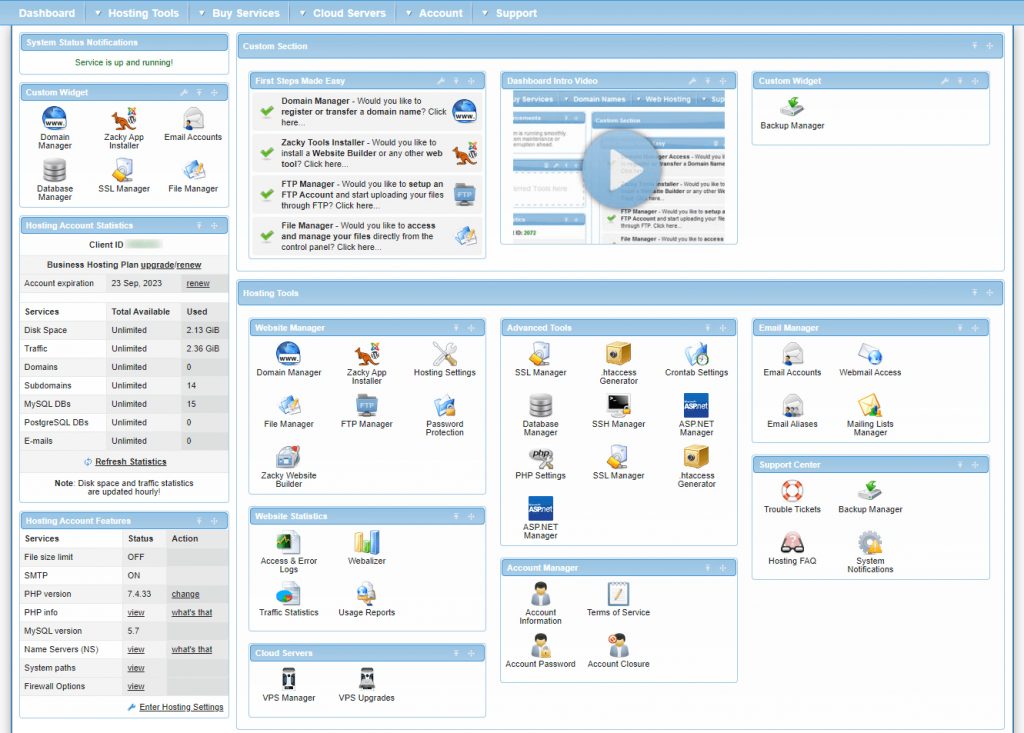
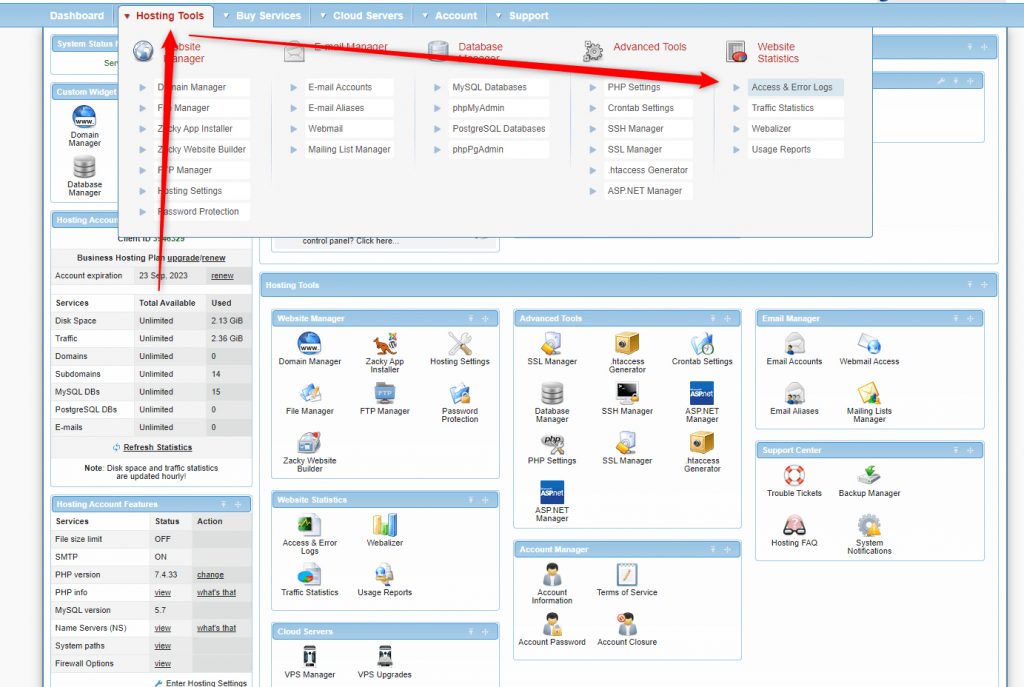
While on this page, via the menu at the top of the page head to Hosting Tools->Access & Error Logs:
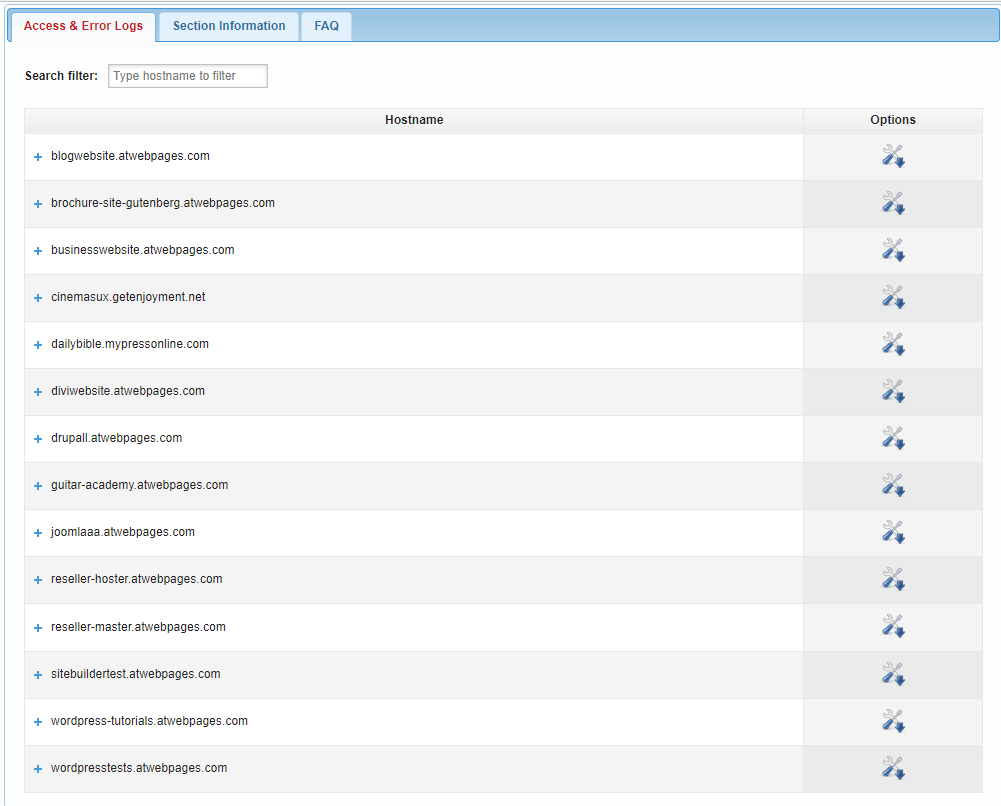
Once you do, a list with all your hosted websites will appear:
Locate the domain name of the website that prompts 504 Error and click on the blue + symbol right at the left of the domain name:
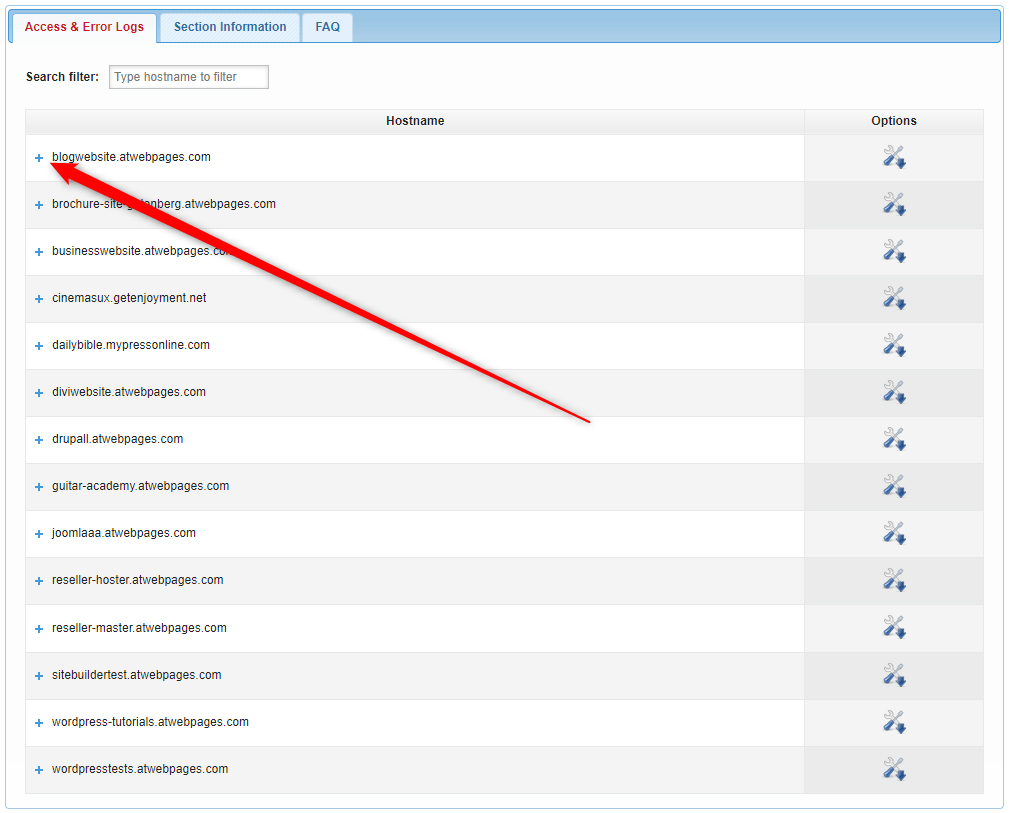
Once you click the + sign, two blue buttons will appear – Access Logs and Error Logs. Click on Error Logs:

Clicking on Error Logs will generate several log lists. Open each one of these and see what could prompt the Error 504 Gateway Timeout message:

Method 6: Check Proxy Server Settings
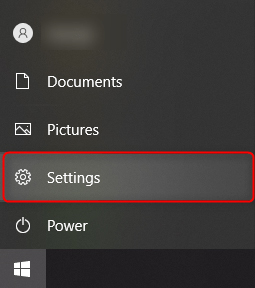
The proxy server is placed between your device and the Internet. It is used to improve online security and privacy by hiding various types of private information. Sometimes the wrong setup of proxy server settings can prompt HTTP status codes such as 504 Gateway Timeout. If you are using a proxy server, then check out its settings and see for some improper setup details. To access the proxy settings on your Windows device, go to Start->Settings:
Clicking on Settings will open a new window that should look like this:
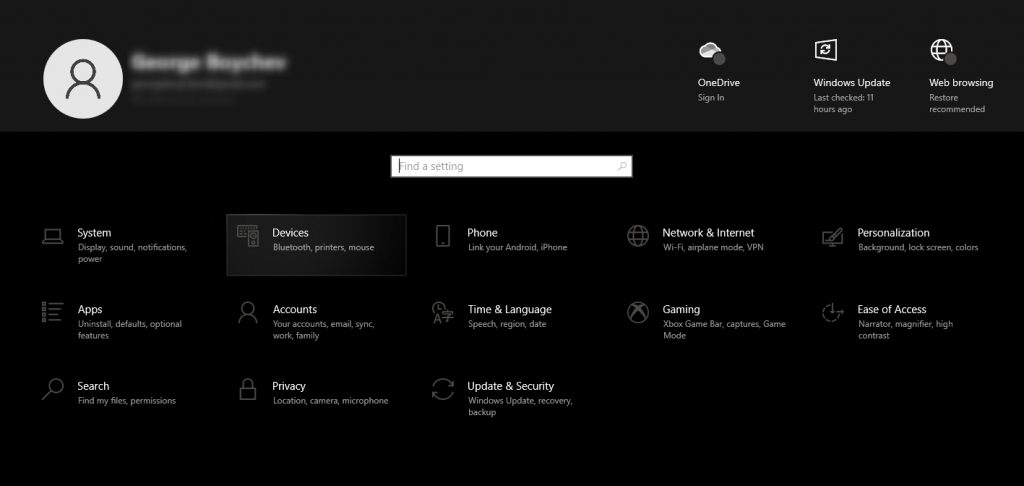
While on this window, search for “Proxy Settings” via the search box:
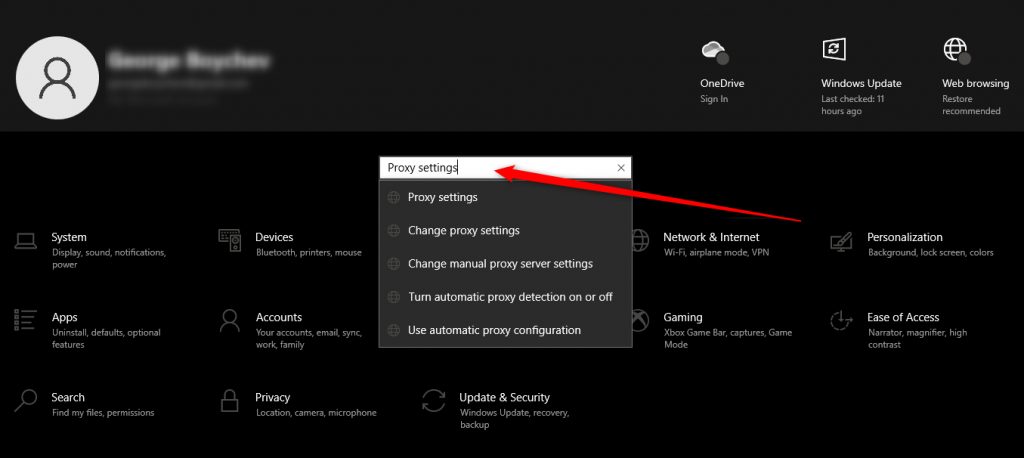
Searching for this term will prompt Windows to open the menu with proxy settings:
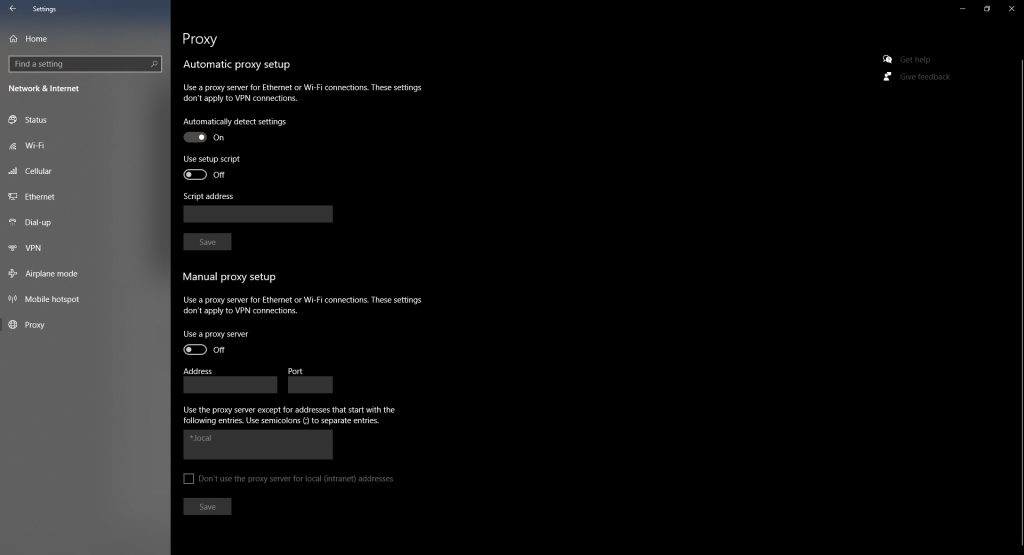
While here, check for setup issues and fix them. Once you do, try to reload the problematic web page. If it still doesn’t load properly and continues to display a 504 Gateway Timeout error, proceed with the next method.
Method 7: Check Website Extensions/Add-ons/Plugins
If your website is based on a CMS such as WordPress and noticed that 504 Error started to appear after a recent installation of extensions/add-ons/plugins, then it is likely that some of them are causing issues.
To see whether this is the case with your CMS-based website, deactivate all your extensions/add-ons/plugins and see whether 504 Error is still present on your website.
If the Gateway Timeout is gone, then the problem lies within some of the extensions/add-ons/plugins.
To find out which one exactly, follow these steps:
- Activate one extension/add-on/plugin and keep the rest deactivated.
- Оpen the problematic website and see whether it displays a Gateway Timeout message.
- If the 504 error doesn’t appear, activate one more extension/add-on/plugin and see whether the error message is present.
- Repeat this process until you activate an extension/add-on/plugin that prompts a 504 Gateway Timeout message.
- Delete it or contact developers for further assistance.
Method 8: Upgrade Your Web Hosting Plan
504 Error can be caused by a server overload – such is the case, for example, in which site traffic is higher than what the web server can endure.
This might be the case in which your hosting plan is suitable for small website projects, and yet the traffic exceeds this limit. In this case, the Request Timeout error can be fixed by upgrading to a premium AwardSpace hosting plan that provides you with the server resources that can deal with the enhanced traffic.
Method 9: Contact Tech Support
If nothing else helps, then you can reach out to the tech support team of your hosting provider. Once you do, explain in detail your issue and all methods you used to try to fix Error 504. The tech support team should explain to you what the problem is and provide you with a solution.
Conclusion
In this article, you read about 9 methods that can help you resolve the 504 Gateway Timeout Error and get your website performing seamlessly.
