Knowing how to set the timezone of your WordPress website will save you from a lot of trouble when it comes to post scheduling. If your website’s timezone is not the correct one, you may find yourself in a situation where a post that you expect to be published at a particular time, won’t be. Depending on your original timezone, the scheduled posts may be published before or after the time you expect them to be.
How to Change the Timezone of Your WordPress Website
As always, we’ll follow a few steps to achieve the wanted result. Obviously, the first thing we need to do is to enter the admin panel of WordPress. And here are the steps to follow:
1. Go to your WordPress Settings area.
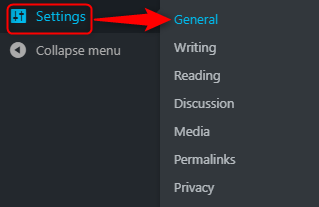
Now that you are in your WordPress dashboard click on the Settings, then click General.

2. Select the Correct Timezone
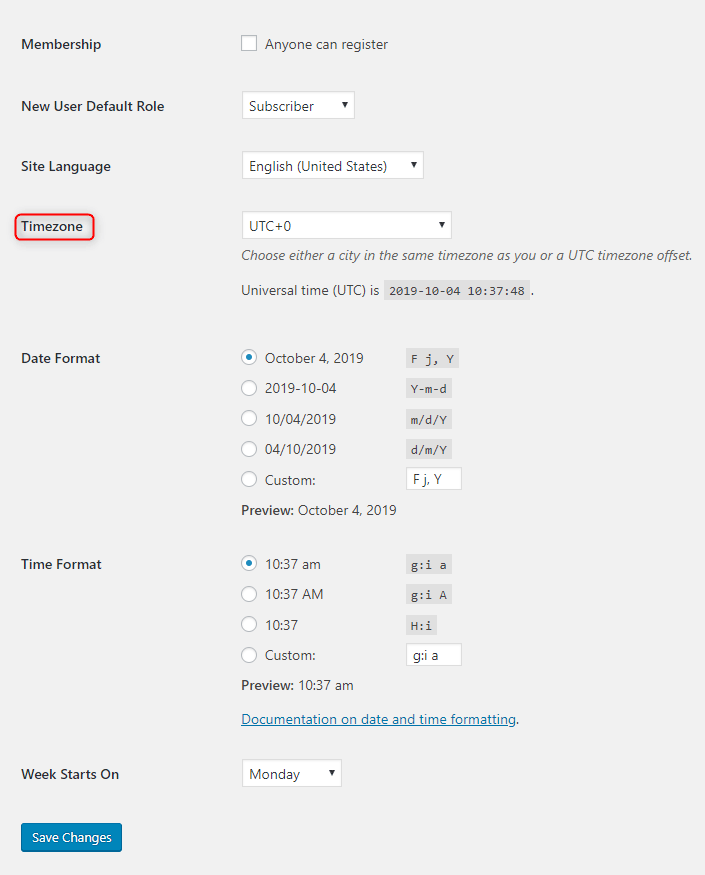
When you click on the General button, a new page will load. Scroll down until you see the section labeled Timezone.

By default WordPress is using the Coordinated Universal Time + 0, a.k.a. UTC+0.
Here you should choose the UTC + X, which corresponds with your country’s(or city’s) timezone.
Under the dropdown menu, where you choose the time, you can see the current UTC time.

3. Save Changes
When everything is set and done, you should not forget to click the Save Changes button at the bottom of the page. If you fail to do that, your changes won’t be saved, and your timezone settings won’t be saved.