WordPress Featured Images are a thing for a reason. Visually appealing websites are, naturally, more interesting to the audience. They provide a higher level of usability (in most, but not all cases) and thus higher engagement with your content.
Not only that but featured images are what catch our attention when we see a shared website link in the social media’s newsfeeds. Therefore, without a featured image, the articles that you are writing and sharing will look dull and boring.
To avoid these results, you need to add a featured image to every post that you are creating and to every page that your website has.
Related: How to Add Facebook Like Box to Your WordPress Website
What is a WordPress Featured Image
The fact that we maintain WordPress Tutorials is not just a mere chance. It is a conscious decision that we made. WordPress is the most famous and used CMS that exists for a reason. When the CMS was built, of course, it wasn’t as great as it is today. Still, WordPress manages to maintain its course along with the internet, and the devoted developers of the former never leave the users of the CMS needing something that WordPress doesn’t offer.
The featured image is often a neglected factor, and rather when we can use one as easy as it is in WordPress, we take it for granted.
Featured images are also known as post thumbnails. They are used to represent your posts, and pages when they are shared on the web. And when looking at the page, you defined as a blog page; the posts will be represented by the same image. You can see how important it is to add featured images to your blog posts.
How to Choose a Featured Image in WordPress
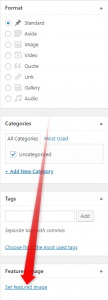
Choosing a featured image in WordPress is a straightforward process. What you need to do is to go to the page or post where you want to add a featured image to, and once your content is ready to be published (or before that if you feel like it) scroll down the page and look at the right sidebar.
Click the Set featured image link, and choose the one that you feel is most relevant to your article.
Click Publish or Update(if the article was already published) and you are good to go.
Related: How to Add Media in WordPress Posts
How to Set a Default Featured Image in WordPress
Every once in a while, you’ll feel the need(or find the value) of setting a default image for your website to be represented, when the page or the post doesn’t have a featured image set.
To add a default image in WordPress, you’ll need a bit of coding. But don’t worry! It’s not as scary, as it sounds. Believe me; I am scared of the word code itself. Plus, in the next section of this article, I’ll walk you through a method of adding a default featured image in WordPress by using a plugin, which will make it a lot easier.
First of all, naturally, you need to create or choose an image that you want your website to show every time that it is shared online, but there is no featured image set to this page or post.
Then go to your WordPress Hosting Control Panel and look for the File manager.
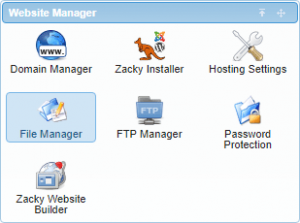
Once there, enter yourwebsite.com/wp-content/themes/themename/Images and upload the image you’ve chosen. If such a directory doesn’t exist (which is highly probable), you can simply create it.
WordPress themes are displaying the post thumbnails in various places. To find the file, where you want to post the code, you need to look for the_post_thumbnail() function in the theme files.
More often than not, this function is in archive.php, single.php, or the content templates.
Next, you need to add the following code where you want to display the post thumbnail.
<?php if ( has_post_thumbnail() ) { the_post_thumbnail(); } else { ?><img src=”<?php bloginfo(‘template_directory’); ?>/images/default-featured-image.jpg” alt=”<?php the_title(); ?>” /><?php } ?>
Don’t forget to replace default-featured-image.jpg with your image file name.
Now everything should be working, and your posts should have a default featured image.
Setting a Default Featured Image in WordPress via Plugin
There are a lot of ways to specify an image to be a default feature on your WordPress website. The easiest, of course, is by adding a WordPress plugin and using its options to achieve the results you want.
One of the possible solutions is this plugin which will help you do that. But this is its main function, and as the usage of a vast number of plugins is not recommended, let’s try another solution.
Yoast SEO is a plugin that we’ve talked about before. And it is a really handy plugin.
In our Yoast for Beginners Guide, we’ve covered a lot of its capabilities, but we didn’t speak of this one. Yoast is granting you with the option to add a default open graph image, that will show when you are sharing your content on the social networks. More specifically Facebook.
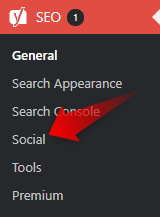
To do so, you need to enter your WordPress Admin Panel. Once there, look for the Yoast SEO in the left sidebar menu. In the sidebar, it says just SEO with Yoast’s logo before that.
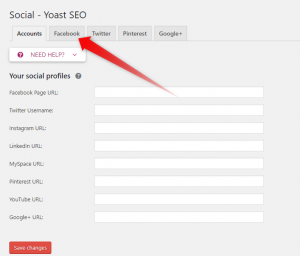
Go to Social->Facebook.
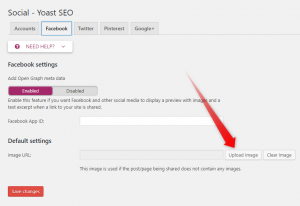
Click the Upload Image button, and choose the image you want to be a default featured image for every page or post that you share on the social network.
Then click the Save Settings button below. You are good to go.
Now you have a default featured image. When you are sharing your posts on Facebook, even if you forget or deliberately didn’t add a featured image (which will be shown in the post as well), you’ll have an image that will drive more users to click on your posts, and to read them.
