Facebook is by far the most popular Social Media ever existed. It’s not like there is no other Social Media in existence. Just the opposite. Still, most people who are online do have a Facebook account. And a lot of friends with whom they are connected. As a webmaster, you are absolutely obligated to take advantage of this traffic channel with high potential.
One way to do so is, of course, to create a Facebook Page for your website or business. And once you have one, you’ll be able to advertise to this enormous market.
But if you are just starting, paying for advertisement is not an option.
Facebook has one very useful feature. If you like something on the web or on Facebook itself, a lot of your friends will find out that you liked it, and will be able to see what exactly you liked.
Thus, if someone likes an article of yours their friends will find out about that. And will in their turn have the opportunity to see your website, your content, your brand, and your business.
I hope that this feature alone is enough for you to want to add a like button to your content.
How to add a Facebook Like button to your WordPress Website?
I believe that this is clear already, but still, I want to stress the fact that there is a big difference between Facebook Like Button, Facebook Page Like Button, Facebook Like Box, and Facebook Feed Box.
All of the others will be covered in our tutorials, but for now, let’s stick to the like (and share) button(s).
The fastest, easiest, and the way that I would recommend to a WordPress newbie to add social buttons to your website is by using a plugin.
Thus, let me save you the waste of time and nerves and introduce you to an easy-to-use, intuitive, and usable plugin that will add a Facebook Like Button to your WordPress Website in no time
Read: How to Add a Plugin to WordPress
Now that you know how to add a plugin to WordPress, go to Plugins->Add New and search for ‘Sassy Social Share’.
The full name of the plugin is WordPress Social Sharing Plugin – Sassy Social Share.
And you should expect to see something like this:
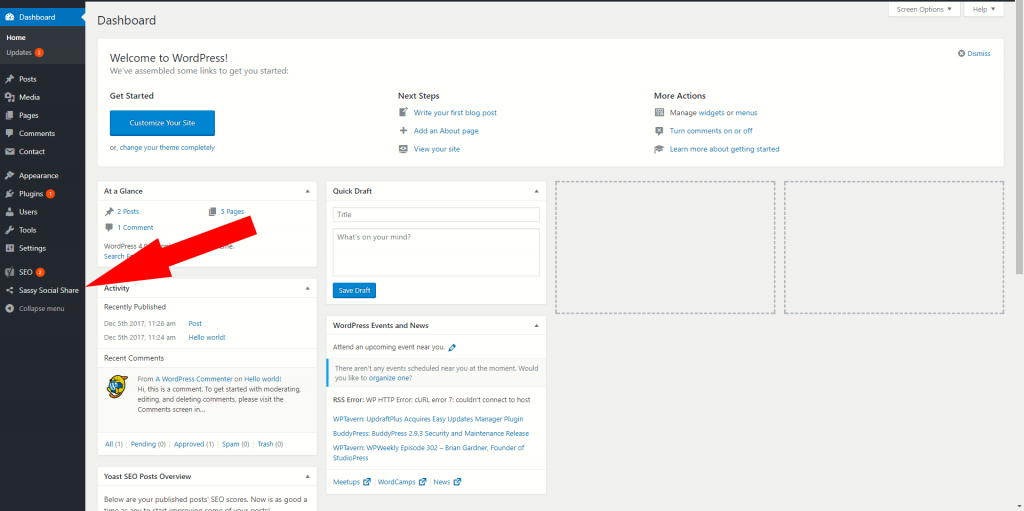
Install and Activate the plugin. Once you do that, a new button will appear on your Dashboard Menu.
From now on, everything you’ll do depends mostly on your taste and preferences.
At first, what you’ll see might confuse you a bit, because they are way too many options to choose from. But hang with me, and you’ll see that there is nothing to be confused for.
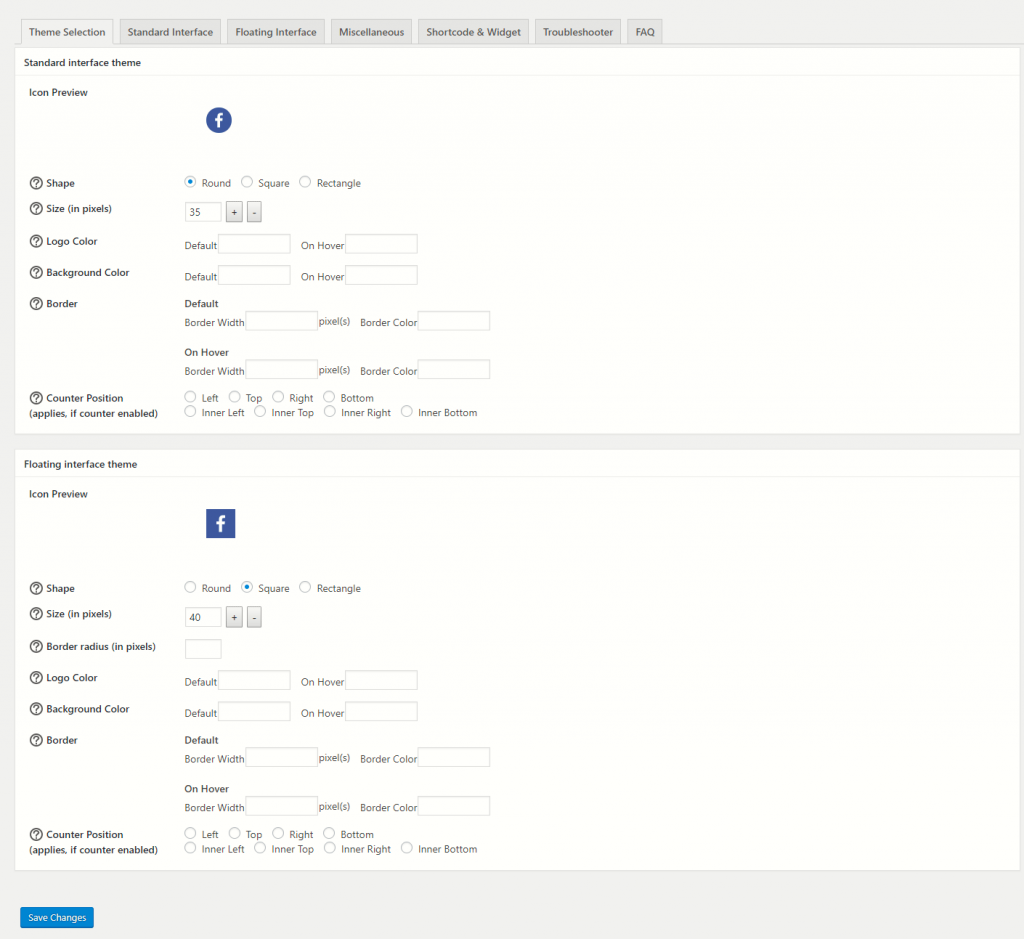
Here is what you should expect to see:
There are a few main tabs that you’ll probably use.
And those are the first three tabs. Namely, Theme Selection, Standard Interface, and Floating Interface.
Let’s examine each and every one of them.
On the Theme Selection Tab, you’ll be presented the opportunity to choose what you want your social icons to look like. Do you want them to be Round, Square, or with a Rectangular shape? How big do you want those icons to be? Do you want them to have borders, and where do you want them to be positioned?
All the good stuff.
Once you’ve made those corrections, you’ll have to further customize the Standard Interface. And here ‘standard interface’ stands for the buttons to be under or above your content. Meaning that the buttons you’ll have in your content will be customized on this tab.
Once you open the Standard Interface tab, you’ll be amazed by how many different Social Media there are, and how many ways there are for the users of your website to share your content.
You’ll be simply amazed.
Yet, you’ll have to make a choice for which social media you want to be on. Don’t make the choice too wide, or too narrow. At best choose 5-6 options.
You’ll see that among all those options, Facebook has three. Share, Like, and Recommend. You can choose one, two, or all of them to be on your website. You can choose where you want these Standard Interface social buttons to appear.
And as we are covering how to add a Facebook Like Button to a WordPress website, I highly recommend for the Standard Interface buttons be enabled only on posts. Whether you’ll add them under or above the content is up to you. Just bear in mind that if the people reach the end of the content, and if they want to click ‘Like’ or ‘Share’ it will be easier for them if the buttons are down there at the bottom.
Thus, more people will click it.
Yet, there are people that will like your content, just because it is from you, even if they never read it. So, why not put it on the top also?
But still, the decision is yours to make.
In the Floating Interface Tab, you’ll be presented with the same vast choice of social media to add. The options for the buttons to be on the left or on the right side of your website. And yet more options to discover.
I personally would recommend you to add a Floating bar on all the pages and posts on the website, with the possibility for the users to only share the page they are on.
On the other hand, the Standard Interface buttons should be enabled under the posts or important content pages.
Yet, this depends from site to site, and from person to person. It is up to you.
Whatever you choose, let your users like and share your content.
You’ll be glad that you did it.
Or go back to the WordPress Tutorial.


