Install a WordPress Plugin

Home » Knowledge Base » Design Tools » WordPress » Install a WordPress Plugin

To be as user-friendly as it is, WordPress relies on a vast network of developers that are creating the small pieces of code that are the plugins. These pieces of code add specific functionalities to a WordPress website, without requiring its owner to be able to write the code himself.

Just like themes that add the visual of your website, the plugins are a key element of what makes WordPress WordPress. Here is how to install a plugin.


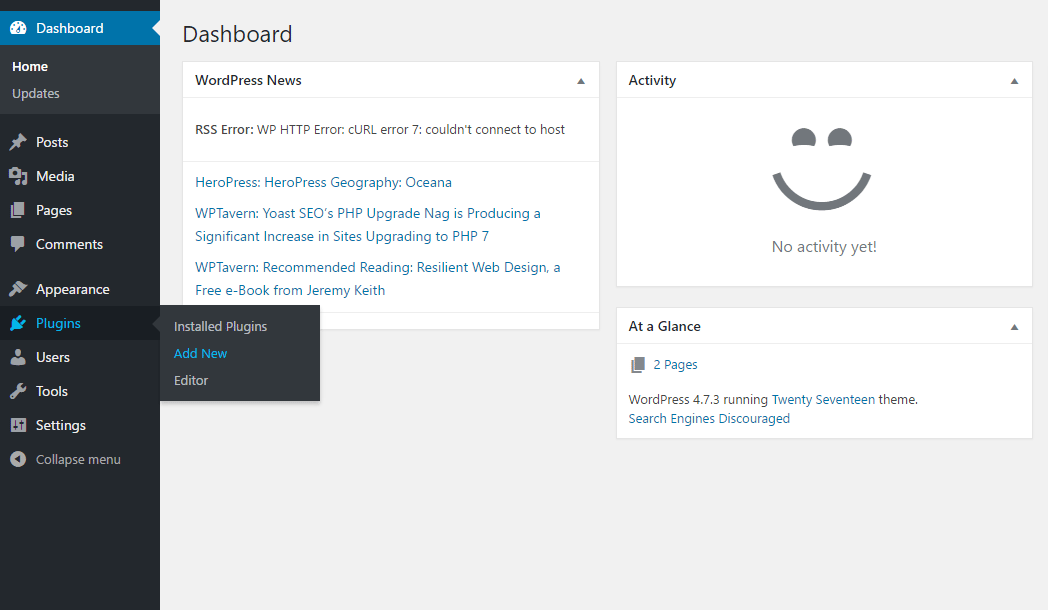
Step 1:  Navigate to the Plugins Page

Before you can navigate to the Plugins Page, you have to log in to your website. Once you see the WordPress Dashboard, focus on the menu in the sidebar on the left side of the screen.

Hover over the Plugins option. A new sub-menu will pop up. Choose Add New. Alternatively, you can directly click Plugins, and on the new page look for the Add New Plugin on the top left part of the page.

How to Add a Plugin to WordPress


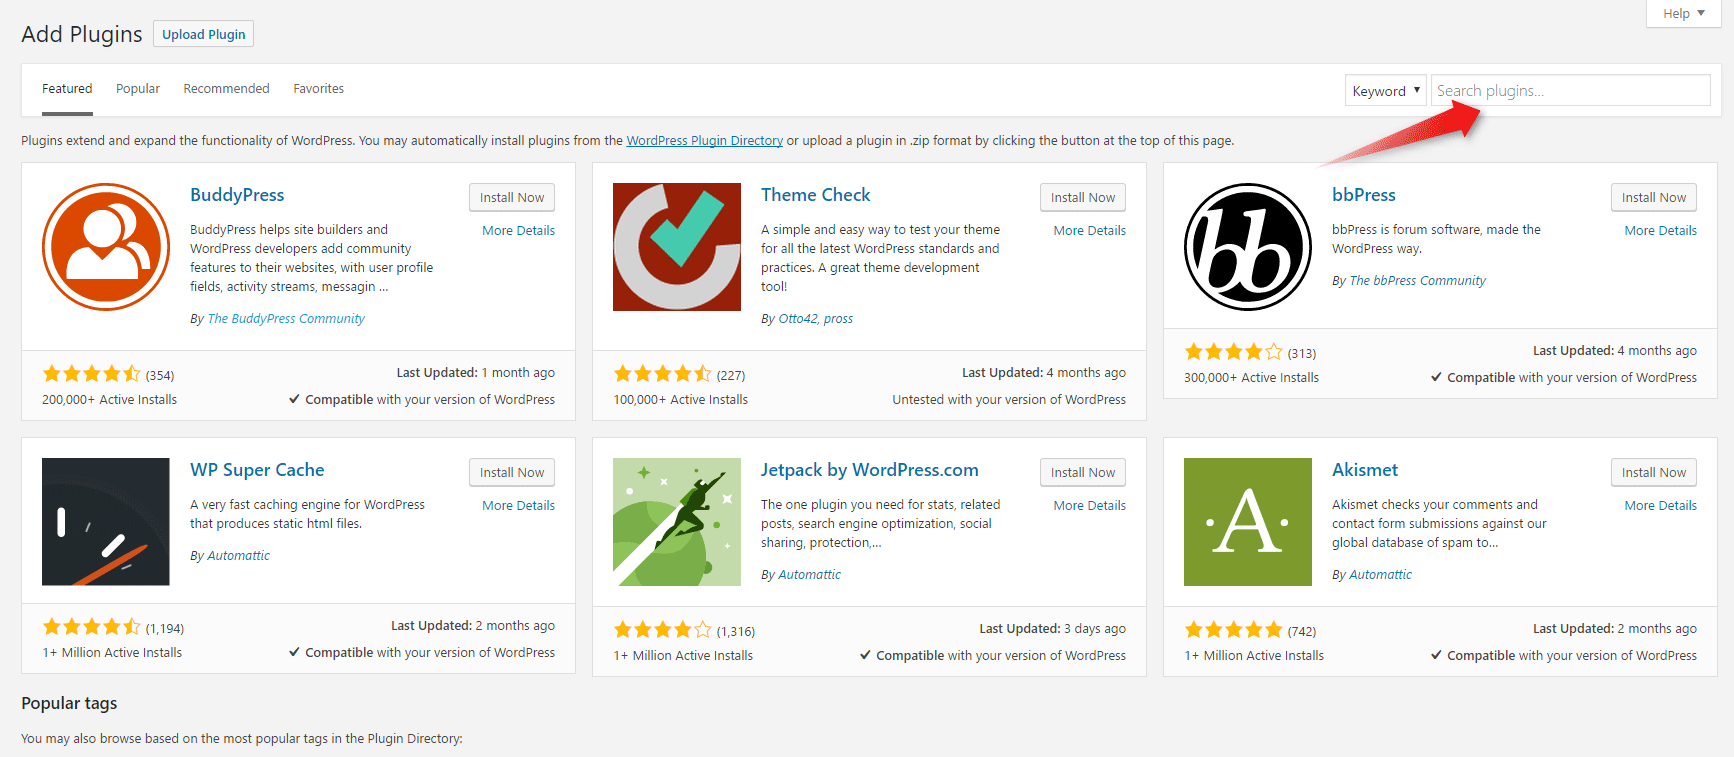
Step 2: Search for the Plugin You Need

Search for a specific plugin using the search box situated in the top right area of the Add Plugin page, either by entering its name or describing its functionality.

How to Add Plugins to WordPress


Step 3: Choose, Install and Activate the Plugin(s)

Keeping in mind what you are looking for, the number of installations, the last updated time, and the reviews of other users, look around to find the plugin that best fits your criteria.

WordPress Add Plugin

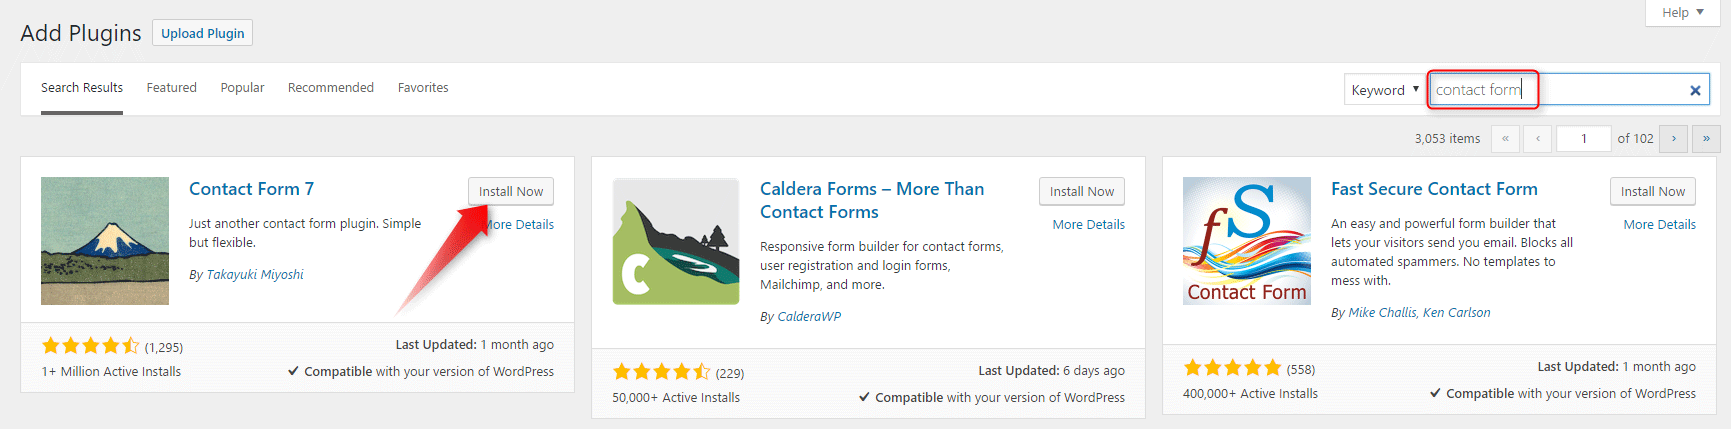
In the top right corner of the image provided for this tutorial, you’ll notice we’re searching for a “contact form”. When you find a plugin that meets your needs, simply click on the Install Now button, as highlighted in the image above.

After installing the plugin, you’re presented with two choices: you can either click Activate to proceed to the plugin activation page or continue browsing for additional plugins.

WordPress Plugins

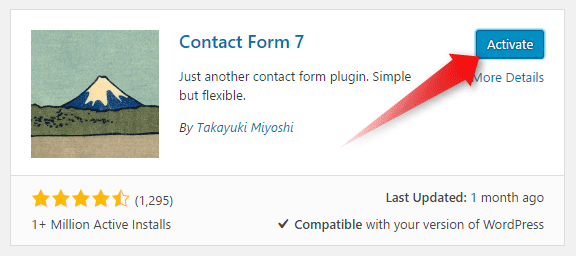
If you choose to Activate the plugin now, simply hit the Activate button.


When choosing your next plugin, except for the promised functionality, you might want to check the reputation (represented by the reviews) of the plugin, and the frequency of updates.

NB! Similar to the themes and WordPress itself, it is among the best practices to keep your plugins updated.

If you need more in-depth directions, check our previously published article on How to Add a Plugin to WordPress

If you feel like you are ready to go further in the CMS, feel free to browse our WordPress Tutorials section.

Alternatively, you can check out how to Remove WordPress Plugin.

Was this post helpful?

i

Relevant tags:

Connect

Latest posts:

How to Fix 308 Permanent Redirect

308 Permanent Redirect is an HTTPS status code indicating that the requested resource has been permanently moved to another location. Similar to 301 Moved Permanently, 308 informs the user of the movement of a given online resource, and unlike the 301 redirect, 308...

How to Fix 301 Error Moved Permanently

The 301 Moved Permanently is an HTTP status code that indicates a permanent relocation of an online resource from a given URL to a new one. More technically, the moved resource has been moved to the new URL specified in the Location header. The HTTP 301 status code is...

How to Fix 307 Temporary Redirect

307 Temporary Redirect is a response HTTP status code that indicates the requested resource has been moved to a different URL for a limited period of time. Unlike a 301 permanent redirect, the 307 Temporary Redirect message indicates that the change is temporary and...

How to Access Crontab Settings

To access the crontab settings, first, you need to log in to your AwardSpace hosting panel. After you have logged in, head to Crontab Settings, located within the Advanced Tools category:   After you click the Crontab Settings icon, a new page should load. Once...

How to Check My Auto Renewals

To check your AwardSpace hosting plan auto-renewals, first log in to the admin dashboard. Then, head to Wallet, within the Orders & Invoices section:   After that, click the Auto Renewals tab, where you can check any relevant information about your hosting...


Create a website for free!


Free forever

Our Support Team is Here to Help


If you need any questions answered, don't hesitate and contact us. Click the button below and follow the instructions. You can expect an answer within an hour.


Contact AwardSpace


iNewest knowledge base articles

How to Fix 308 Permanent Redirect

308 Permanent Redirect is an HTTPS status code indicating that the requested resource has been permanently moved to another location. Similar to 301 Moved Permanently, 308 informs the user of the movement of a given online resource, and unlike the 301 redirect, 308...

How to Fix 301 Error Moved Permanently

The 301 Moved Permanently is an HTTP status code that indicates a permanent relocation of an online resource from a given URL to a new one. More technically, the moved resource has been moved to the new URL specified in the Location header. The HTTP 301 status code is...

How to Fix 307 Temporary Redirect

307 Temporary Redirect is a response HTTP status code that indicates the requested resource has been moved to a different URL for a limited period of time. Unlike a 301 permanent redirect, the 307 Temporary Redirect message indicates that the change is temporary and...

How to Access Crontab Settings

To access the crontab settings, first, you need to log in to your AwardSpace hosting panel. After you have logged in, head to Crontab Settings, located within the Advanced Tools category:   After you click the Crontab Settings icon, a new page should load. Once...

How to Check My Auto Renewals

To check your AwardSpace hosting plan auto-renewals, first log in to the admin dashboard. Then, head to Wallet, within the Orders & Invoices section:   After that, click the Auto Renewals tab, where you can check any relevant information about your hosting...

How to Check My Payment Requests

To check your payment requests, first log in to the AwardSpace hosting panel. Then, head to Wallet within the Orders & Invoices category:   Then, click the Payment Requests tab. There, you can browse all the information you need about your...

Even more web tutorials

Check out our web hosting knowledge base and the WordPress tutorials to learn more, and be better prepared for your website creation and maintenance journey.